Despite the fact that GarageBand is a fairly complex DAW (especially given that it’s free), it can be easy to fall into the trap of creating music that sounds just like everyone else’s.
That’s because there are only a finite number of combinations of stock loops, software instruments, and drummer tracks!
The key to getting out of this rut is using free GarageBand plugins to spice up your tracks and make your productions stand out, and that’s exactly what you’re going to learn about here.
Before we get into it though, if you’re new to the software, you should first check out our GarageBand tutorial for a solid overview of Garageband.
Let’s dive in.
Does GarageBand Allow Plugins?
The short answer here is yes, it does allow the use of plugins. In fact, there are a couple of different kinds you can put into play:
- Stock plugins
- Free AU plugins
Be careful not to use plugins to mask a poorly edited track though.
Need to get your editing sorted?
Learn how to edit, cut and more tips in this song making tutorial using GarageBand.
Where Are GarageBand Plugins?
The easiest way to access plugins in the DAW is to double click on a track (or hit B), to bring up the Smart Control view.
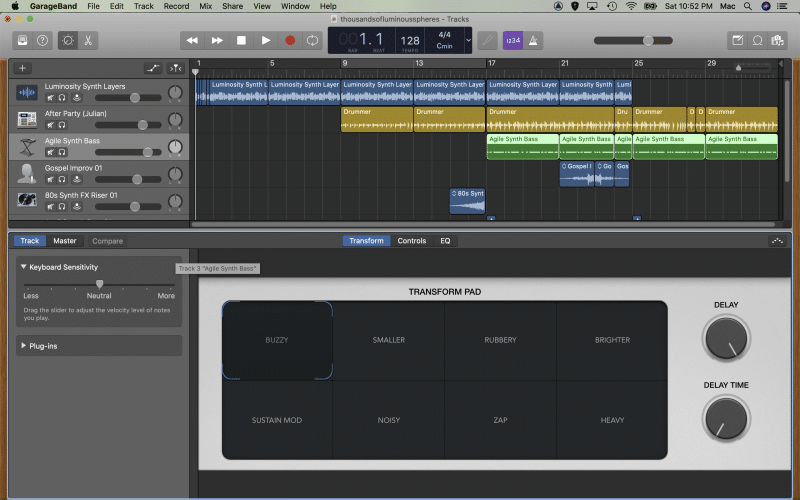
Depending on the type of track you have selected, you may not see the Transform header at the top of the window, but you should see both Controls and EQ.
On software instruments, Controls gives you access to manipulate the various elements within a synth.

On an audio track, Controls will give access to a multi-effect display which includes Compression and EQ controls, as well as sends for reverb and ambience. The knobs assigned to the EQ controls manipulate the same plugin as in the EQ tab.

To activate, de-activate, or add new plugins, click the drop down menu:

Using GarageBand’s Stock Plugins
Apple borrowed a number of slick plugins from its bigger brother, Logic Pro X, filing them under the following groups:
- Amps and Pedals
- Compressor
- Delay
- Distortion
- Dynamics
- EQ
- Imaging
- Filter
- Modulation
- Pitch
- Reverb
- Specialized
- Utility
This might seem like a pretty overwhelming list, but don’t worry, you don’t need to master all of them straight away. Here are a few of the important one’s you’ll want to get your head around:
Compression
The stock compressor is pretty simple, with a no frills interface.

You have access to four controls:
- Threshold – determines the point at which the compressor kicks in
- Ratio – how much the signal is compressed once it passes the threshold
- Attack – how quickly the compressor reacts after the signal passes the threshold
- Gain – adjusts for any loss in perceived volume due to compression
Alternatively, you can use the simple one-knob interface under Controls. Turning up the amount knob here essentially lowers the threshold while applying automatic make-up gain depending on the level of compression.

EQ
This paragraphic EQ module is borrowed from Logic Pro X, and is available on every track under Smart Controls.
This is a solid equalizer with high and low shelves, high and low pass filters, and 4 parametric bell type EQ nodes.

GarageBand has a whopping 4 reverb plugins, giving you the ability to create space in a mix to your heart’s content, airy or eerie!
They all offer something a little different, most notably in the controls you have available. Space Designer is a simple three control reverb and a great starting place.
But if you need something more complex, we’d shoot for the PlatinumVerb.

Delay
Commonly used on guitars and vocals, delay can be a great way to add a little depth, dynamics, and interest to a mix.
You have access to 5 different delays, ranging from the simple Sample Delay to the complex Stereo Delay plugin.

Amps and Pedals
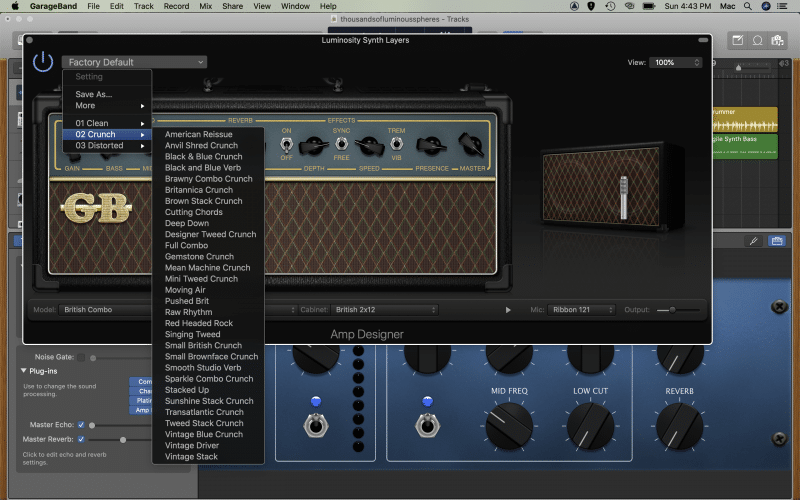
Amp Designer
One of the miracles of modern recording is the ability to simply plug your guitar into your Mac or iPad, and use free amp and pedal simulators.
Apple’s free DAW gives you access to the famed Amp Designer, offering no less than 26 amp models, which can be paired with any of the plugin’s 26 cabinets and mic’d with a selection of condenser, dynamic, and ribbon microphones.
There are some pretty sick presets included too.
Pedalboard
Any legit guitarist loves to stack a few pedals in front of their amp, whether that’s a subtle overdrive, or an array of modulation and delay effects.
Those recording guitar and bass direct into this epic DAW can enjoy the same luxury, thanks to an epic range of pedals in the Pedalboard plugin.
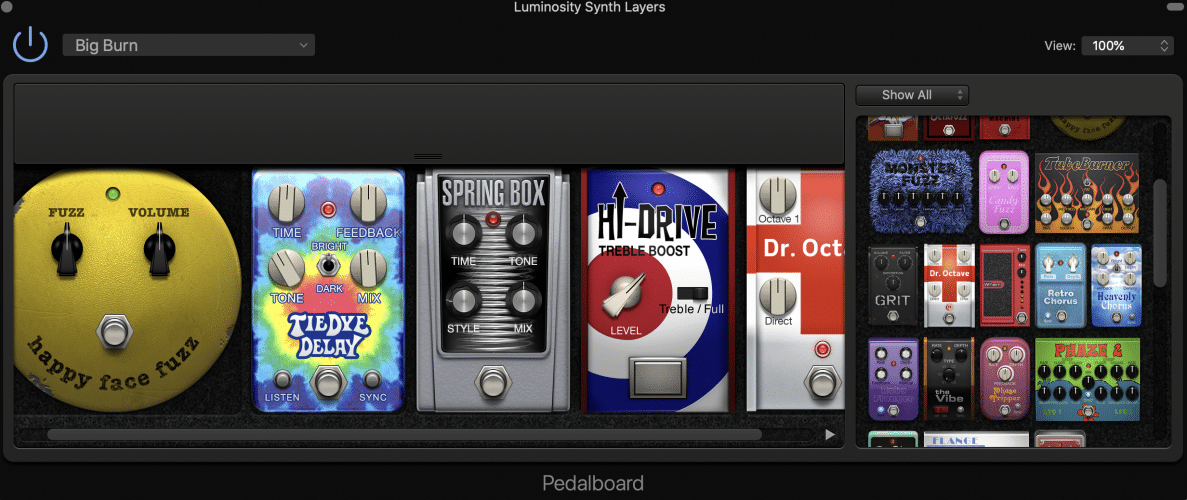
Don’t limit yourself to using these incredibly deep and versatile plugins only on guitar and bass though, they can be equally interesting on synth or drum parts!
How Do I Add Plugins To GarageBand?
You aren’t limited to just the stock plugins. Just like you can pick up a new outboard compressor or reverb and plug her into your studio, you can buy and download additional plugins as you see fit. This can be a sweet way to give yourself a little extra inspiration when needed.
Plus, there are some amazing free GarageBand plugins out there. Just do a Google search for “free vst plugins, vst plugins free, vsts free, or vst free” and you’ll get a ton of awesome results.
You’ll want to make sure they’re compatible first though. Apple uses the AU plugin protocol, as opposed to AAX or VST.
Unfortunately the term ‘VST’ has kind of become a catchall term for all types of plugins, which admittedly makes things confusing. Just make sure you select the AU option.

Once you’ve found something you like, installing them is pretty easy. Simply download the package and follow the installation instructions. This might involve having to drag a ‘Component’ file into your plugins folder. This is pretty straightforward.

From Finder, head to Macintosh HD>Library>Audio>Plug-Ins>Components, and drag the component file into this folder.
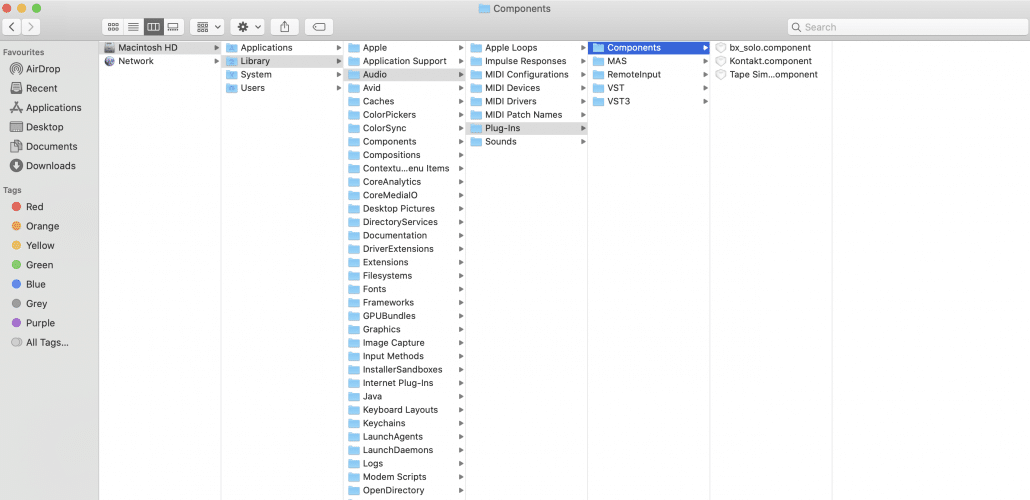
You’ll then need to shut GarageBand and reopen it, so it can rescan your computer. In some cases, you might need to restart your Mac altogether.
A Few Of Our Favourite Free Plugins
There are a bunch of great free plugins for GarageBand, but there are a couple that we seriously love, and want to share with you all.
Abletunes have three free plugins known as Abletunes Knobs. They are simple one-knob plugins, each with a different twist:
- Drive – distortion unit
- Attack – transient designer
- Space – reverb
iZotope is an all-time favourite plugin manufacturer for sound engineers the world over. Their free Vocal Doubler plugin is an epic way to add a bit of thickness to a vocal melody.
Need a bit more? How about a lot more? Melda Production offers a sweet plugin bundle called MFreeFXBundle, which is a set of 37 amazing plugins, from analyzers to saturation to delays.
TX16Wx Software Sampler is a pretty comprehensive tool, and one worth downloading for anyone wanting to learn how to sample in GarageBand.
Conclusion
From simple one-knob compressors to the complexity of Amp Designer, GarageBand’s stock plugins can take you pretty damn far. And with the wide range of free plugins available, you can go even further.
Got a free plugin you really like using? Share it below.