Do you need to know how to cut audio in Audacity?
If you are a content creator, interviewer, YouTuber, music producer, or podcaster, there is a strong chance you will need to edit and trim your audio.
In this article, we will show you how to perform basic editing tasks….. and all for free!
Cutting audio is an action performed when audio editing. By loading your audio into a DAW (Digital Audio Workstation) you can cut out empty space and remove unwanted artifacts.
DAW’s can be expensive. However, Audacity is a free music editing software that will serve as a great audio editor.
And with the help of some fantastic step-by-step Audacity tutorials, you can be up and running like a pro within minutes!
Being in control of your editing is an efficient way to get your audio up to broadcast standards. With clean and edited content you will be delivering your production like a professional. Ultimately, increasing your chances of success.
So be gone with the dead space, mistakes and unwanted noise in your audio. Take control of your final product, and improve your vocals and other tracks.
With your new knowledge of Audacity, you can deliver your content or music to the highest quality.
Let’s dive in.
How To Cut Audio In Audacity, Step One: How To Import Your Audio
If you haven’t downloaded and installed Audacity yet, the following steps will get you up and running with your audio loaded and ready to edit.
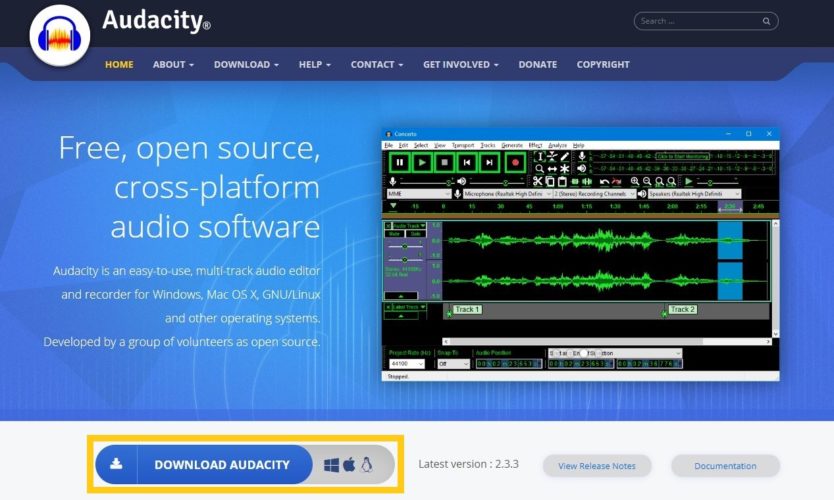
- To begin editing using Audacity you will need to download the installer file. This free download can be obtained from the official website here.
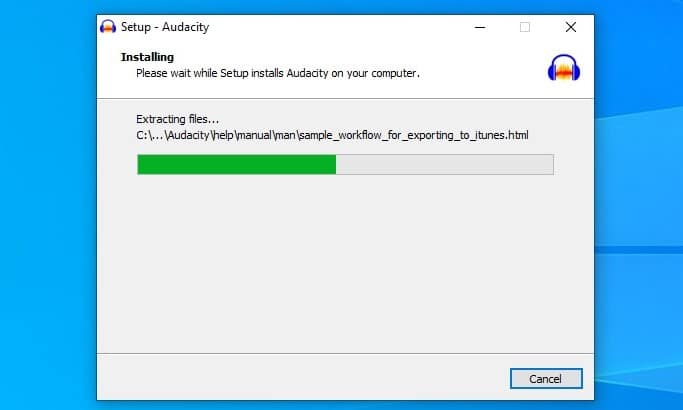
- Install Audacity by running the downloaded installer file. For Windows, this is named ‘audacity-win-2.3.3’. Once installed, open Audacity. The logo is easily recognizable with an orange sound wave surrounded by a pair of blue headphones. Now you’re ready to enjoy your new editing software.
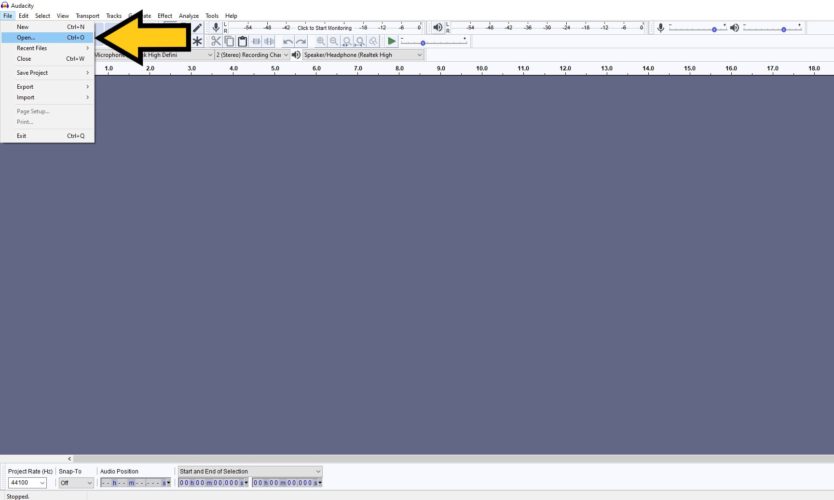
- To open an audio file press Ctrl + O, alternatively with your cursor click File followed by Open located in the top menu bar.
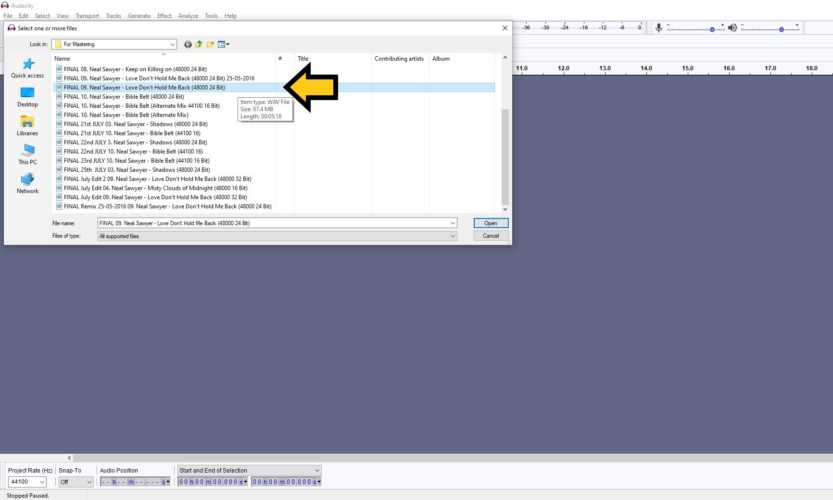
- Locate the audio file that you want to edit in the dialogue box and double click on the file.
Your audio content will now be loaded into Audacity. For this example, I have used a music recording but the content can be any audio. Audacity supports all the main file types including WAV, MP3, and AIFF.
How To Trim Audio In Audacity
Whether it be the recording of a song, podcasts, interviews, or any other type of content, you will have to trim your audio to make sure there is no dead space at the beginning or end of the audio. With the recording of a song, this might be a count-in that is no longer needed.
With a podcast, it may be a delay before the speaking begins.
Either way, trimming down unnecessary parts will make sure your content is delivered more concisely. There are two ways to trim audio. First, we will look at trimming the beginning or end of your audio.
How To Individually Trim Beginning or End
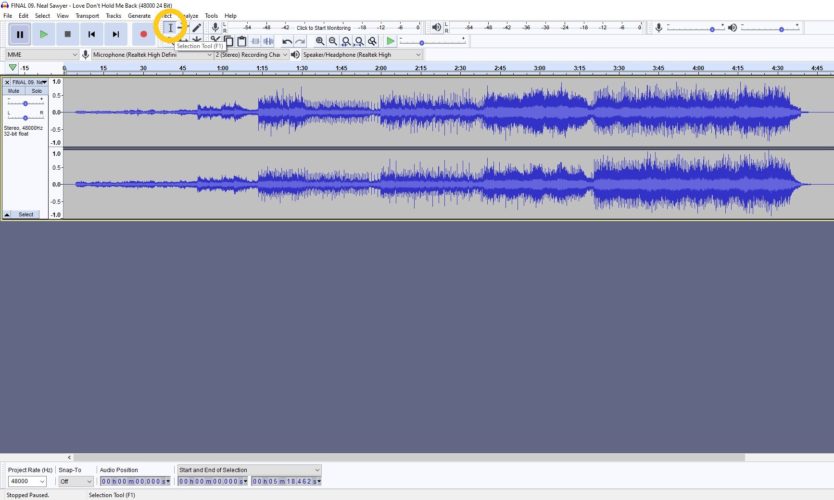
- Firstly click on the Selection Tool or alternatively press F1. The Selection Tool has been circled on the graphic below and looks like the ‘I’ found in word processing
Programs.
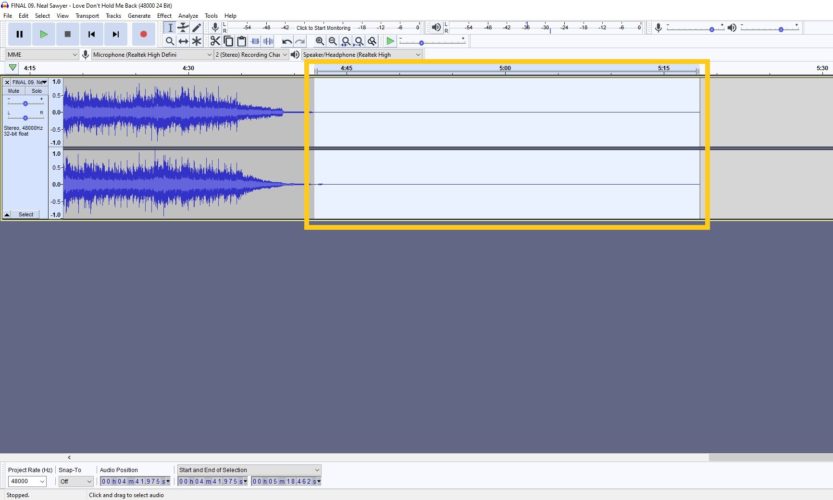
- Before you cut you may want to zoom in for improved accuracy. This action can be done by pressing Ctrl + 1 on the keyboard or clicking View, Zoom then Zoom In from the top menu. Also, the Zoom button can focus on a part of your audio.For this example, I will cut the end of the audio. As you can see there is plenty of dead space that needs to be deleted. Simply highlight the unwanted audio with the Selection Tool by clicking the left cursor on your mouse, and drag to the required length.
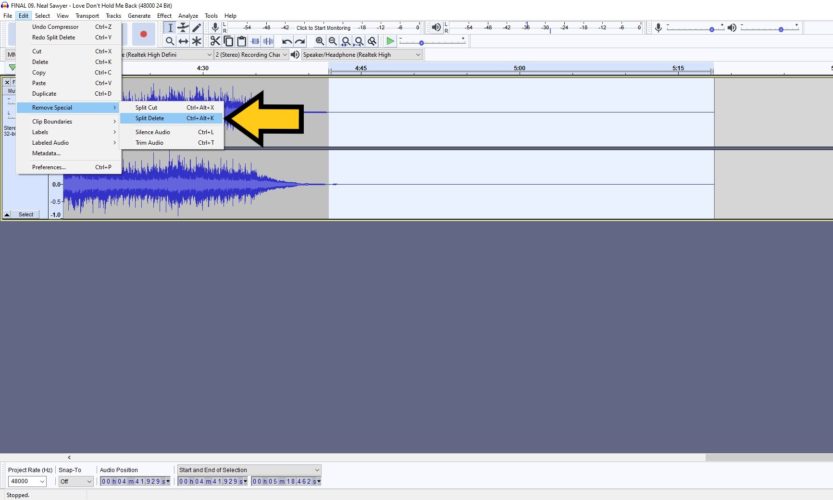
- Next, click on Edit, Remove Special and Split Delete or press Ctrl + Alt + K. The highlighted audio will now be removed.
How To Trim Both Beginning and End Simultaneously
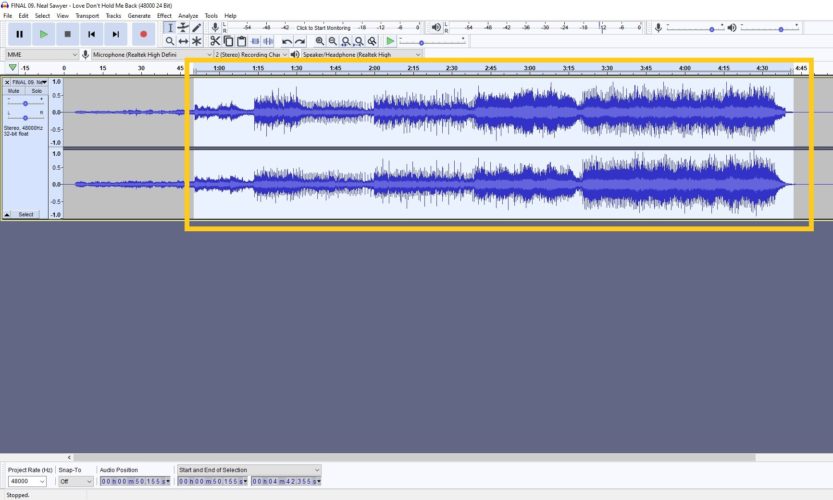
- If you want to trim audio at both beginning and end at the same time, this can be done by the use of the Trim Audio feature. For this, you want to use the Selection Tool to highlight the audio that you want to keep. To ensure that you like this selection you can listen to the selection by pressing the SpaceBar or click the play button.
- Once you are happy with your selection. Click Edit, Remove Special then Trim Audio or Ctrl + T. Now only the highlighted part of song or content will remain.
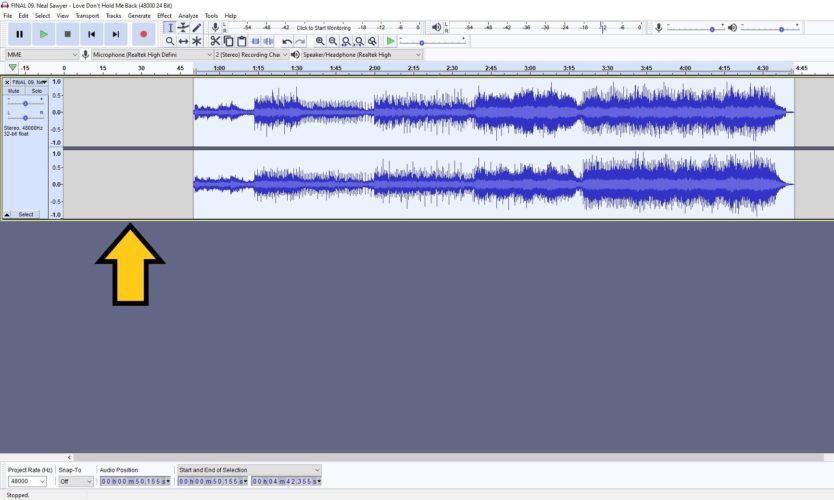
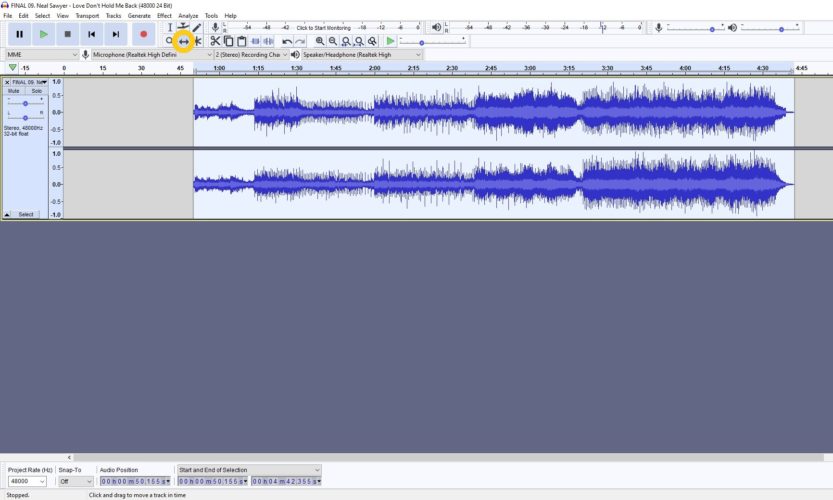
- Now we might need to move the recording to the beginning. To do this we use the Time Shift Tool button. Click on the icon circled below or use F5.
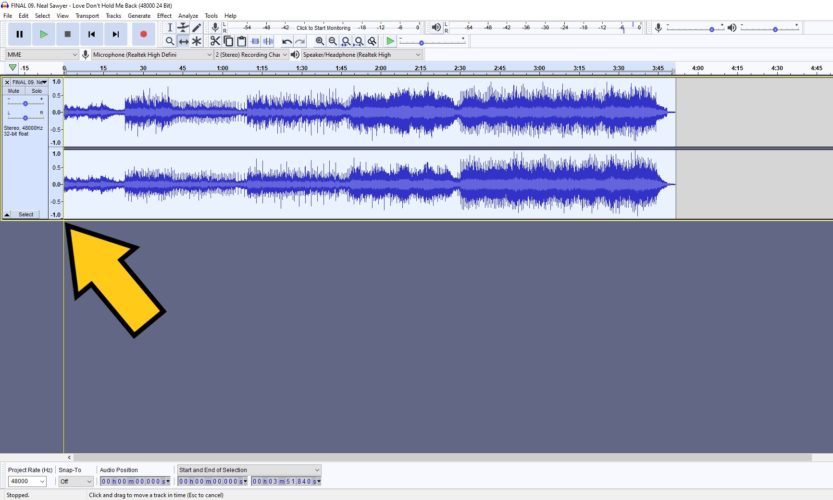
- With the Time Shift Tool engaged, use the left mouse to drag your recording to your required time. A yellow line will appear when snapped to the very beginning.
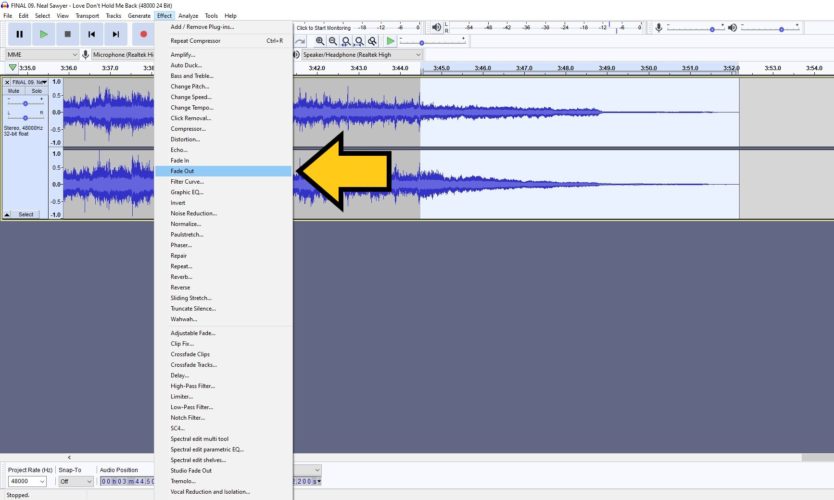
- For an even further professional finish, you may want to try the Fade In or Fade Out feature. Highlight the area you want to Fade In or Out using the Selection Tool. Then go to Effect and click Fade In or Fade Out. If you are tidying the beginning of your audio go to Fade In and if you are fading out the end, use Fade Out.
How To Cut In Audacity
Cutting audio is important if you have an error in the middle of your production.
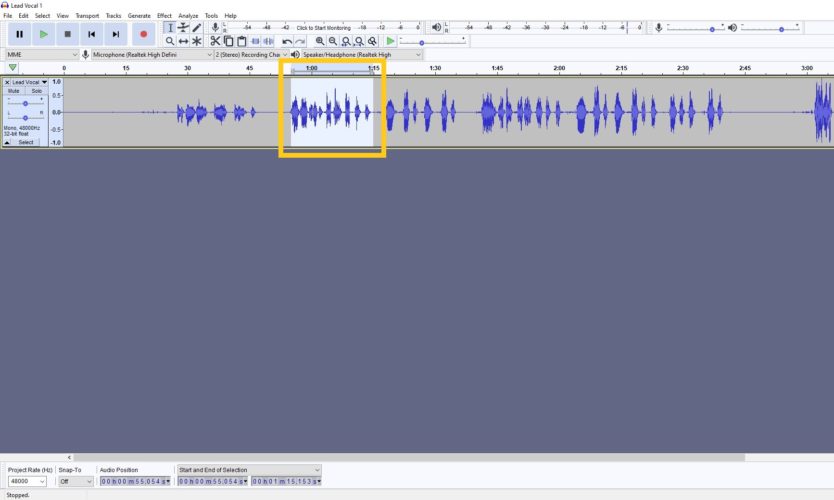
This can be an unwanted section, or you may want to delete errors or mechanical noise. For this example, I will be using a vocal recording. Load your audio file as outlined in the ‘How to Use Audacity’ section. To cut audio in Audacity follow these two steps.
- Using the Selection Tool button, left click on your mouse and drag over the error or area that you want to cut. You will see the selected area highlighted darker. To adjust, use the Finger Tool to drag in or out. Playback the area to make sure it is the correct part you want to delete.
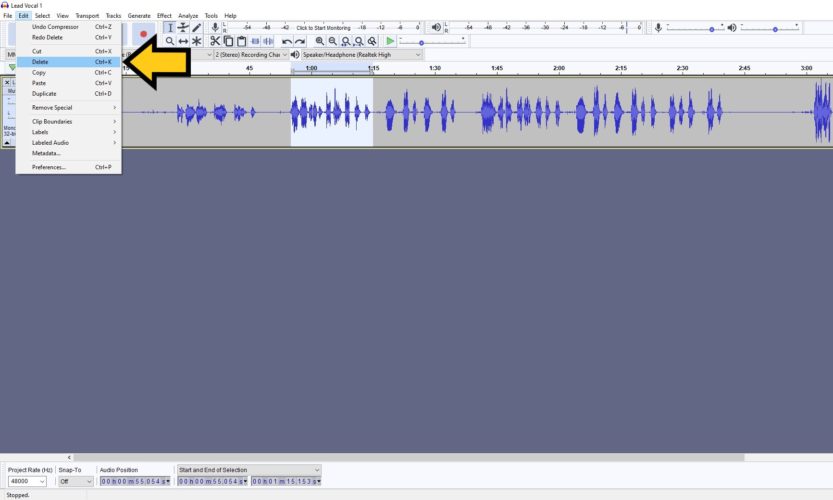
- Press the delete key on your keyboard. Or click Edit then Delete on the top menu.
How To Split Tracks In Audacity
You may want to try the Audacity split track option to cut your audio.
This is a good option if you want to add a gap in your audio. This can be used to add space for an interlude such as a jingle or an advert. Once your audio is split into two parts it can be dragged apart to leave a space or simply deleted.
Using The Selection Tool, Select Where You Would Like To Split The Audio
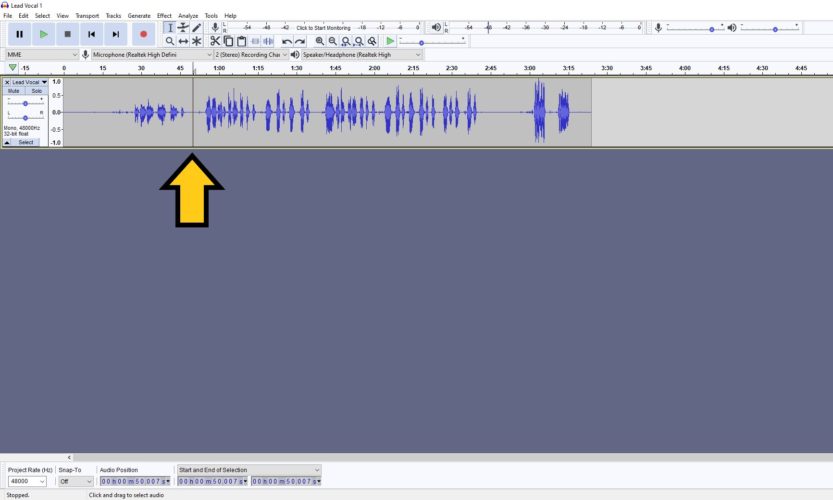
- Open the Edit menu then click Clip Boundaries followed by Split. A dark line will appear where the audio file has been split into two.
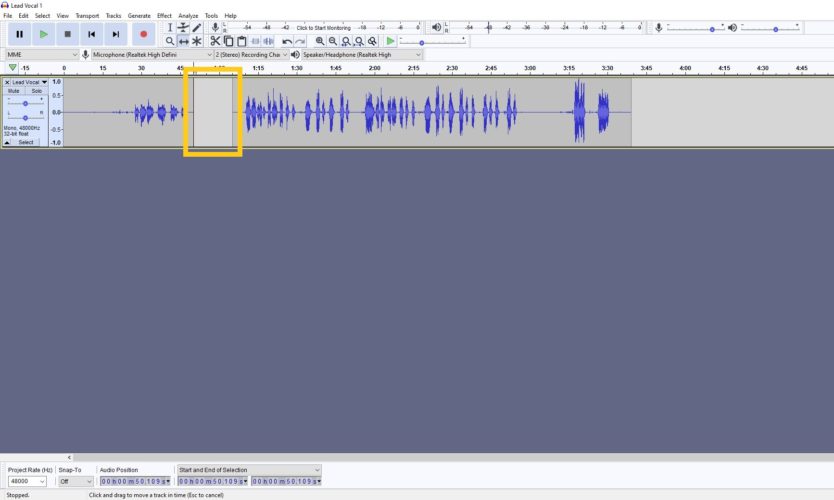
- Press the Time Shift Tool to drag a gap into the audio.
How to Export Audio In Audacity
Once you are happy with your audio recording it is time to file export.
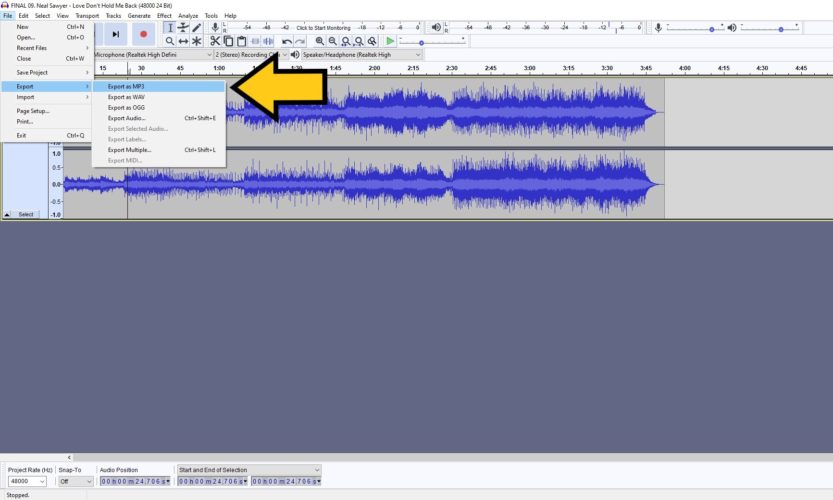
Click File, Export Then Export As Mp3 Or Export As Wav, Dependent On Which File Type You Require
- It is worth noting that there are more than two options to export as. Other file type options can be located if you click Export Audio.
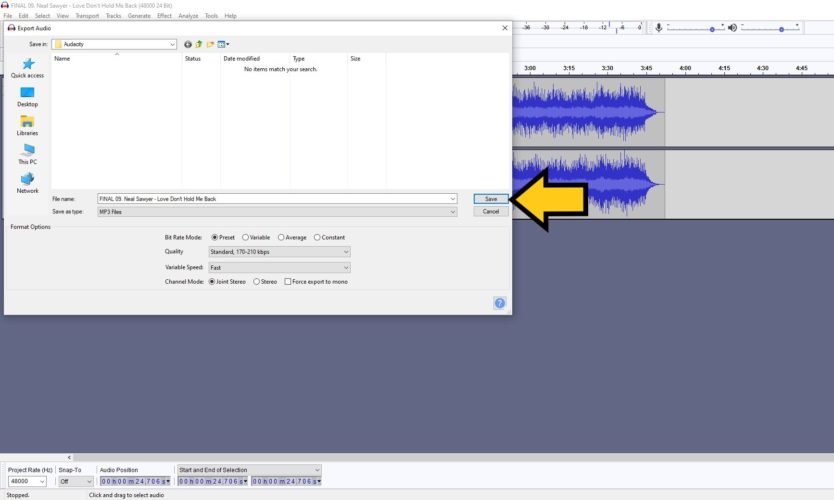
- Type the name of your audio file and click save. When exporting as an MP3, you have the option to pick options such as the quality or bitrate to suit all your needs.
Conclusion
At some point, regardless of your craft, you will encounter the need to edit your audio.
There is a wealth of DAW’s out there, most of them priced quite expensively. If you need basic editing like we have walked you through in this article. our advice would be to explore Audacity.
Audacity is a great resource to edit your audio. Beyond the obvious positive that it costs absolutely nothing, it has features that can easily perform simple tasks very well. It is relatively easy to navigate and a great way to clean up your audio.
We hope that you now have an understanding of some basic editing skills to perform in Audacity. Don’t be afraid to experiment with Audacity. Beyond the basics, you can experiment with compression and other processing effects to further enhance your content.
All that is left to do is to take that next step and upgrade your production with pristine and clean audio.
We wish you every bit of luck with your work!
And most importantly….. enjoy!

