Thanks to Apple’s miraculously free DAW GarageBand, writing a song from your bedroom has never been easier!
This GarageBand tutorial is all about how to make a song on GarageBand, and you’re going to learn pretty much the easiest way to get started and rock.
Here are the steps you will learn today:
- Setting Up Sessions and Tracks
- Using Apple Loops
- How to Use Garage Band’s Drummer
- Laying Down Some Bass
- Recording Vocals and Vocal Hooks
- Arranging Your Song
- Including, effects, levels, layers, and plenty more tips as you dive in.
Ready?
So open up a new project and let’s get into it.
1 – Setting Up Your Session
When you first open GarageBand, you have a few options.
Project Templates are a great way to get started with a predetermined set of instruments. However, it can be easy to fall into the trap of relying on them and creating songs that sound just like everyone else’s.
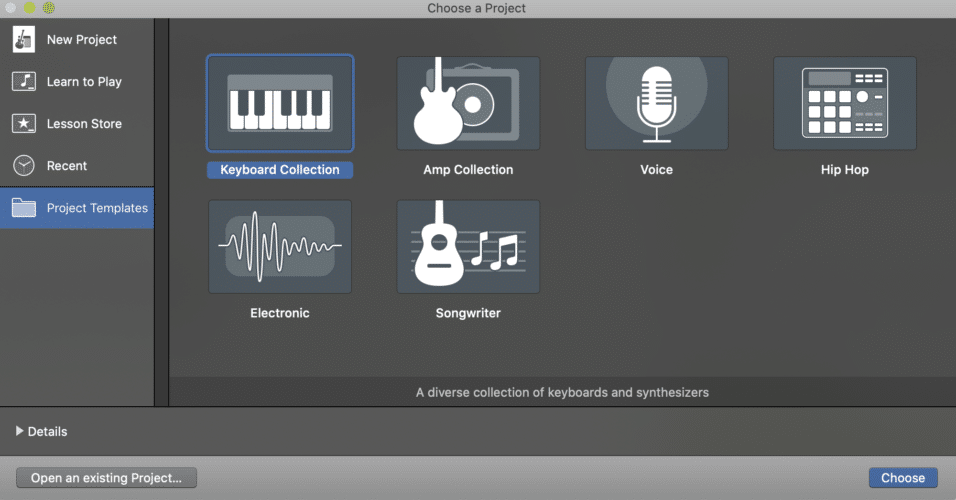
To avoid this, use the Empty Project option. When you select this, GarageBand will ask you which type of track you’d like to create.
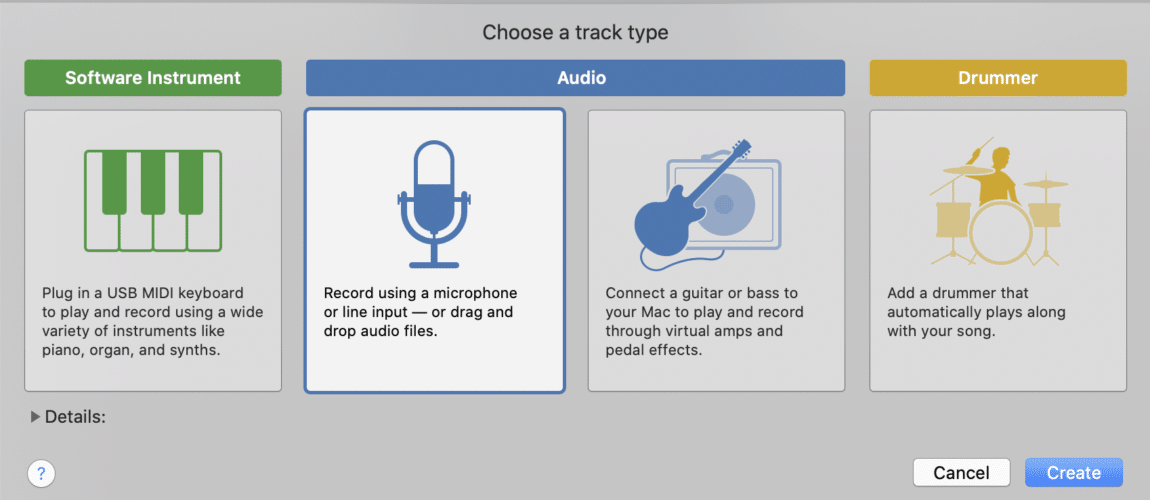
There are four options to choose from. Don’t worry, this doesn’t change how your project will operate, this is simply selecting your first track. You can and will add many others, and most likely use a combination of all four.
- Software instrument – a virtual instrument in GarageBand like a guitar or piano
- Audio (mic) – for recording mic’ed instruments such as vocals
- Audio (guitar) – for recording guitar or bass directly into your computer
- Drummer track – a virtual drummer that literally writes beats for you
Let’s start with an audio track (the one with the image of a microphone).
2 – Using Apple Loops
Apple Loops are a freaking godsend. These little gems are pre-recorded and mixed loops that give you the ability to create some insane music simply by clicking and dragging them into your session.
They come free with GarageBand, and are made up of drum loops, vocal chops, melodic phrases, risers, you name it…
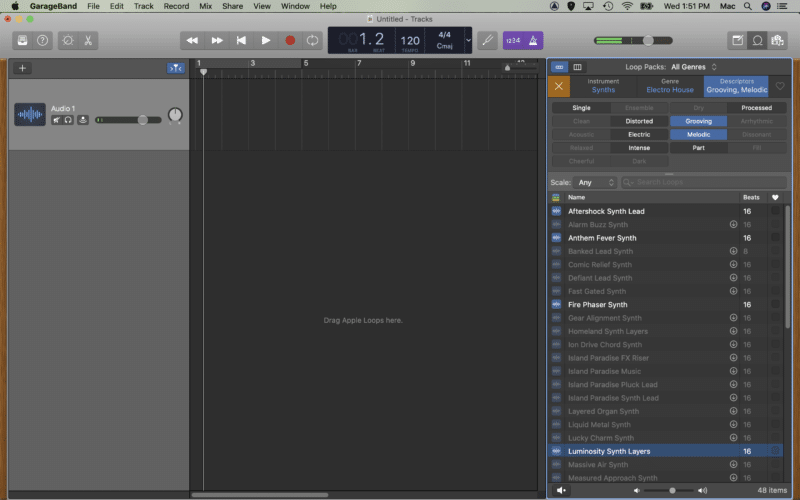
Hit O to open up the loop browser, or click the toggle button at the top right of your screen.
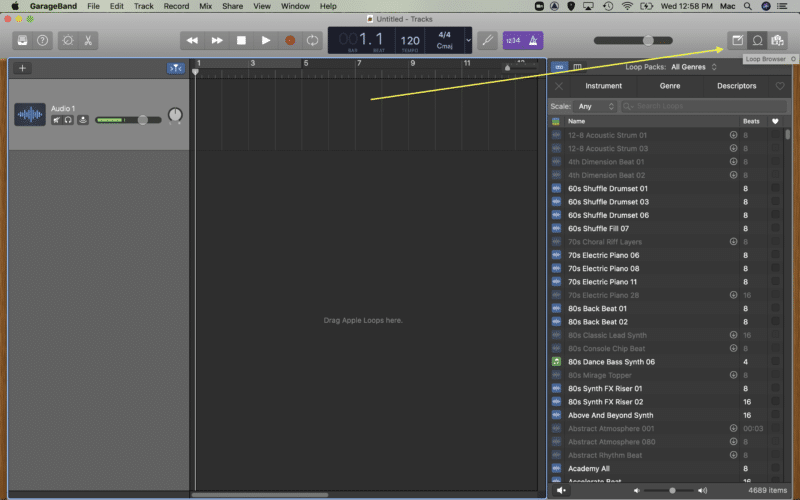
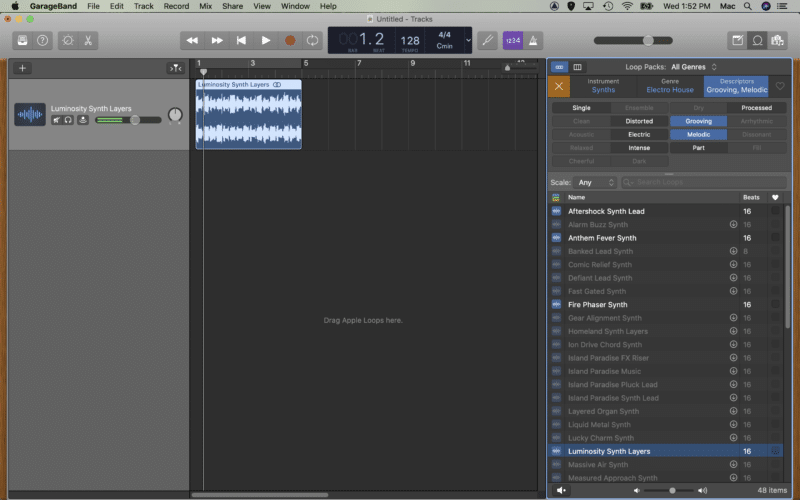
You can narrow down your search using the Instrument, Genre, and Descriptors tabs. To audition a loop, click on the title to play it.
Once you find a loop you like, just drag it onto your timeline and position it appropriately. The tempo of your project will change automatically (unless you have other regions in the timeline), but the great thing about Apple Loops is they adjust as you raise or lower the tempo!
3 – How To Use GarageBand’s Drummer
Now that we’ve got a nice little loop going, it’s time to get rhythmic by adding a drum beat. This is super easy in GarageBand, whether you have experience programming beats or not.
Of course, you can fire up a drum software instrument and tap in a beat yourself, but we aren’t going to go to all that trouble. Let’s fire up a Drummer track, and pick a drummer and drum kit that suits our loop.
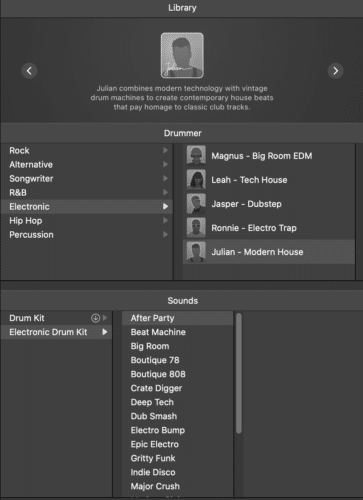
Adjust the parameters as you like and until you find something you really like. These parameters are region specific, not track specific. That means you can create a more laid back beat for the verse, build it up through the rise, and then hit home when the beat drops.

4 – Laying Down Some Bass
GarageBand has some seriously sick bass instruments. Not only will you find some sweet upright and electric basses, there’s also a suite of bass synths available. Modulated bass-lines here we come… wob wob…
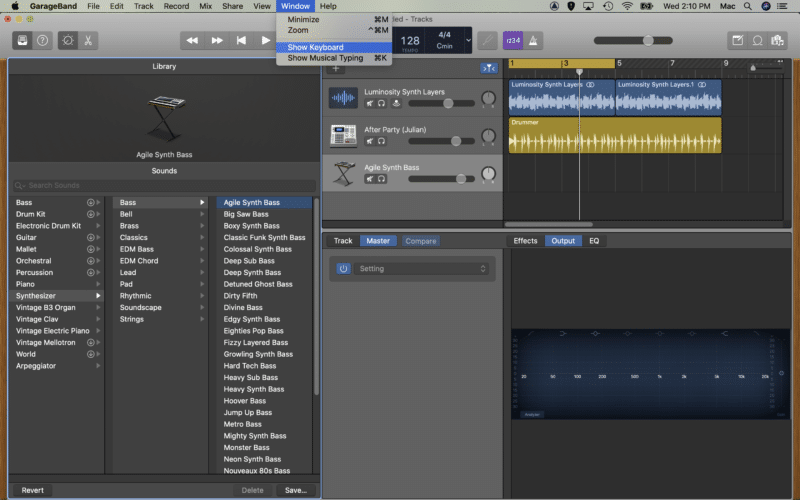
Load up a new software instrument, and browse the library for something you feel you can use.
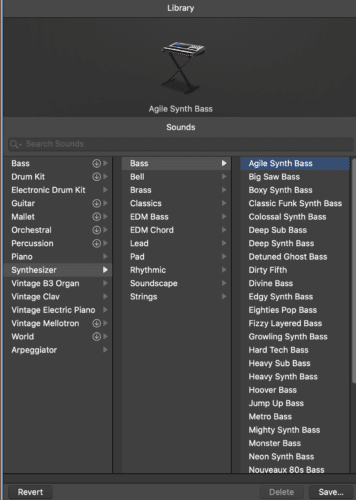
If you have a MIDI controller connected, you can now use this to play in some bass-lines. Don’t have one? Don’t worry! GarageBand has a neat little way to use your computer’s keyboard to play software instruments.
Navigate up to Window at the top of your screen, and select Show Keyboard.
Click the computer keyboard icon, and you’re away!
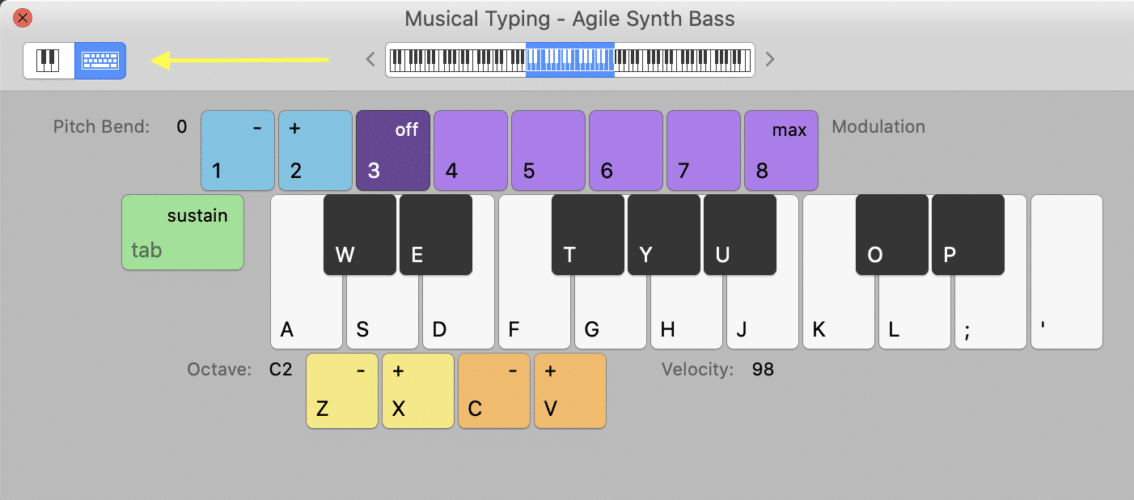
Now you can play your bass instrument from your keyboard, and add some low end to your song.
It can take a little bit to get used to this type of keyboard, and even after you’ve been using it for a while, you’ll still play some bum notes here and there.
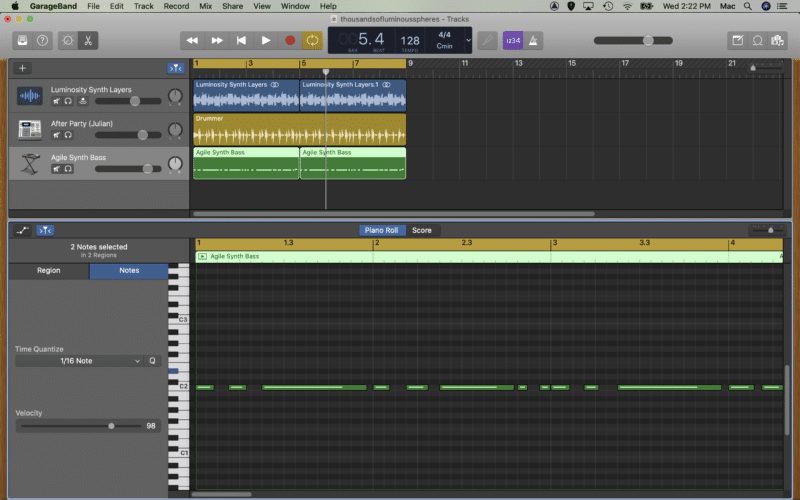
Hit E to bring up the Editor and edit your MIDI information. You can make changes to timing, note length, velocity, and pitch, whatever your song needs.
5 – Adding A Vocal Hook
Though there’s nothing wrong with using GarageBand to create an instrumental song, one thing that will add a whole new level to your tracks is a sweet vocal hook.
If you are (or know of) a singer, awesome! It’s pretty simple to use GarageBand to record vocal lines.
How To Record Vocals
Simply plug in your USB mic or interface, and set up the recording preferences under GarageBand>Preferences.
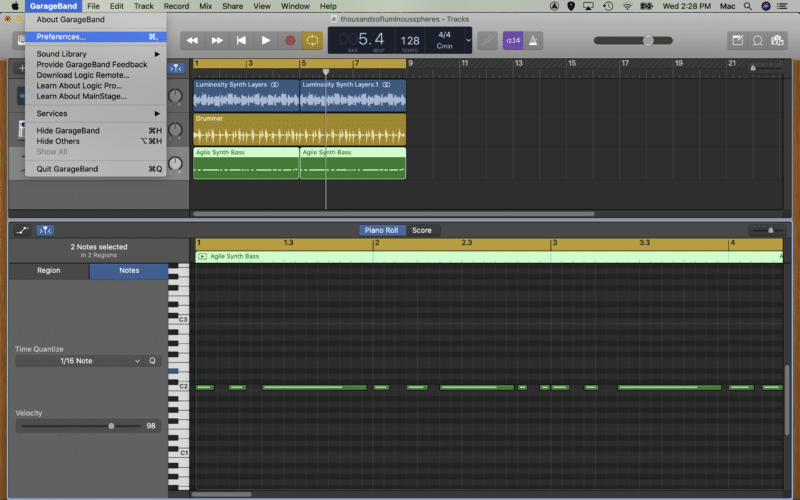
Then head to the Audio/MIDI tab and change your Input and Output settings.
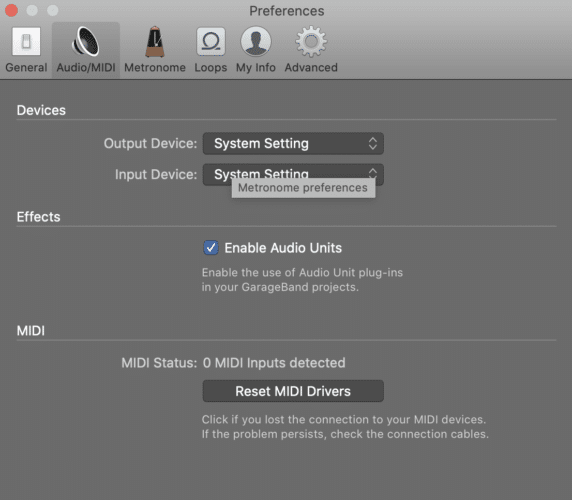
Once everything is all set up and working, you can create a new audio track and hit record! You’ll probably be stopping and starting a lot while recording, so here’s a little tip: the key command to record is R.
Finding A Vocal Hook In Apple Loops
If, like many of us, you’re not blessed with the voice of an angel, GarageBand has you covered there too.
Hit O to open the loop browser and check out some vocal lines. Just make sure they fit with the key of your song. You should be able to tell pretty quickly once you add them as new tracks.
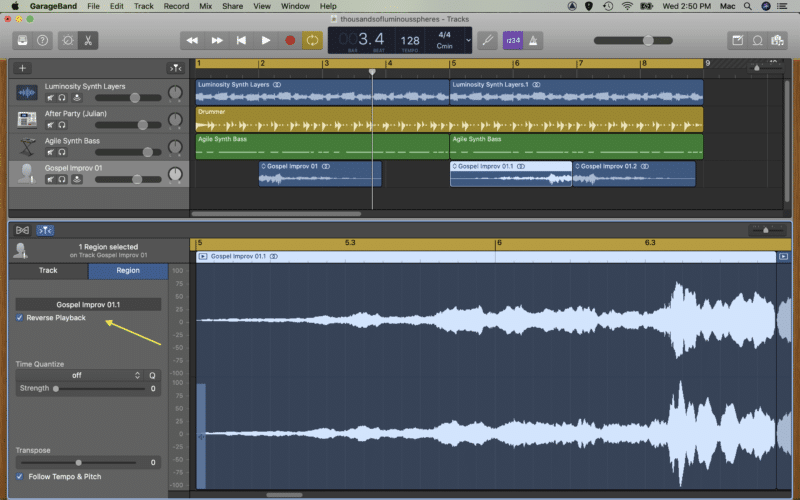
A cool little tip to spice up your tracks is to open up the Editor and click Reverse Playback on a loop. You can also chop up and edit your loops, so it’s an important thing to learn how to cut in GarageBand.
6 – Arranging Your Song
Now that you’ve got a few different instrument tracks loaded, and your project is beginning to sound like a song, it’s time to make some arrangement decisions. You don’t want to get stuck in a rut of making 8 bar loops all the time!
Let’s assume what you’ve written so far is the chorus, hook, or drop. Well, now we want to give the song a bit of flow, some dynamics, and create a bit of a build-up.
Make Your Song Build
Perhaps we’ll start by introducing the melody, and then bring in a drum beat after eight bars.
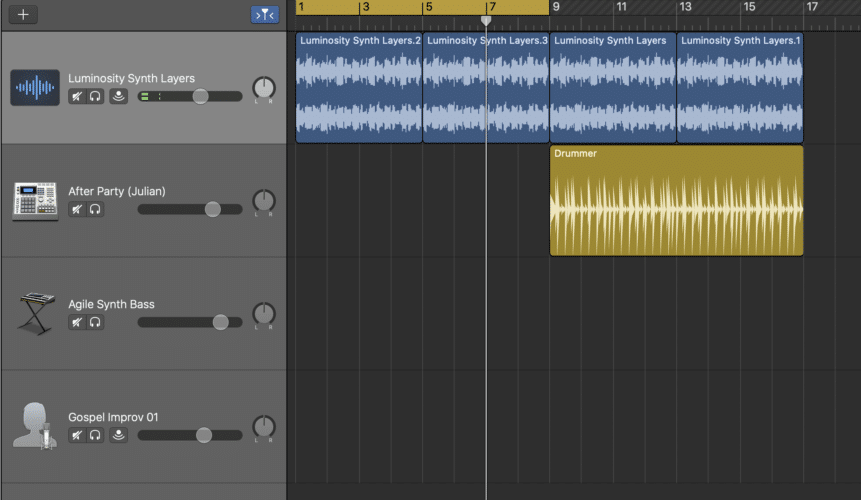
To give the song a bit of momentum, and to create some variation between the build and the drop, you might mess with the drummer settings to make a more mellow drum beat.

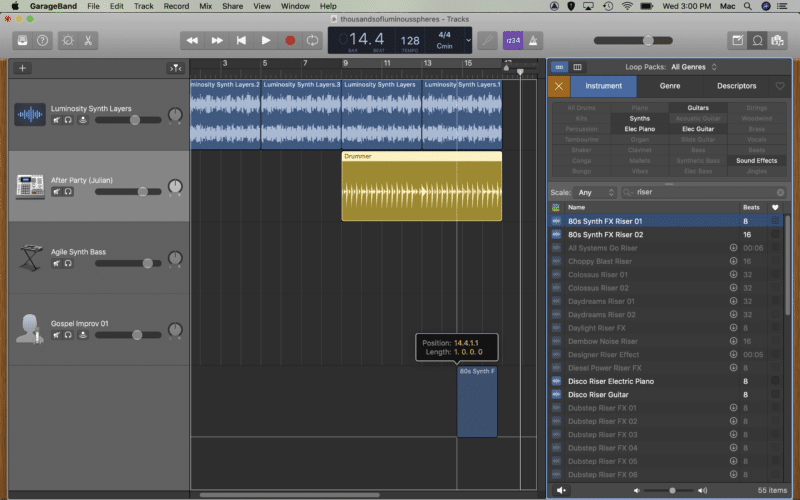
Check out the Apple Loops browser and see if you can make use of any of the FX and risers to add a bit of interest and impact to your song.
Silence Is Golden
One of the keys to dynamics is understanding when to use silence. A great little trick to add impact is to use a little space and silence in between sections.
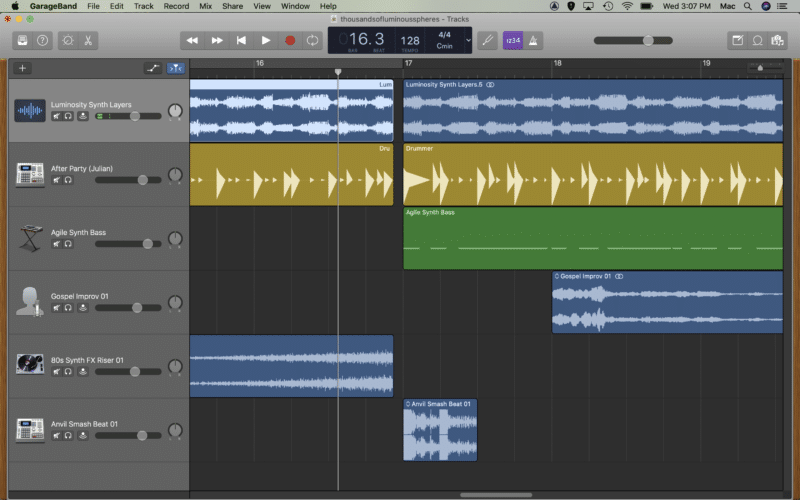
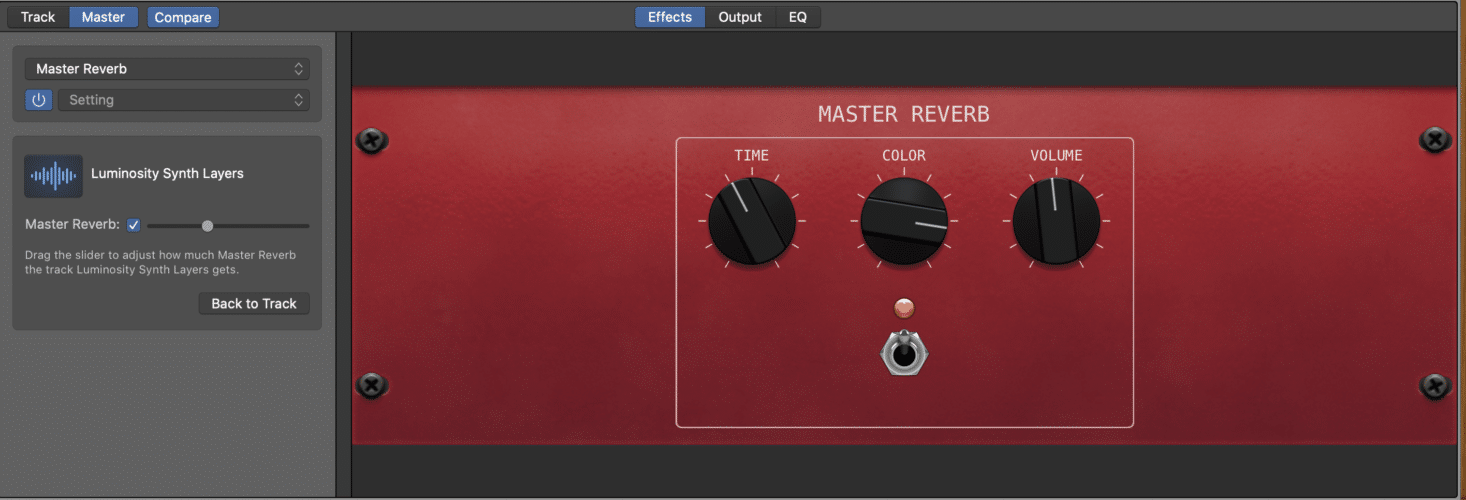
Many of the loops and software instruments in GarageBand use effects to make them more interesting. A great way to tie things together and create a bit of space in your song is to use a reverb plugin.
Balancing Out Your Levels
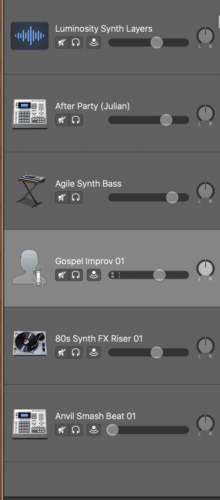
Not every track has to be turned up to 10 in a song. In fact, you’ll probably find that you need to do some level adjusting to get everything just right.
Use the level controls on each track to balance your mix and make sure each track is audible, but that none are coming through too loud.
Conclusion
Whether you’re using a Mac, or the iOS app on iPad or iPhone, GarageBand is a super quick, easy piece of software to get your head around. It’s no wonder that it is popular with beginners and top producers alike. Plus, it’s probably one of the only truly free DAWs left…
Whether you’re producing hip-hop beats, or simply playing around with a few chords, GarageBand makes it easy. We’d love to see what you’ve created, why not post your track below?

