How to make your voice sound better in audacity
Audacity is an awesome free recording software program that can help you to remove problems and increase quality in your recording. But it also takes some skill and know-how to use it well.
In this post, you’re going to learn how to make your vocal audio sound better in audacity. You’re also going to learn a few tricks for using this free software to spruce up your recording and make it sound more professional.
Let’s dive in. Here’s what you need to know about how to use audacity.
Beginners How-To Guide For Great Sounding Audio
Here are a few ways to get the best sound from your audio vocal tracks. First, you need to download Audacity. It’s actually a fairly high-quality audio program that can help you to remove unwanted noises, clean up audio tracks, and perform basic editing. You can also record into it.
But first, you’ll need to download it. Click here to find the download.
The goal is to take any recording track from any microphone and optimize the noise profile to improve quality. Here is your guide to the basics of audacity audio editing.
Step One: Remove Background Noise In The Audio Track First To Create A Clean Slate
First select the silence at the beginning of your audio track and then click on the Effects tab at the top of the screen. Scroll down the menu to “Noise Reduction”
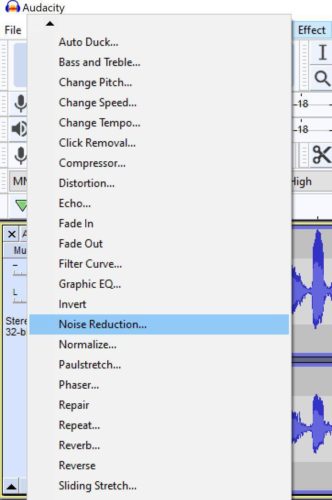
Open the box and you will see this:
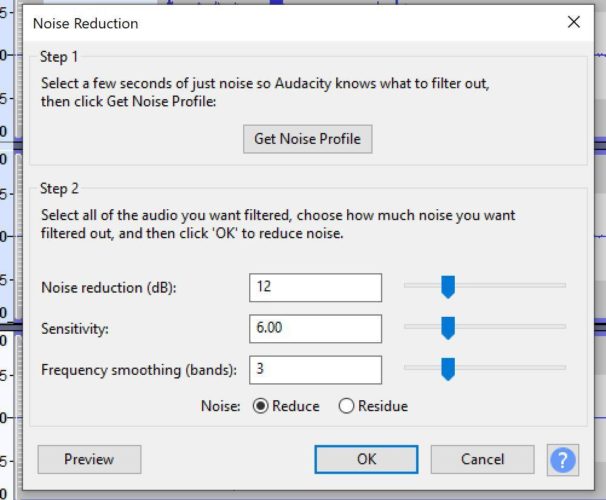
Now hit “Get Noise Profile”
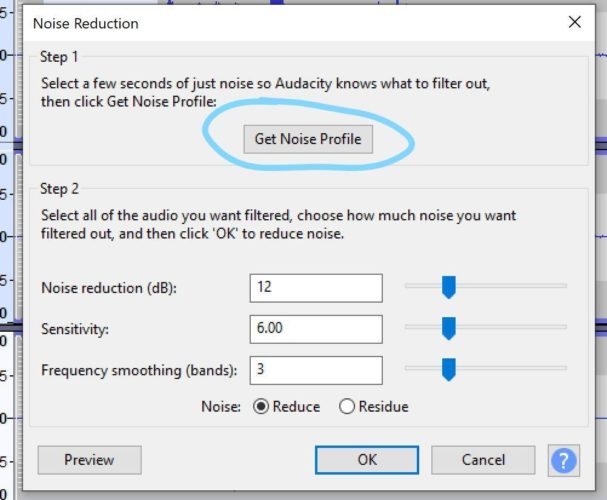
You can now select whatever part of the audio track you want to remove background noise from. I would suggest the whole track, but whatever you want to do is great. Select the audio track, reopen Noise Reduction and click “reduce” at the bottom. Boom. Clean slate to work with. Remove all the background noise from your recording file!
Step Two: Use The Equalizer To Boost The Bass Across The Vocal Frequencies
In women, the frequency range is about 165 Hz to 255 Hz. In men it is a bit lower, 85 Hz to 155 Hz usually. This gives you a more specific range to tinker with it so you don’t put a ton of time and effort into ranges that really don’t affect voice quality.
Click to the effects bar at the top of the interface. Select Graphic EQ from the drop down menu and this is what you see:
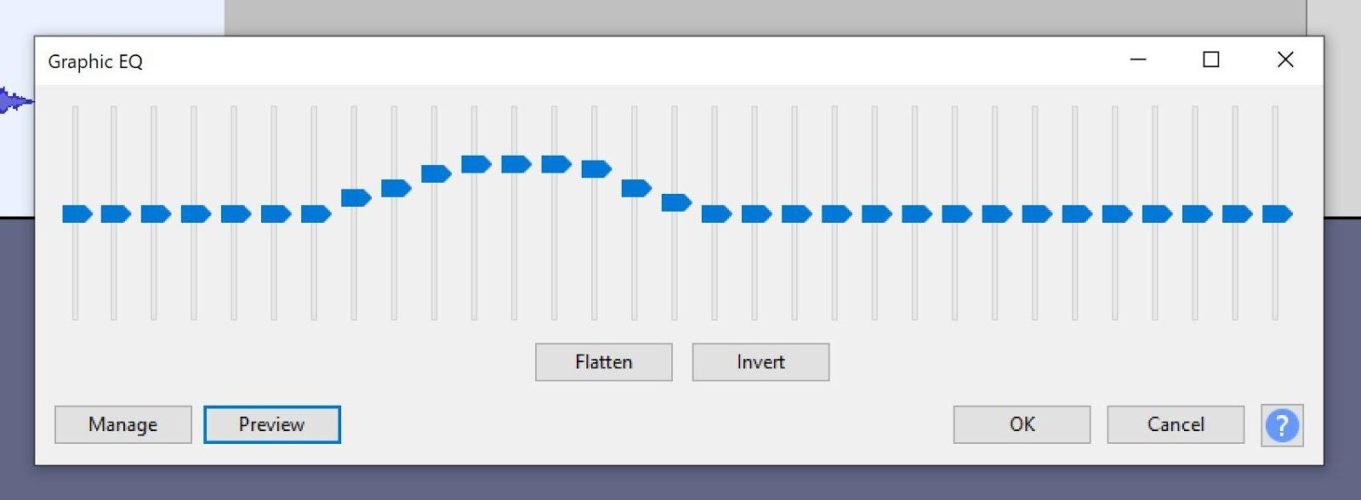
No matter what the program sets as the default curve, you should tweak it based on the requirements. The curve above is set to optimize a female singing voice.
There is a preview feature on each effect. Click on it and adjust the curve accordingly. You always want a gradual curve as opposed to straight, blocky transitions.
Based on what kind of equipment you are using, you may find that the bass starts to get gritty sounding, so also keep volume levels in mind.
Step Three: Double Your Audio Track For Depth
Simply duplicating your original audio track can add a level of depth and interest to your recording. It also gives you another place to place effects. Here is how to duplicate a track.
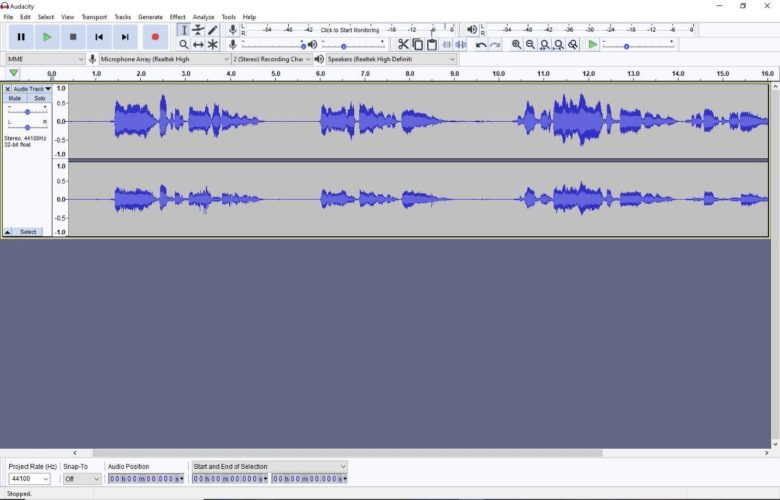
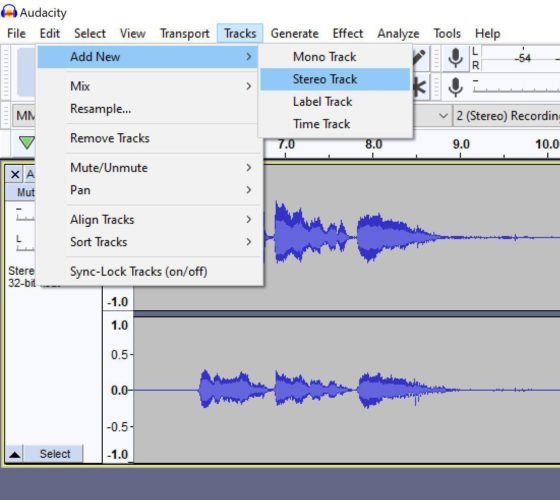
Above is a single stereo track. This one happens to be of a singing voice, but the process is the same for speaking, and also for mono tracks recorded with a professional microphone. Navigate up to “Tracks” and open the drop down menu. Select “Add New” and then choose what kind of track you want to add. In this case a new stereo track has been selected.
Next select the whole previous track (keep in mind that if you only want to double certain parts of the original track that is just as easy. Just use the cursor to select the part you want and copy/paste), Ctrl + C to copy and Ctrl + V to paste in the newly added track. It should line itself up automatically like this:
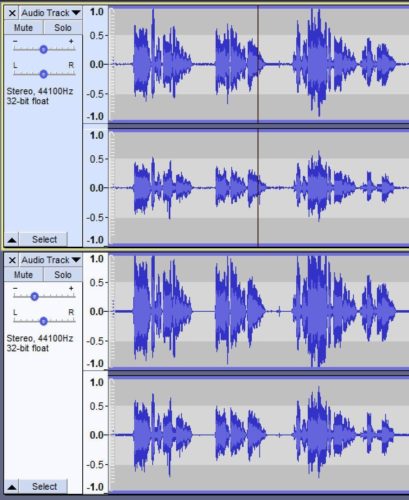
paste the newly added track
Now that you have two tracks to play around with let’s move on to another great way to add interest to a vocal track. This effect changes the tone and timing of the recording slightly, adding interest without changing the overall feel.
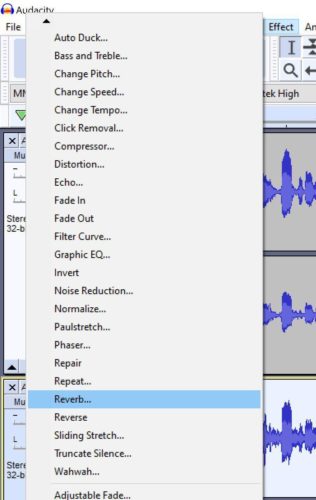
This opens the Reverb control panel
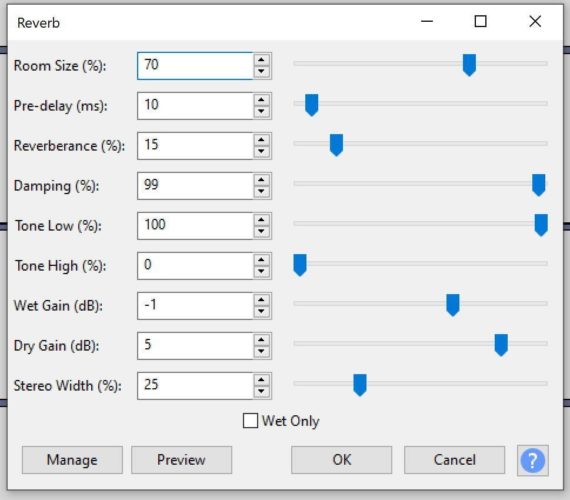
Here is a quick guide to the controls:
Room Size (%): This sets the size of the “room” the vocals are in. 100% is like a cathedral or football stadium. The higher the value the larger the room and the greater the reverberation.
- Pre-delay (ms): This delays the reverberation onset based on the set value. This can be tricky but if you time it well it can improve the clarity.
- Reverberance (%): Determines how long the reverberation lasts after the original sound stops. The larger room sizes will have longer reverberation tails.
- Damping (%): Gives a more muted effect by keeping the reverberation from building up too much. It also causes the high frequencies to be “absorbed” faster.
- Tone Low (%): If set below 100% it keeps the low frequencies down, creating a “boomy” effect.
- Tone High (%): If set below 100% it keeps the high frequencies down and creates a “bright” effect.
- Wet Gain (dB): The volume adjustment of the reverberation (the “wet”) component.
- Dry Gain (dB): The volume adjustment for the original (the “dry”) component. This reduces the strength of the reverb.
- Stereo Width (%): Only a setting for stereo tracks, it sets the width of the effect. If this effect is increased it causes variation between the left and right channels and creates a more open effect.
- Wet Only: If this is checked the track will only contain the added reverberation and not the original “dry” track.
Using The Compressor Feature
This tool makes quiet voices sound louder, or far away voices sound closer. This is good for the professionals out there, but great for those who can’t afford a super expensive, quality microphone as well.
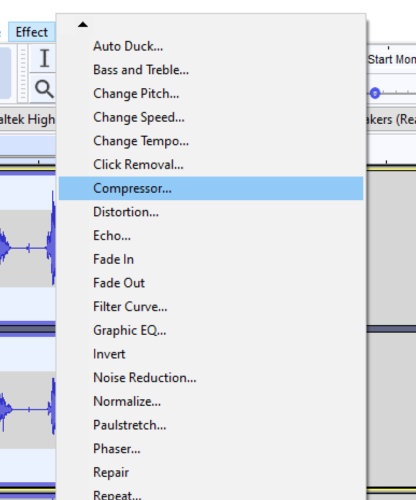
Select the track you want to compress then click Effect, and open Compressor
The controls look like this:
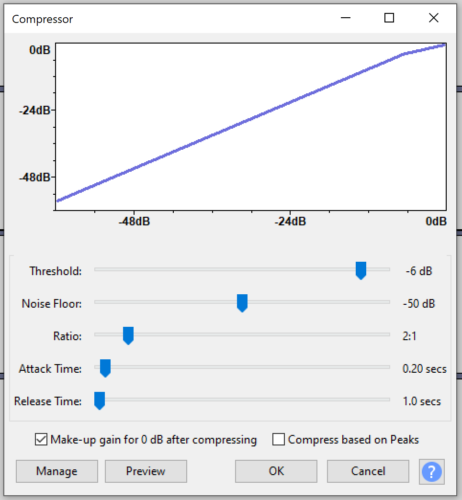
Some compressor tips:
The further left you move the threshold bar, the more background noise you hear. Try to keep it between -15 to -18 dB.
Try these settings to play around with:
Threshold = -15 dB to -18dB
Noise Floor = -40dB
Ratio = 2.5:1
Attack Time = 1.5 to 1.9 secs
Release Time = 10 – 12 secs
Use a limiter to keep your dB range locked in.
This will help prevent clipping if you speak or sing very loudly and then very softly.
Open Limiter on the Effects drop down:
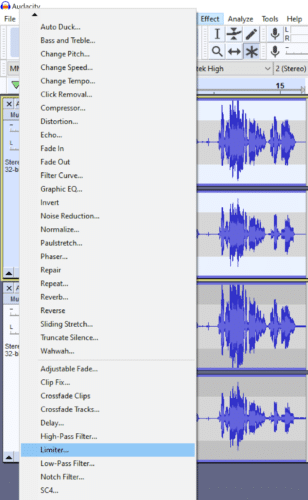
It opens to this box:
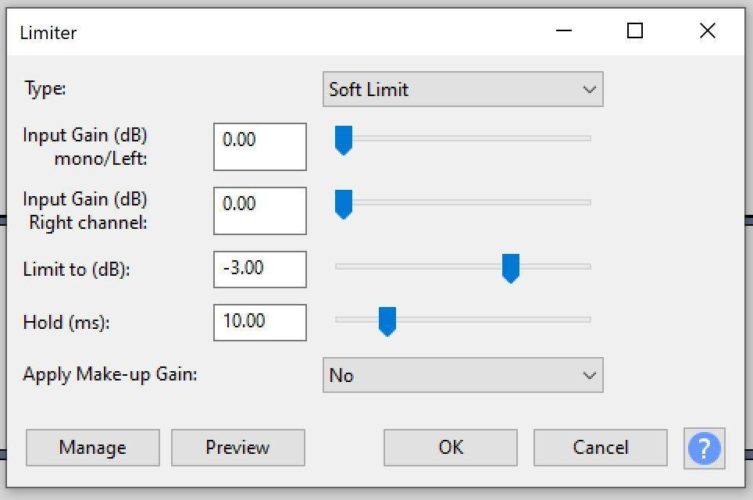
Select Hard Limit in the top dropdown box to set the noise ceiling. I would start with -3.00 dB and a Hold of 3 ms and then play around with it. This is highly variable based on your equipment and how loudly you are vocalizing!
Those are some basic steps to get you started on making any audio track recording file sound great. As you can see, Audacity has the capacity to do so much more, but even with just these few features you can see how powerful and easy to use this software is.
What If I Do It Wrong?
First of all, there are no wrong answers in the creative process. You have the freedom to add and subtract and adjust settings all you want for the track of your dreams. However, if you’re afraid of accidents and audio recording trainwrecks, know that Audacity has you covered.
First of all, you have unlimited undos and redos in a sequence. You can add something and immediately remove it with an undo. You can listen carefully to the voice and decide you really liked that and redo it. The idea is to create your ideal audio recording sound.
But what if something goes terribly wrong? Good news: Automatic Crash Recovery is here for you. The included autosave recovery file will recreate any unsaved changes or projects.
You can just hook your microphone back up and go again!
Final Thoughts
Audacity is an ideal program for achieving a better professional audio recording of your voice.
There are also many tools within Audacity that you can make use of.
There is an Audacity voice changer, there are more Audacity editing tools, there is equalization Audacity for your audio, and all kinds of other ways to make your recording audio voice file sound awesome.
The key is to jump in and just make it happen!
