Do You Have To Master A Song?
If you want professional quality, finished track that you can put up on Spotify, Apple Music, or YouTube, you should learn how to master a song properly.
Mastering is a pretty deep subject, and a field in its own right. But that doesn’t mean you have to spend years learning how to become a mastering engineer.
In fact, there are really only 15 steps that you need to master to, well, master well.
Let’s dive in.
How to Master a Song
1 – Before You Master, Get Your Sh*t Sorted
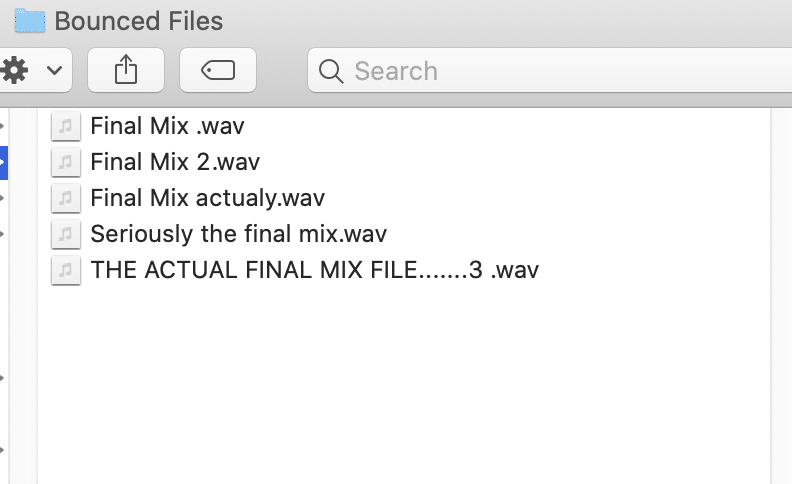
Finish The Mix First
Mastering is a separate and distinct process to mixing, so you should ensure the mix is FINISHED before you even think about mastering.
This means listening to your mix over and over again, on a number of different systems, until you’re absolutely, unequivocally, 100% sure it’s done.
Give Yourself A Break
Before you approach the master, you should give yourself a couple of days or more off from hearing the track. Doing this will give you a chance to hear the track with fresh ears when you open up that mastering session.
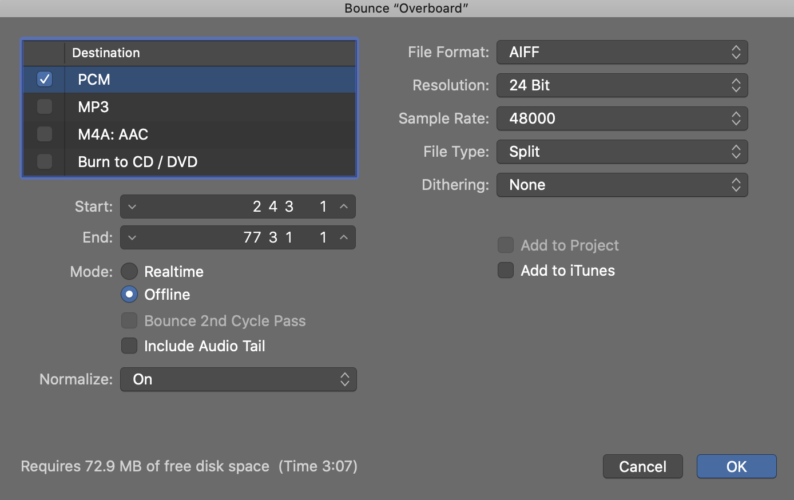
Exporting Your Mix
When bouncing down your mix, you’ll want to choose a high quality, lossless file type such as WAV or AIFF. Just make sure you don’t choose MP3. Repeat after me: DO NOT CHOOSE MP3.
You’ll also want to export the track at 24-bit, and ideally use a sample rate of 48kHz or higher.
Most important to the mastering process is that you give yourself the space to apply compression and limiting. This means leaving at least 3-6dB of headroom at the mixing stage. If your mix is pumping above this, then your mix isn’t finished.
Move back one space, do not pass go, do not collect $200.
Give Your Track Some Friends – Using Reference Tracks
One of the biggest elements of mastering music is making sure your tracks compete with other songs of similar genre.
And to do that, you need to master with reference to other tracks. So, when you import your final mix into the mastering session, bring along 2 or 3 commercial releases in a similar genre that you like the sound of.
You should listen carefully to these tracks, comparing them to your mix as you listen back. How do they differ to your mix?
- Do the references have more or less low end?
- Do they sound more compressed, or less?
- What does the stereo field sound like in comparison to yours?
- Is your mix darker or brighter than your references?
Made To Measure – Metering In Mastering
Though mastering engineers some time back made a move from a strictly technical role to one that embodied a strong creative element, there is still a highly practical and scientific facet that can’t be ignored.
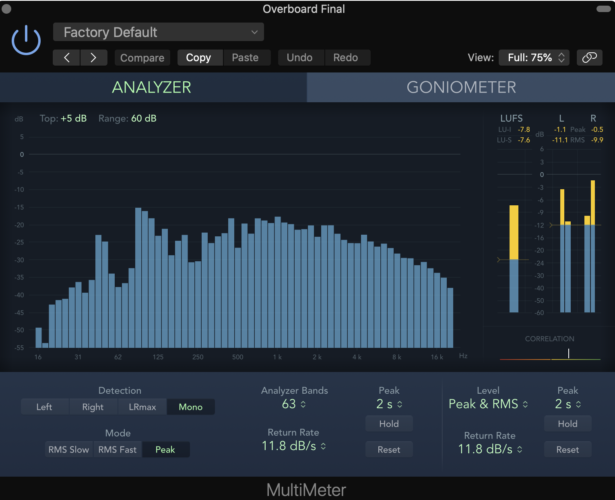
Whichever DAW you are using to master, make sure you have a decent suite of metering plugins. At a minimum you should have access to:
- Loudness meter (peak, RMS, LUFS)
- Goniometer (stereo field)
- Frequency analyzer (spectrum analyzer)
These three handy metering tools give you a visual representation of what’s happening in your track in terms of level, frequency, and the stereo field. Of course, you should be mastering with your ears, but as you’ll learn soon, sometimes numbers matter.
2 – Clean Up Your Act: Fixing Up Your Track
Both mixing and mastering are about creating a tight, polished, professional sounding production.
As much as we try to do this during the mix, sometimes things get missed, and often it’s the cumulation of all instruments in a mix that lead to the necessary sonic fixes that mastering encompasses.
Removing Noise
Getting rid of noise in individual tracks is going to be pretty difficult in the mastering stage, but there are a few ways we can combat noisy productions.
For starters, trim the beginning and end of your track to remove any unwanted ambient noise, apply fades where necessary, and get those start and end points sounding clean.
If you do find some unwanted crackle, pop, fizz or other noise in your track, and you can’t go back to the mix and fix it there, you might have some luck with a noise removal plugin such as iZotope’s RX4.
Rumble In The Jungle – Cutting Out Unnecessary Low End
It’s pretty common for there to be a lot of unnecessary low end in a mix.
In a typical rock track this would be caused by the cumulation in low end of the bass guitar and kick drum. This is only worsened in many modern productions by super low tuned guitars. Also, bass heavy synths, effects and bass drops don’t help.
Whilst we all love a bit of bass, it’s true that many consumer speakers cannot actually produce the lowest of the lowest, and this actually ends up muddying a track. Try a subtle high-pass filter to deal with excessive rumble.
Removing Harshness
Our ears are particularly sensitive to the upper midrange (1-8kHz), and an excess of energy in this range is typically described as harshness.
Unfortunately, many instruments contribute toward this. Distorted guitars often have an aggressive and grating bit around 4kHz, vocal sibilance sits around 5-8kHz, and sizzle in cymbals begins around 8kHz. See what we mean?
You can combat this in a couple of ways. Firstly, try an EQ cut between 3-8kHz (whatever works for your track).
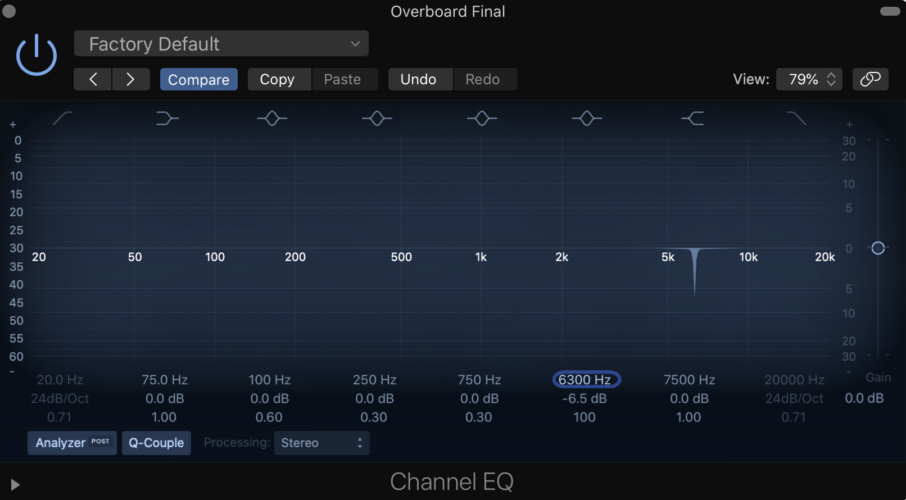
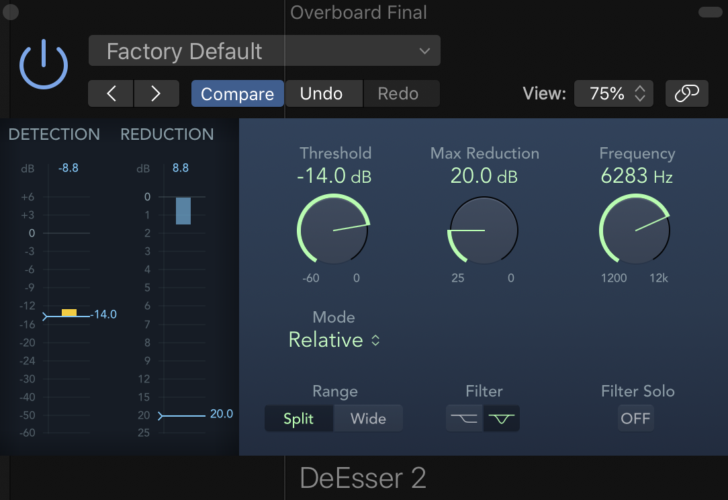
For a more dynamic approach to taming harshness in a master, fire up a de-esser plugin.
These are a special type of frequency-dependent compressor that are designed to tackle sibilance (s-sounds) in vocals, but can also be particularly useful for taming other harsh frequencies in the same range.
3 – Enhance The Night Away – Making Your Master Shine
Now we get into the fun stuff: making our track sound good!
It can be easy to go overboard though, so keep in the back of your mind that mastering should be about subtle touch-ups, not massive enhancements. If you find yourself having to apply some major changes, you might want to go back to the mixing phase.
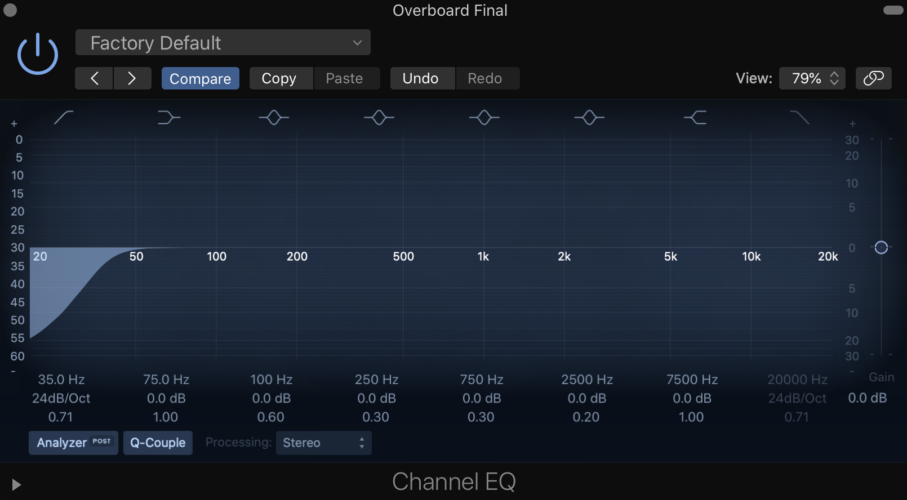
EQ
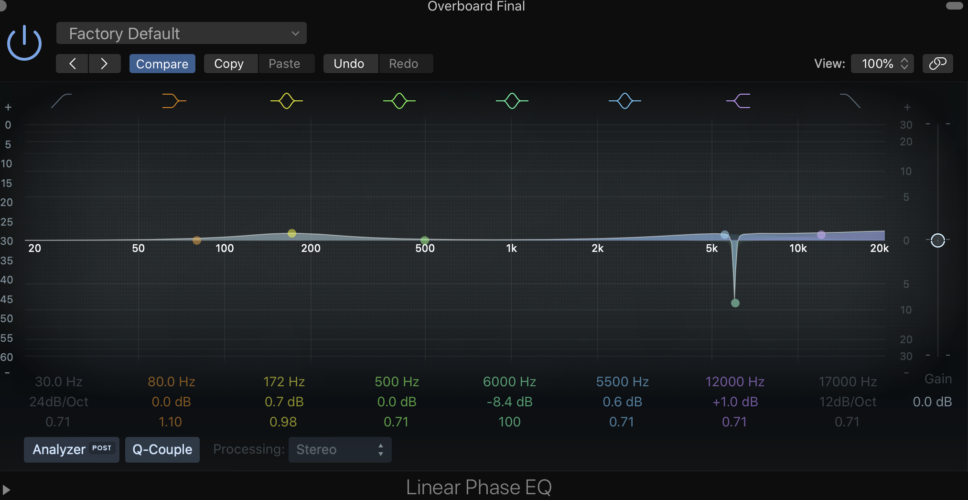
EQ should be applied subtly, and can be used to give a track a little more air, presence, or weight. Remember to compare with your reference tracks and aim for something genre-appropriate.
Typically, a mastering engineer would use a linear phase EQ, which combats phases issues that normal EQs create.
Stereo Widening
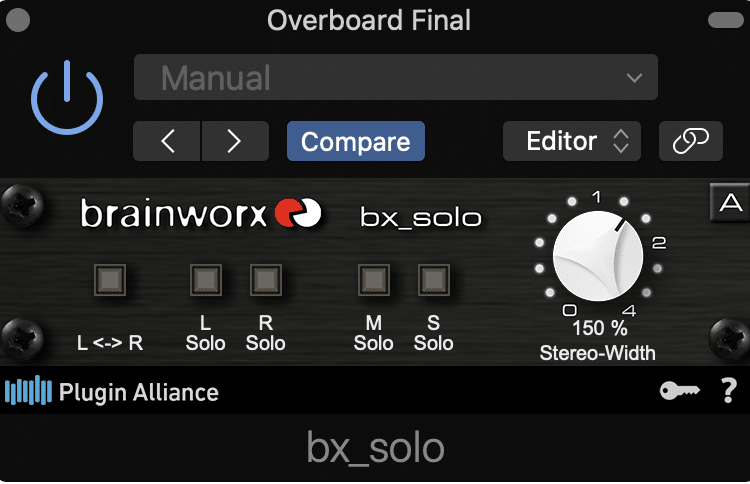
If you’re finding your reference tracks seem a lot wider than your mix, as if the instruments are popping out the sides of the speakers, you might want to try a stereo widener across the master.
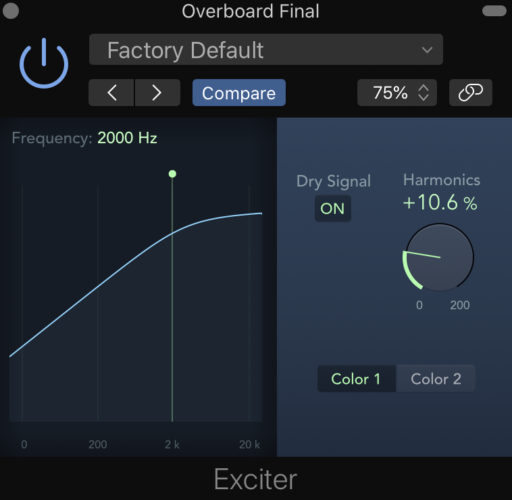
Exciter
EQ is a great way to boost high end and add some air, but you can only work with what you’ve got. That is to say, if there’s little high end to boost, and EQ won’t do much. If you’re finding this is the case, try an Exciter plugin.
Exciters create higher order harmonics based on the actual frequency content of your track. This can actually be a great way to glue a track together too when applied during mastering.
Tube And Tape Emulators
A great way to add a little analogue flavor to your track is to use a tube or tape emulator. There are a number of free ones available, download a few and see which flavor is your favorite.
4 – How Do You Make A Loud Master?
For a long time now, a huge part of mastering has been about making your tracks pump. In fact, it became such an important component that it sparked something called The Loudness Wars. More on that another day though.
The trick with mastering is using the tools you have at your disposal to make a track as loud as possible, while still retaining the clarity and dynamics that makes music music. Essentially, we want to make sure we still make our song sound good!
To do this, a typical mastering engineer would utilize three different types of dynamic processing.
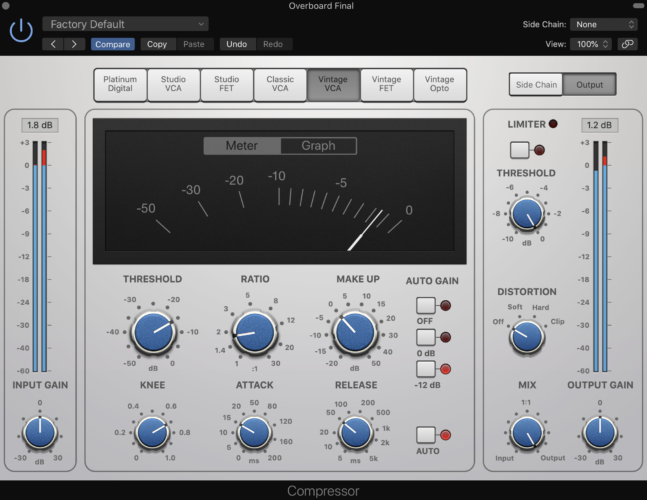
Compression
You’ll know all about this from mixing your tracks. Compression is a great way to tighten up a snare, or to tame an overly dynamic vocal line. They can also be a fantastic way to add a little glue during mastering, and tighten up the dynamics of a track altogether.
Applying some compression will also give you more range to smash the track with a limiter (you’ll learn about this soon), which will really bring up the perceived loudness.
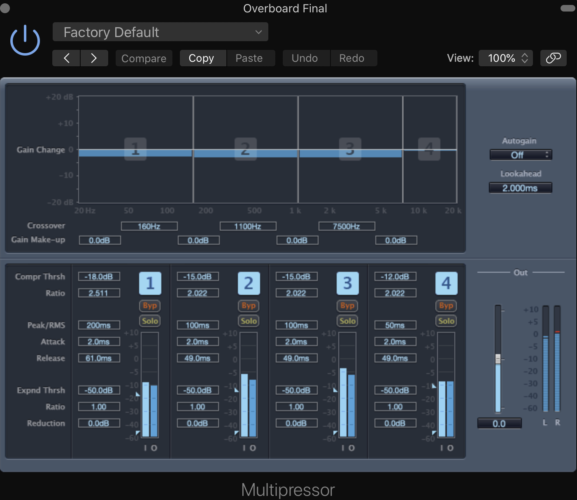
MultiBand Compression
Multiband compression is an interesting facet of audio mastering, as it’s kind of the bridge between dynamic and frequency domain processors.
In mastering, any form of processing you apply affects all instruments. Sometimes, this causes a problem. Maybe you’re trying to tame an overly dynamic low end, where certain bass notes are combining with the energy from the kick drum and blowing out your speakers.
Because of the dynamic nature of issues like this, a simple EQ often won’t do. In fact, it will probably end up leaving the track lacking in low end for the most part, only sounding decent during the parts in question.
The answer? Multiband compression.
Multiband compressors allow you to target specific frequency ranges, defined by you, and compress them to different degrees. For example you might want to target bass frequencies with a low ratio and low threshold to even out the low end, while taming short bursts of energy in the upper mids by setting a high ratio and threshold.
Make It So Loud That They Open Their Eyes – Using Limiters
Now we’ve got our dynamics sorted, we can really push this sucker and make our track LOUD.
Limiters are essentially super aggressive compressors with an infinite ratio. When you set the threshold, nothing gets past. You should set this to -0.1 or -0.2dB, just to give you a little safety net from digital overages.
From here, you push the level of the track up and up into this ceiling, and the limiter acts on any peaks and cuts them back down to size. Essentially what this does is reduce the dynamic range of your track.
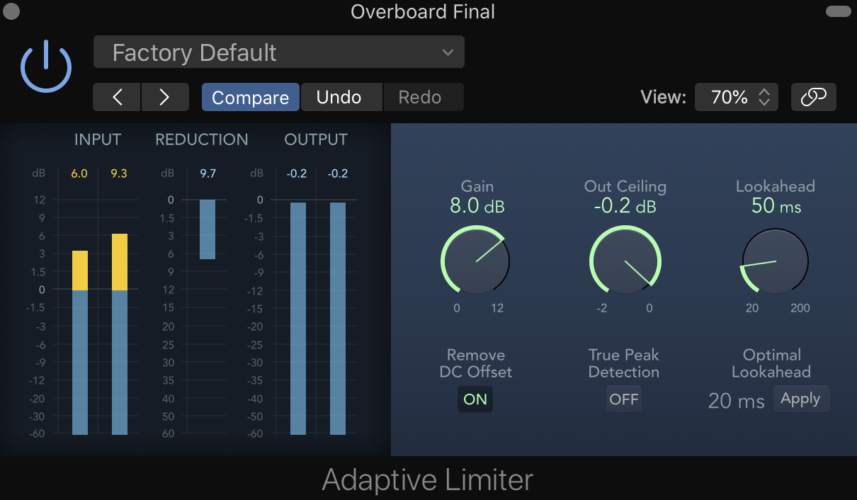
Here’s what limiting does to your tracks:
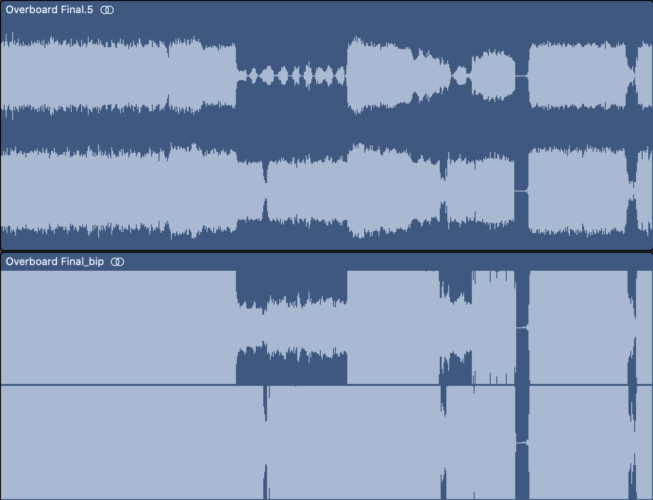
Now, dynamic range itself is a pretty good thing, we want a dynamic track, but we also want perceived loudness. Have you ever been listening to a YouTube mix and one song is suddenly quieter than the rest? Yeah… You’ve gotta compete.
Find the balance between loudness, a track that has some decent dynamics and isn’t overly squished.
5 – Monitoring The Situation
Your listening environment has a massive effect on how your tracks sound. Typically, a professional mastering engineer would have several sets of pro-quality monitors, and an incredibly well treated room.
We aren’t all afforded this luxury though, so whether you are mastering at home or have a studio set up, make sure you check for translation by using a bunch of different audio systems.
This might include professional mixing cans, consumer headphones like AirPods, the sound system in your lounge, and as a final step, in the car.
As you move in between these environments, make a note of what you hear, and make sure to look for any patterns. This will give you a good idea of what you can change in the master to make your track translate better.
What Even Is Mastering?
To properly understand why mastering exists and its place in the audio engineering process, it helps to take a little look back in time.
Back before the rise in digital audio and streaming services such as Spotify, Apple Music and YouTube, recorded music was typically destined for a physical medium.
You know, those things people used to actually pay money for. Vinyls, cassettes, and CDs, plus a few other audio formats that crashed harder than Wall Street in 2008 – read: MiniDisc.
The Birth Of Mastering
Mastering was born in the 1940s, and was originally developed in order to process mixed audio tracks for pressing onto vinyl.
The thing with vinyl is that it has some pretty finite limitations when it comes to things such as dynamic range, frequency range, and track length.
So, mastering evolved out of the need to ensure that the final audio tracks were suitable for vinyl production, and engineers would use processes such as compression or limiting to control the dynamics of a track.
As the world of audio developed, and CDs succeeded vinyls as the dominant medium for consuming recorded music, mastering engineers were forced to pivot and reposition their service.
This meant stripping off the lab coats and goggles that identified themselves as technical engineers, and embracing their creative side.
Mastering became, as it is today, concerned still with controlling frequency and dynamics but more for the consistency of songs over an album. In really basic terms, it became about answers to a few key questions:
- Do all of the tracks on the album fit within the same dynamic range (i.e. no track or part thereof much louder or softer than others)?
- Are the tracks consistent across the frequency range?
- How does the stereo field fit across all tracks? Should it be wider or narrower?
- Are there noise artefacts that need removing?
- Do the tracks also flow into each other nicely?
- Does the overall sound of the album reflect the artist or producers reference tracks?
- Are the tracks loud enough for their desired purpose?
- Are the audio file types suitable for their desired medium? e.g. CD, digital release, vinyl etc
Hiring A Mastering Engineer Vs DIY
This is a question that gets asked a lot, and is even something that crosses the mind of professional mixing engineers.
Should I hire a mastering engineer to master my new tracks?
The official answer is yes, just as you should hire a mechanic to service your car, a gardener to trim your hedge, or an accountant to do your taxes.
Of course, when you outsource any task to a professional, you should expect a better job than you could do yourself. Otherwise, why pay them in the first place?
But the thing is, in the real world, we like to get things done ourselves. That’s why you’re here, now, learning all about mastering.
These days, many mixing engineers offer mastering services as well. Audiophiles and purists would contest that you shouldn’t follow this method, and that you should hire separate mix and mastering engineers.
The truth is, aside from a difference in skillset, the only real benefit of hiring a dedicated mastering engineer is having a second set of ears. This can actually be of huge benefit though.
If you’ve just spent days or even weeks mixing an album’s worth of songs, you’ve become accustomed to the tonal qualities embedded in those mixes. That means you’ll be less sensitive to things that should be tended to in mastering, such as dynamics or frequency issues.
So, should you hire an ME or master your tracks yourself? Well, the answer is, as it is with anything creative, it’s up to you!
That’s A Wrap
Learning how to master doesn’t have to be difficult. Sure, you can spend years learning how to mix and master, get a degree, or an internship at a good studio. But, ultimately there’s only five steps you need to master to make your tracks sound like the pros do.
Once you’ve got your mix sorted and exported, and any noise and harshness removed, then all it takes is a few EQ tweaks, some work in the stereo field, a bit of compression and some careful limiting, and you’re there!
Not only that, you’ll be able to give your friends a little lesson next time they ask “what is mastering in music?”.