How to split audio in audacity.
Are you a content creator, podcaster, interviewer, YouTuber or music producer? Do you need the professional and seamless production that comes from audio editing in a DAW?
For basic editing, Audacity does the job brilliantly! It is the perfect solution for a creator on a budget thanks to it costing absolutely nothing! That’s correct… it costs $0!!!!!
After you make your vocals perfect, you may need to split your audio. In this step by step tutorial, we will teach you how to split tracks in Audacity.
Splitting audio is the act of separating recordings without erasing or cutting any of your production. There are several features in the software that actually make this task very simple. There are also different methods to use that we will run you through.
It is an efficient way to make shorter verses, make episodes more concise, and to add interludes to your production.
Without a basic knowledge of splitting and cutting sound files, you run the risk of deleting and losing your hard work.
Follow these simple instructions to gain an understanding of splitting audio. There’s no time like the present to use your newfound skill for higher quality recordings. Best of all… You can do it without spending big money on expensive DAWs.
Let’s dive in!
Downloading your free software:
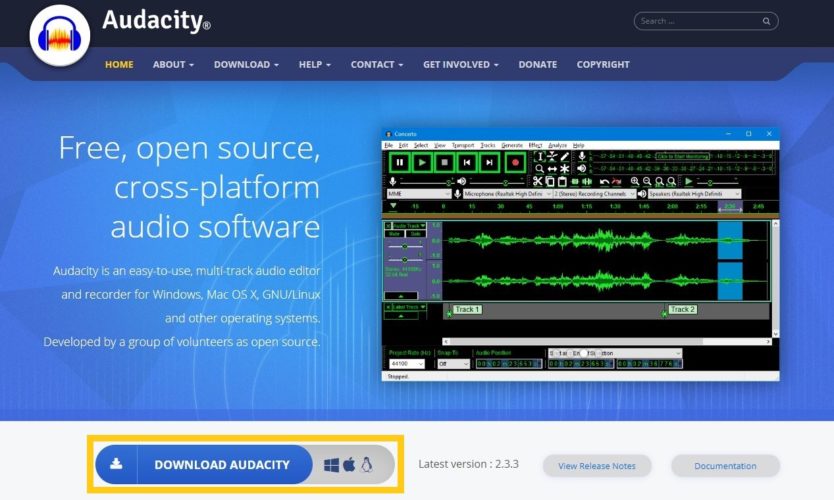
Step 1: If you haven’t downloaded Audacity yet, visit the official website here and download the installer file.
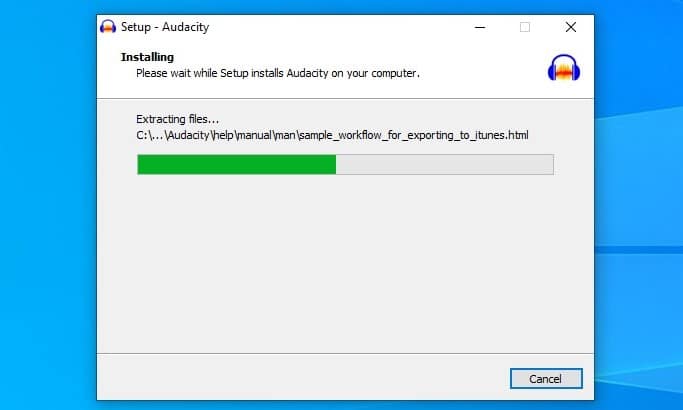
Step 2: Once downloaded, double click the installer file and your editing software will begin the installation.
Audacity Split Tracks Shortcut
The Audacity split track feature makes splitting a recording very simple! Firstly, upload your file into the DAW using ‘File’ then ‘Open’ then double-clicking on the file you wish to edit. Now follow the steps below to separate audio:
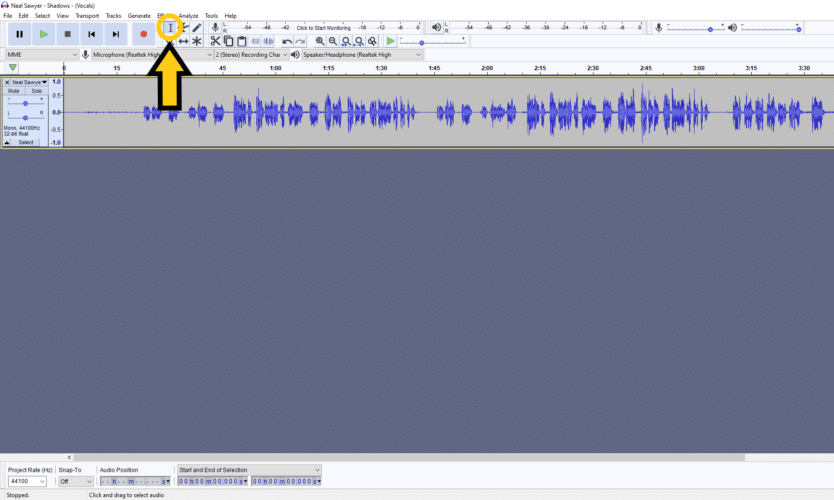
Step 1: Press F1 or select the ‘Selection Tool’. The icon for this tool has been highlighted in the image below.
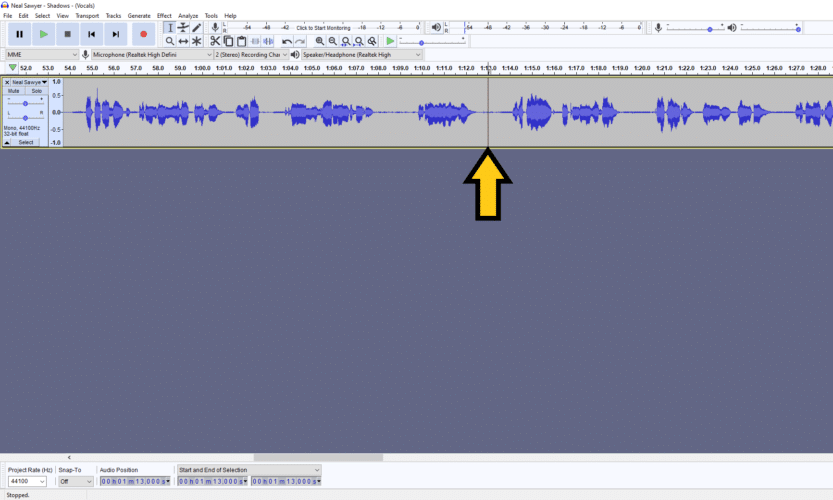
Step 2: Locate the part of the production that you wish to split and left click on your mouse. A thin line will confirm the area you have selected. For the sake of improved accuracy, you can use the shortcut Ctrl + 1 to zoom in for an enlarged and more focused view.
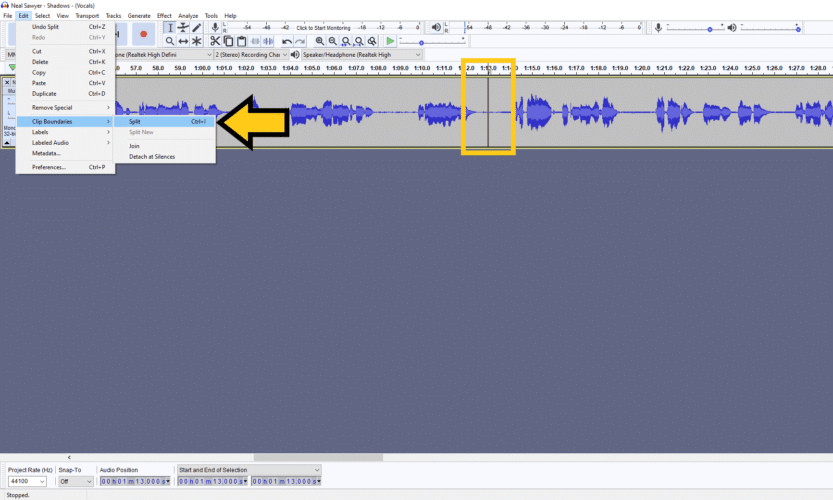
Step 3: Press ‘Edit’ in the top menu followed by ‘Clip Boundaries, Split’. Or simply press Ctrl + I. Once the audio splits you will notice a bolder line in the position you selected to confirm the separation.
Step 4: You may want to drag the now separated audio apart. You can do this using the ‘Time Shift Tool’. Simply engage the tool that has been highlighted below. Drag the separated track by holding the left mouse button.

How Do I Automatically Split Tracks In Audacity?
Splitting audio in multiple parts can be time-consuming. Using the ‘Labels’ and ‘Export Multiple’ functions may be a good way of saving time.
Labels can mark your required cuts. Also, this allows you to name the individual snippets for when you export.
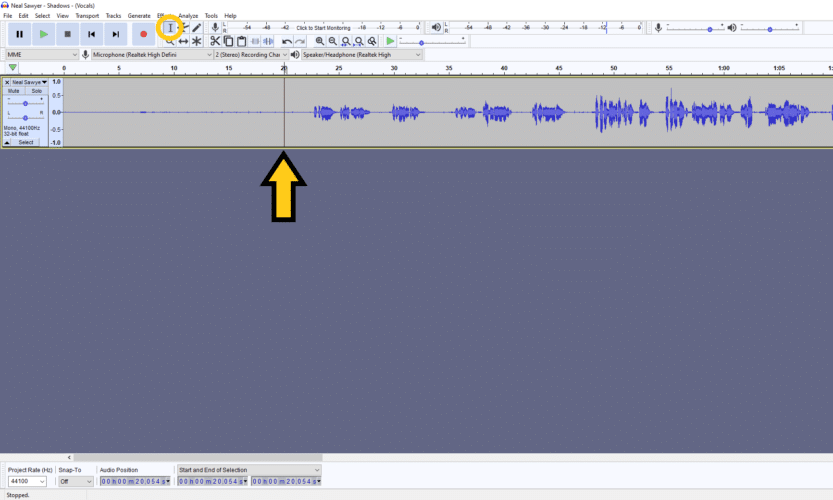
Step 1: Click the ‘Selection Tool’ then identify the beginning of where you would like to split. Left-click the mouse button.
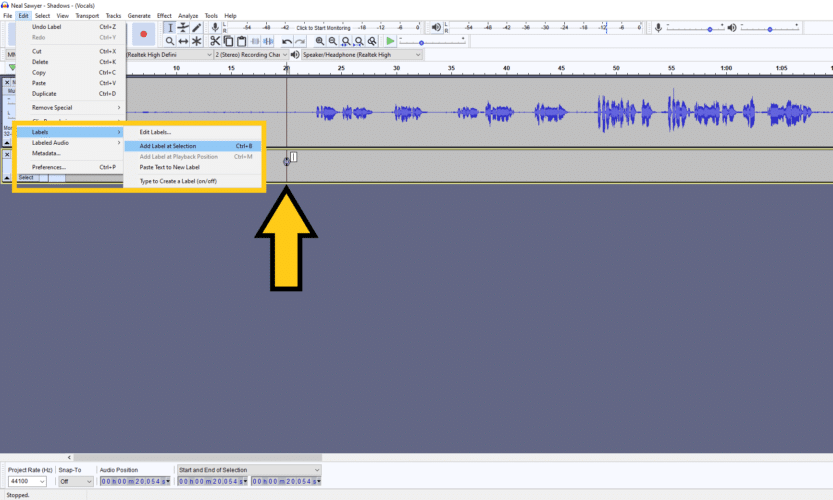
Step 2: Located in the top menu. Click ‘Edit’, ‘Labels’, then ‘Add Label at Selection’. Alternatively, press Ctrl + B. You will see a new label track created with a new marker created.
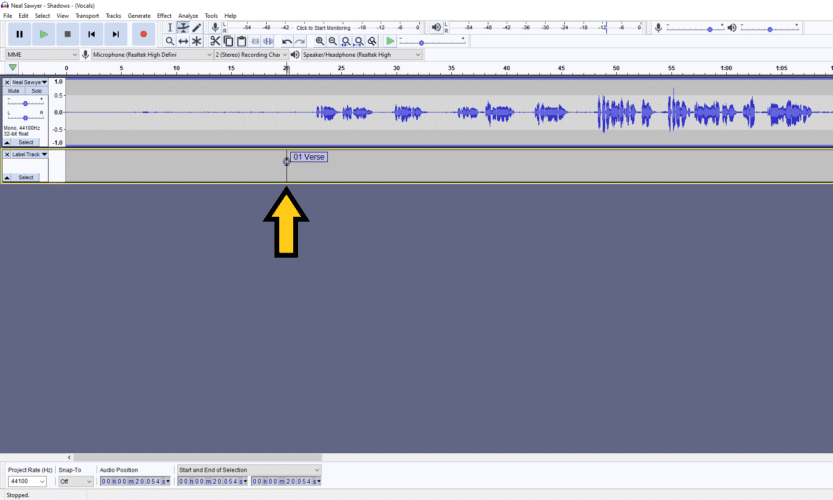
Step 3: Next, type in the desired file name on the label.
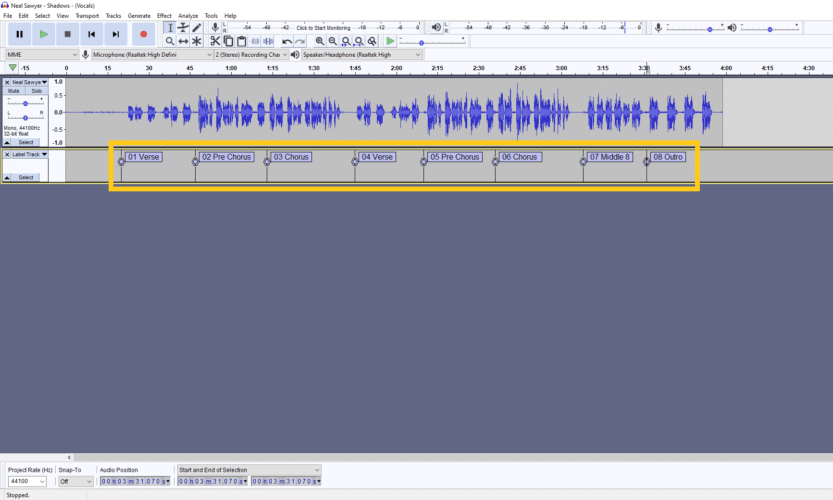
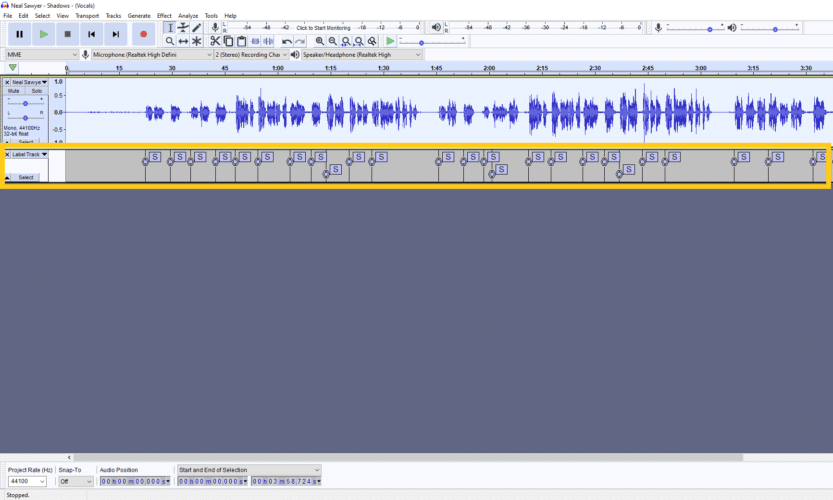
Simply click on the label and type. For this example, I am using the vocals on music production, so I have divided and labeled the sections under the song parts. This procedure can be used for any production though, and the same principle applies.
Step 4: Repeat these steps depending on the number of separations required. If you are happy with the labels, follow the exporting section below.
Audacity Split Tracks Automatically
You can automatically detect split points if you have well-defined silences in your audio. To do this follow the steps below:
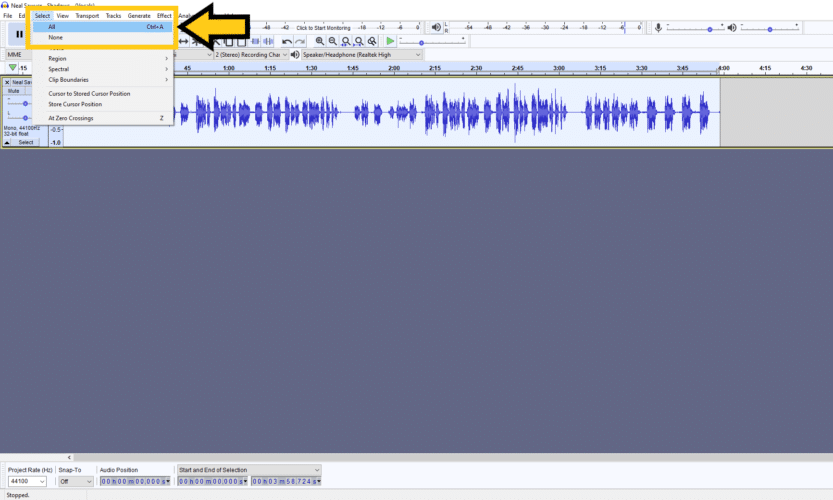
Step 1: Firstly click on ‘Select’ then ‘All’ in the top menu. You can also use Ctrl + A. This will select all the recording audio.
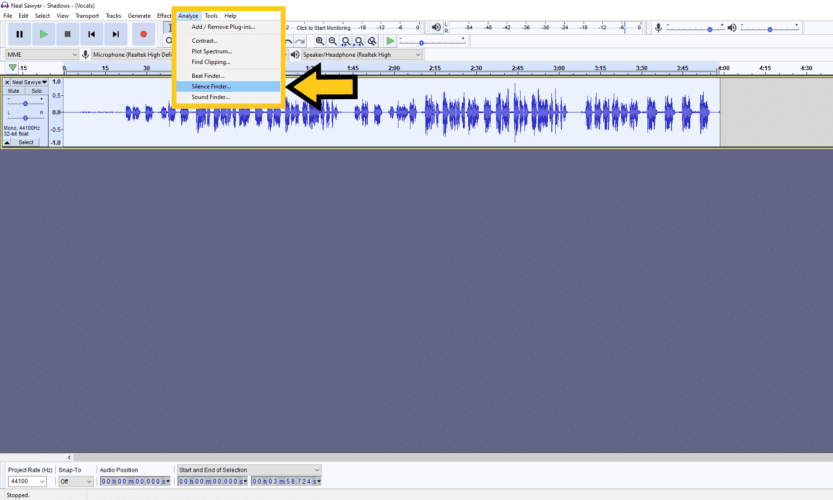
Step 2: Next click ‘Analyze’ then ‘Silence Finder’ from the top menu.
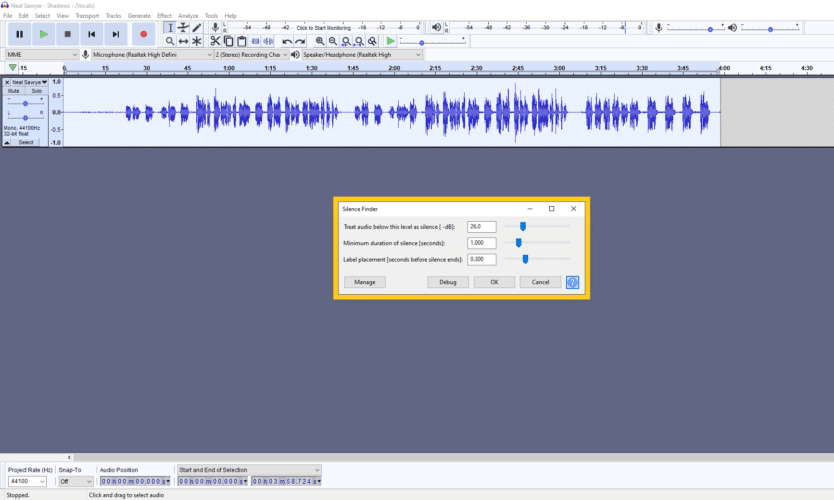
Step 3: You will be prompted with a dialogue box where you can select the parameters for your selection. Click ‘OK’.
Step 4: The program will now have automatically created labels based on silence in your audio file.
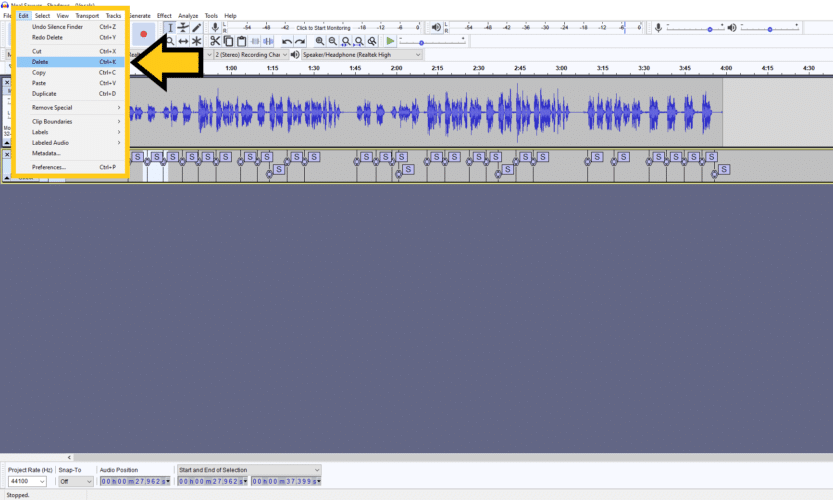
Step 5: There may be labels in areas that you do not want to split. To delete the label, highlight the label using the ‘Selection Tool’ then click ‘Edit’ then ‘Delete’ or Ctrl + K.
Step 6: Once happy with the labels, name them and you are prepared for export.
Audacity Split Stereo Track
In Audacity, you can separate a stereo track into two mono tracks. This may be helpful if you need to edit the different channels individually. For example, adjusting the levels of the left or right channel.
Separating Stereo Tracks
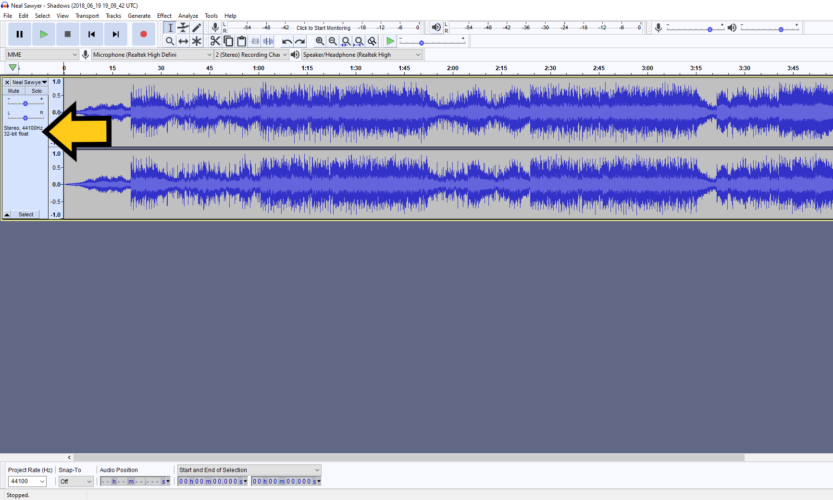
Step 1: Load a stereo recording into Audacity.
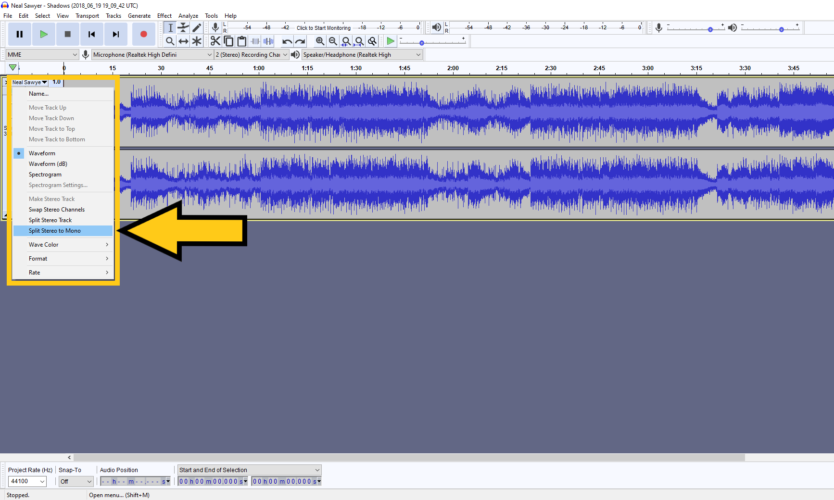
Step 2: To find this feature, you will need to open the audio track menu. In the left column, click the arrow located beside the audio file name. Then click ‘Split Stereo Track’.

Step 3: Alternatively, you can separate the stereo track into two mono tracks. Again, click the arrow located alongside the audio file name. Then click ‘Split Stereo to Mono’.
Exporting Audio
You will want to make sure that your newly separated tracks are exported as individual audio files. Follow these steps to export:
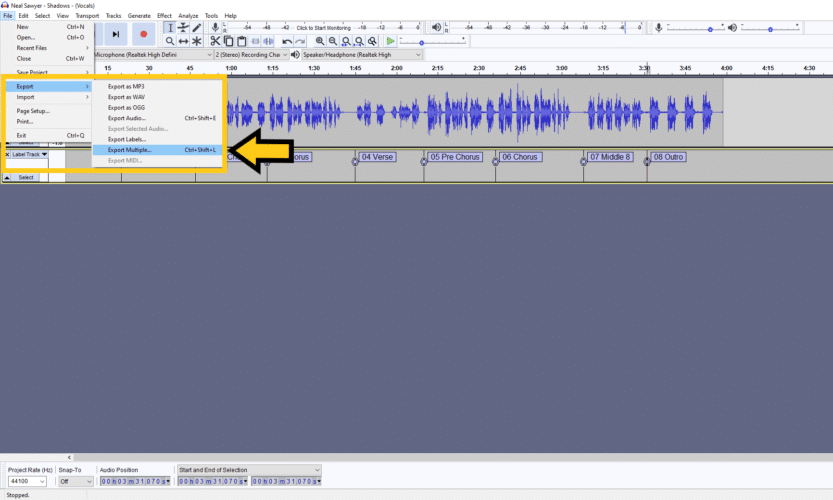
Step 1: With the labels set, you can export the split tracks as individual files. Click ‘File’, ‘Export’ then ‘Export Multiple…’
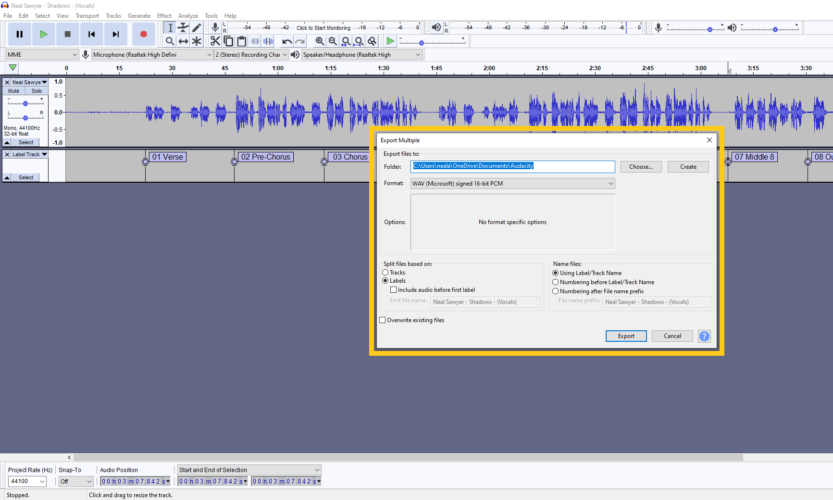
Step 2: The dialogue box as pictured below will now appear. Choose the option ‘Labels’ under ‘Split files based on:’ and then click ‘Export’.
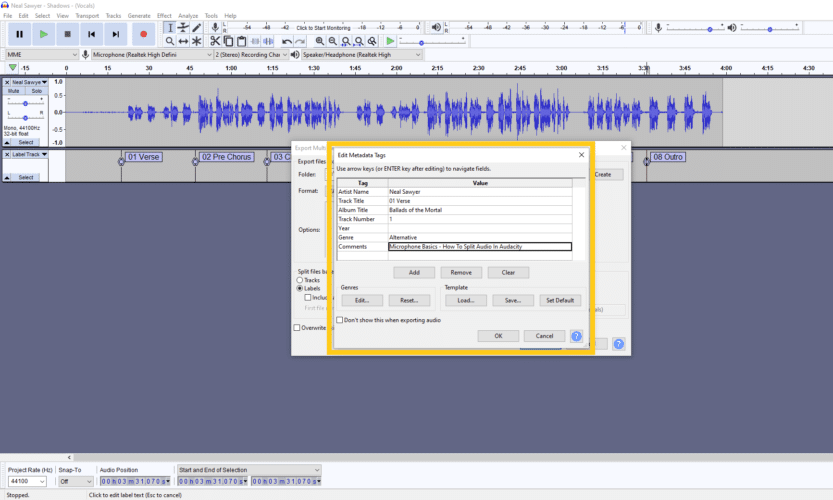
Step 3: Next, you will be prompted to add any metadata to the audio file. If necessary, complete the fields, and click ‘OK’. Note that you have to do this for every split so you may want to use the Template feature to save time.
Conclusion
Whether you are a hobbyist or professional, a producer or a broadcaster, you have most likely come across the need for audio editing.
Editing is an important skill in production, whether it be for music, podcasting, or any project that uses audio. Basic knowledge of editing can go a long way. Learning to perform simple skills can not only save you time, but also level up your work to create clean and professional content.
Picking a DAW (Digital Audio Workstation) can be very difficult as there are so many to choose from. Not to mention they can be very expensive. Luckily, Audacity is free editing software that can help you to carry out simple tasks effectively.
You really should take advantage of this free resource.
We hope this guide has helped develop your skillset, and that it will assist you in editing your production. Once you gain basic skills, you can delve deeper into Audacity and even look at processing your work with effects.
Take your newfound skills and enjoy creating your new pristine content!