The world of vlogging is a big one, and there are a ton of amazing content creators out there right now working on some seriously awesome videos.
I know that from the outset it might seem like you would need a load of expensive equipment to get yourself started, but here’s the truth…. you really don’t!
Do you have an iPhone?
Awesome!
In that case, you’re already basically set up and ready to go.
But how do you vlog with your iPhone?
Basic Iphone Vlogging Tips: Getting Started
One challenge when working only on an iPhone is the editing side.
You won’t be able edit to the same depth as you could when performing post-production on a desktop computer. But if that doesn’t matter to you, there are easy ways to keep doing what you’re doing.
You can download an app like iMovie to perform all your video cuts, and then do your coloring with filters when uploading it to your chosen host.
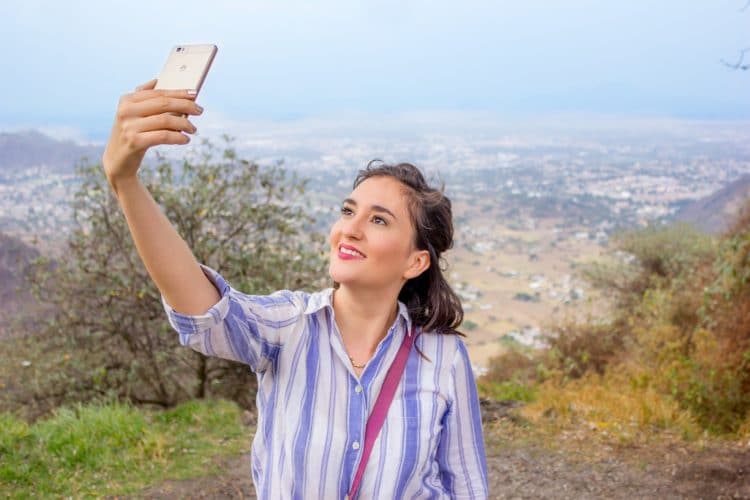
Travel vlogs are often designed to captivate the viewer, so you’ll want to be sure that you shoot in good lighting to show off where you are.
Be sure to use the full range of features that your phone has to offer, including the night mode, and the editing parameters in the photo app.
Let your audience see what you see as you vlog it. For those action shots, don’t forget your tripod or selfie stick to give a wider view of the action as it happens!
Many vlog videos are made up of multiple clips spliced together over a period of time, more on this later, so don’t worry about shooting it all in one huge video.
The iOS photo app will organize videos by timestamp in chronological order, and it will also show them on an interactive map so you can pinpoint what videos you shot in what location, and it’s surprisingly accurate when you zoom in!
Using a phone to capture a whole trip is a great way to cut down on bulky equipment and get good results that you can choose to edit and upload on the go or save for later.
How To Capture Great Footage

Here are some top tips to help you get the most out of your filming.
Turn on Airplane Mode – This will stop any incoming calls, messages, and notifications coming through. Imagine your phone ringing in the middle of you capturing a once in a lifetime moment. That’s not very cool!
Rotate your Phone Horizontally – When you film in portrait mode you will see black bars above and below the video. Be sure you hold the phone in landscape mode to capture the widest and best shot.
Always do a Test Shot – Ok, this applies more if you’re recording a how-to video or something that is predetermined. Before you start, shoot a quick video to make sure that your lighting and angles are perfect!
Use Your Eyes – There are many tutorials telling you exactly how to frame shots, but use your eyes. Does it look good and professional? Check out a concept called the ‘rule of thirds’ for some guidance on where to start. Be creative and use your judgement.
Edit on the Go – You’ll save yourself a lot of time editing on your phone as you go, but remember there are various limitations on how and what you can edit on a smartphone.
Which brings us nicely into our next topic…
Editing On The Go
Of course, making videos on a phone is going to come with compromises.
We aren’t compromising on specs here, we are compromising on post-production.
When editing videos on your phone, you have limited options.
Apps For Vloggers
There are a ton of fantastic apps available on the App Store, but the reality is, for most basic vlogging needs, the iPhone will have everything you could ever need.
The main apps I would recommend for a vlogger on the go are:
- iMovie – Apple’s very own video editing tool. You can edit videos in your built in photo app, but iMovie allows better timeline views and allows you to edit multiple clips together
- Youtube Studio – This is a back end access to your Youtube account where you can update metadata, permissions, and more.
For iOS users, the best place to start would be one of Apple’s own apps, iMovie. Other movie editing apps are available, but I find this to be the best for getting started right away!
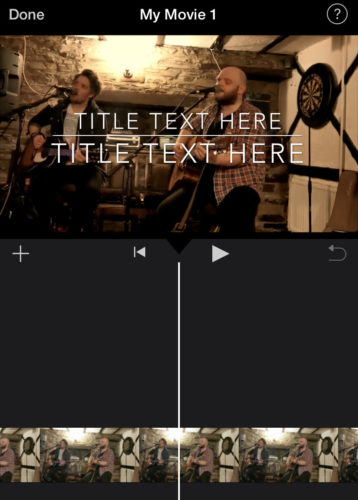
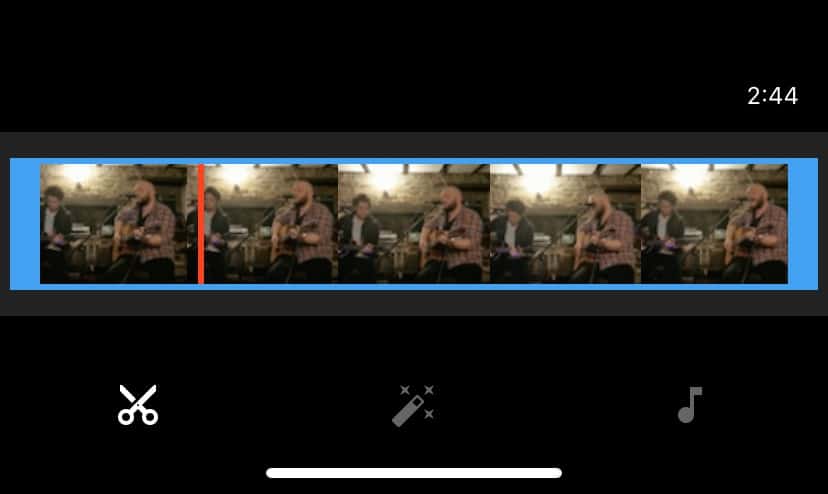
iMovie will allow you to do very simple editing to your video. For example, you can cut clips together, add text titles and overlays, apply a color filter, add a slow motion or speed up to a section of the video, and adjust the level of the audio.
However, it does not have any of the in-depth editing options that you’d expect to have on a desktop.
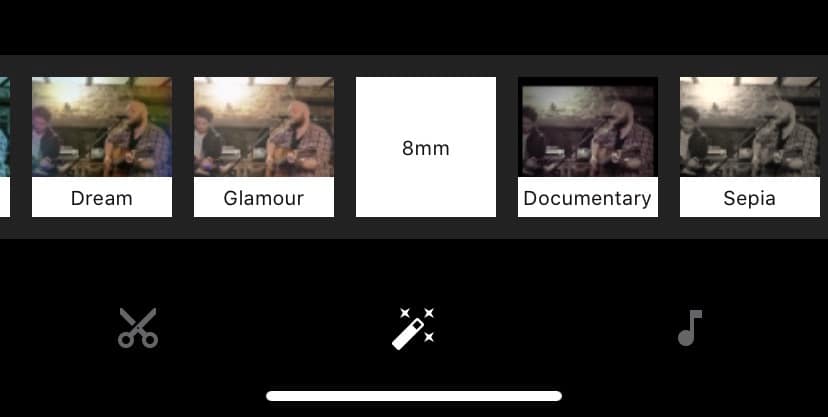
For video creation on the go, this might be all you need. Filters are simple to apply and can transform the look of your video in just a single click.
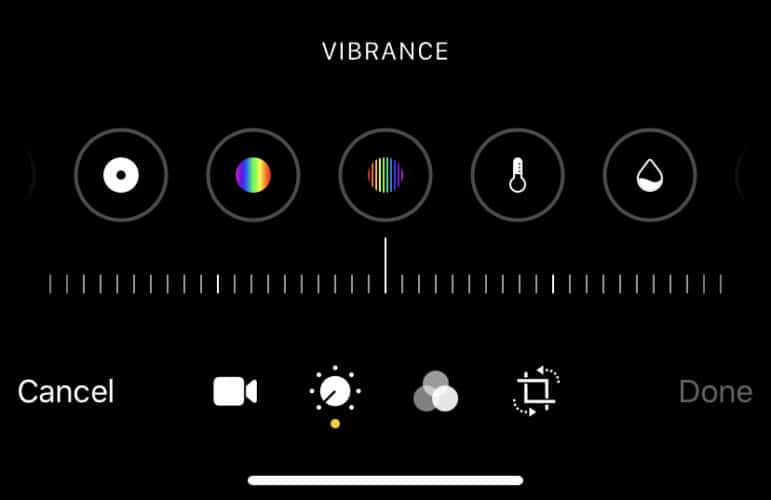
iOS has a range of built-in editing tools you can use to tweak the visuals of your video.
There is also quite a wide range of parameters that you can use to edit your raw footage, including exposure, highlights, shadows, contrast, brightness, saturation, vibrance, sharpness and more.
It also allows you to add definition, reduce any unwanted noise (especially useful for those low light capture moments), and add a vignette to your video.
These parameters are accessible via the iOS photos menu by clicking the “Edit” button.
Do You Need Any Special Vlogging Equipment?
Your iPhone will get you all the high quality video and okayish audio you need to create engaging vlogs on the go, especially if you’re creating a lot of content when you’re in public places.
The specs and apps available out the box are plentiful, but there are also loads of awesome accessories that you can start using if you feel your content could be better.
If you find that you want the audio of your vlogs to step up a level, then you could always purchase a plug-in microphone to accompany your phone.
Many Companies Make Incredible Sounding, Portable Mics.
The Shure MV88 is best because it’s small and it will connect straight to the lightning port of your iPhone so that you can take it anywhere you want.
[lasso ref=”shure-mv88-ios-stereo-condenser-microphone” id=”37997″ description=”Intuitive, easy to use, and attractive to boot, the MV88 from Shure is by far the best option for upgrading your iPhone audio at a reasonable price point!” link_id=”105138″]
The MV88 has 5 presets to cover speech, singing, acoustic instruments, flat response, and loud. Whatever you’re filming, one of these settings will have you covered.
The MV88 also has a built-in windshield… so if you vlog from any outdoor locations, this will certainly reduce any unwanted wind noise in your content.
It is also reasonably priced… at around the $149 mark, and could be one of the best accessories you pick up for your vlogging needs.
Should You Buy A Tripod For Filming?
If you want to capture a lot of action, or perhaps you need both hands free to be demonstrating something particular, then yes… a tripod would be very useful.
A tripod for iPhone vlogging can be fairly inexpensive, and some will even fold down very small for travel, which helps you in the long run, especially if you’re planning on taking your vlog creation to lands far and wide.
You will see a lot of professional iPhone vloggers walking around with their phone attached to a gimbal, which will help provide constant stability while keeping the iPhone floating at a level plain regardless of the terrain you are walking over.
This can give you a consistently smooth moving shot, and can be incredibly advantageous if you want quality moving video.
[lasso ref=”hohem-3-axis-gimbal-stabilizer-for-iphone” id=”39686″ link_id=”105139″]
If you feature adventure segments in your blog, such as sports or outdoor activities, there could be some shots that really demand the use of a tripod or gimbal.
For example, you could be swimming or jumping off some rocks into the sea. If you are, you probably won’t want to be holding your phone to capture it! Hence… the need for a tripod!
Should I Carry Lights?
Well, like all questions on iPhone vlogging, it really depends on what and where. If you are filming outdoors, you will have access to the best type of lighting… natural light.
If you are shooting indoors, then you can often get away without needing to transport lights just by filming your vlog videos in a well lit room or area.
If you are setting up a regular vlogging area, for instance a room at home or an office space, then some lighting could be a useful addition to keep the shots looking bright and crisp.
For background, you generally want gentle light. If your background is totally dark and you are lit up, you can tend to blend into it… while soft lighting in the background can actually make you pop!
This can be accomplished using simple lamps in your background, to help provide a depth of field. Making this one simple change is a night and day difference, and you don’t need anything fancy at all to make this happen.
You can also grab a can shop light (they aren’t expensive), and use it to spread light onto your background. Put them near the ground and point them up onto your background.
This will light up the wall, making it super crisp and super clean… helping you to pop out and really stand out on camera.
If your video does happen to come out slightly darker than you intended, you can always try to save it with a little light editing courtesy of some Youtube filters.
The iPhone 11 has a built in night mode that will automatically activate when the camera detects a low level of light.
There are also a range of third party apps on the app store that you can use to import and edit video, some free and some paid. Many of these may have optional extras to compensate for bad lighting.
What About A Selfie Stick?
You will see a lot of people using selfie sticks for taking photos, but they are also very useful for filming on the go.
The main two benefits are that you won’t get tired arms from holding your camera at arms length all day. But… you also get to capture extra height and width in your shots.
The extra width you can capture using a selfie stick can look amazing on those outdoor shots, especially if you really want to show off the scenery that surrounds you.
[lasso ref=”mpow-selfie-stick-tripod” id=”39687″ link_id=”105140″]
Direct Uploading To YouTube
If you’re going to edit your video vlog on the go and you don’t need any of the fancy extras that a desktop computer would offer, then the great news is you can upload directly to YouTube.
YouTube even has some small, in built editing capabilities that you can use to make your video better.

To upload to Youtube from the iOS app, you need to click the camera icon at the top.
This prompts you to then select a video to upload. Once you’ve selected your video, you will be taken to the edit screen.
The editing features on Youtube’s mobile app are by no means extensive… but they offer enough basic functionality to allow you to make your videos look good using tools available to you.
Youtube’s direct uploader allows you to trim your clip to the desired length, add some color filters to transform the overall look of your video (including some fun ones), and if you are uploading a still image, or a collage of clips, you can also add a music track over the top from Youtube’s extensive music library.
This set of editing tools is very easy to use and apply to your video.
With just a few clicks, you can transform your rough video into something artistic and creative!
If you want to add additional overlays to your video, once it has been uploaded to Youtube via the mobile app, you can log onto Youtube on a desktop computer, access Youtube studio from your account, and add additional features… such as video popups, recommendations, and playlists.
What iPhone Is Best For Vlogging?
It would be best to have the latest and highest spec’d iPhone that you can afford at this moment in time.
Remember, the camera and audio technology moves fast… and even an iPhone that might be a few years old would not have the same level of detail and finesse that a more modern model would boast.
Sure, iPhone 5 content will look great, but the 11 is the latest, highest spec model as of the time that this was written (Feb 2020).
4K/1080p HD videos are the main two formats you’ll see in most vlogging setups these days, so this camera is definitely capable of making your content look good and stand up against others.
The iPhone 11 also has the latest processor chips that will let your camera work at it’s full potential and create better videos for you.
The powerful processing will help your videos look as good as the leading vloggers online.
The camera on the iPhone could well be the best vlog camera that you already own, without even realizing it.
It’s good, it’s very good. It’s high spec, works in low light, has some inbuilt editing capabilities, and has a bunch of add-on accessories to make it even better… such as an external microphone or a tripod.
What’s not to like about a professional camera that you already own and can fit in your pocket?
Also, vlog creation tends to be quite an organic process.
What Types Of Vlogs Can I Make?
Travel vlogging is all the hype right now. But.. vlogging is not exclusive to traveling.
You can create vlogs about whatever topics you want! It’s an open book as far as topics go. The main aim is to keep it interesting and exciting so that people will want to keep on watching.
Here are just a few of the different types of vlogs you can create with an iPhone.
Talking Head Vlogs
These types of vlogs are just you and your thoughts. It could be you explaining something cool that’s happening, telling a story, giving tips, or letting off some steam.
When you create talking vlogs, you want your face to be the focus of the frame so that you are talking directly to the person watching.
How-To Vlogs

If you’ve got a skill to share, then start creating some videos to share. It could be you giving tips on an instrument that you play, or a recipe you’ve perfected.
Create a vlog that gives your viewers the inside scoop on this skill and show them up-close-and-personal how to make it work for them.
Adventure/Reality Vlogs
This is similar to travel, but your niche may be sports or something you do on a day to day basis. These types of vlogs are all about letting people into your life and showing them what you do everyday.
Many business owners will choose to create this type of video to give clients a behind-the-scenes view of what goes on in their business.
How Do I Make Travel Vlogs On My iPhone
Shooting travel vlogs on an iPhone is super easy, because you have everything you need right in your pocket.
The iPhones small size makes it ideal for travel vlogging, and the built-in camera and microphone will give you great audio.
Can I really Vlog With An iPhone?
You certainly can!
iPhones have fantastic cameras, both front and back facing, as well as great audio capabilities. iPhone vlogging has become a very common activity for traveling content creators.
Many will exclusively rely on their iPhone as their medium of contact with their audience, wherever they may be in the world.
The latest iPhone 11 has the specs to back up creating great vlog content:
- 2x optical/3x digital zoom
- Image stabilization
- 4k video at 24/30/60fps
- 1080p HD video at 30/60fps
- Autofocus
- Cinematic stabilisation
- Subject tracking
- HEVC and H.264 formats
Spec wise, this is definitely an impressive list. The ability to shoot at 4K should appeal to even the most detail mad video creators.
It’s easy to look at lists of Youtubers equipment and think that you need to spend thousands to create the best quality vlogs around, but this doesn’t have to be the case.
The iPhone could be the best camera for your video project.
You just need to know what you’re doing!
Conclusion
Chances are good that when the inspiration strikes, you may be out away from all your bigger camera equipment; and no one wants to carry filming gear everywhere just in case inspiration strikes!
Help yourself by making your vlog equipment fit into your pocket.
Using a small iPhone camera will change your vlogging. No more bulky camera cases or lighting stands when you’ve got a great camera in your pocket.