Audacity sound effects.
If you create YouTube videos, record music, do interviews or create podcasts, you’ll want it to sound as awesome as possible!
Adding sound effects to your production is a great way to grab the attention of the audience.
From the intro music that sets the tone, to the cool glitch effect in an interlude.
Today you’ll learn how to use Audacity to add effects like a pro.
But surely you need expensive software, right?
Actually… the answer is quite the opposite! Audacity is a free open-source audio editor that will level up your content!
You can use audacity for anything from cleaning up a vocal track, to creating a podcast.
So with your hard-earned cash in your pocket, your production is about to get cooler, bigger and more professional with this step by step tutorial!
Let’s dive in.
Does Audacity Come With Sound Effects?
While Audacity has an abundance of audio effects such as compressors and noise reduction, it doesn’t have any sound effects. More expensive DAWs like ‘Ableton Live’ will have an array of SFX.
We can, however, get our SFX from other online resources and use them in Audacity. The section below has some resources to download your favorite sounds to use as you like.
Where Can I Find Free Sound Effects Downloads For Audacity?
Before we get to the fun part, first let’s talk about the boring bit.
You must get your sounds from the right resource to protect yourself. There is no point in working hard on your production only to be flagged for copyright infringements.
A quick search will show that there are plenty of sites that claim to offer free downloads.
However, finding true freebies can be massively time-consuming in itself. Using the sites listed below will ensure that your effects and loops are royalty-free and save you search time.
99 Sounds
Your search for cinematic effects is over! 99 Sounds have cinematic loops that are great for movie trailers and podcasts. There is an option to donate, but if you want to download for free enter $0 in the enter the price box.
Glitch Machines
Glitch Machines has an extensive stock of glitches. The free samples are clearly labeled, just add them to your cart and follow the instructions to download your pack.
Premium Beat
With over 280 high-quality free SFX, Premium Beat is a perfect resource for embellishing your videos and podcasts. Search through a wide range of effects from horror sounds to footsteps.
YouTube
You’ll most likely be uploading your content to YouTube. A little known fact is they have free music and SFX that you can use on your production.
How Do You Add Sound Effects In Audacity?
Firstly you will need your project open in Audacity.
You have two options for inserting audio into your project.
Option 1
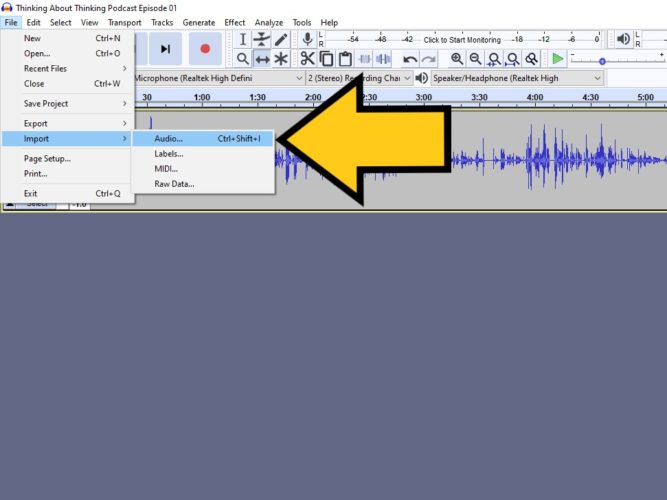
Click File, Import, Audio. Alternatively, use the keyboard shortcut Ctrl + Shift + I (Windows) or Cmd + Shift + I (OS X).
Option 2
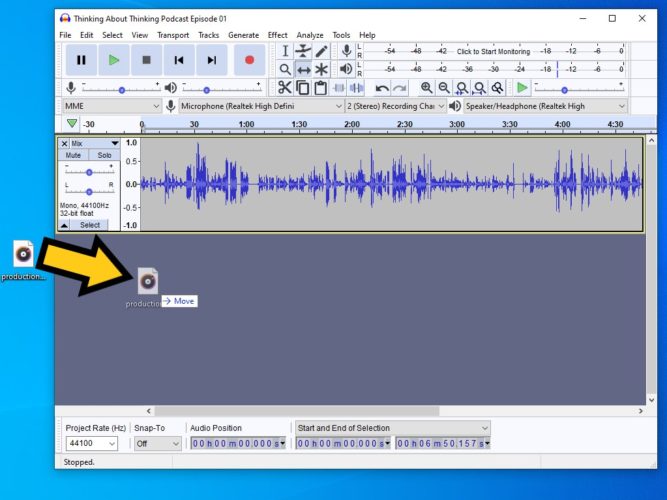
Simply drag and drop the audio file into the open Audacity project.
How Do I Add Sound Effects To My Music or Podcast?
Now your effect is added to your project, and you can tweak it to suit. You’ll notice the SFX will be added on a new audio track. This gives you the flexibility to adjust and edit to make it sound perfect.
Position the SFX
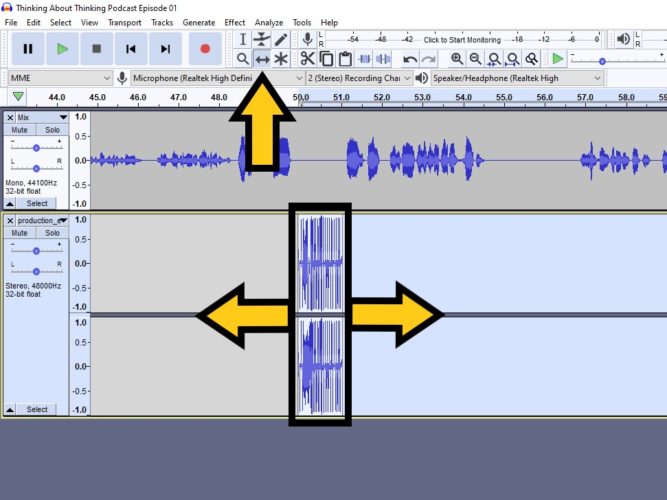
Firstly we will need to use the ‘Time Shift Tool‘ to drag the effect to your required position.
Select the ‘Time Shift Tool‘ and drag using your left mouse button.
Adjusting the SFX Volume
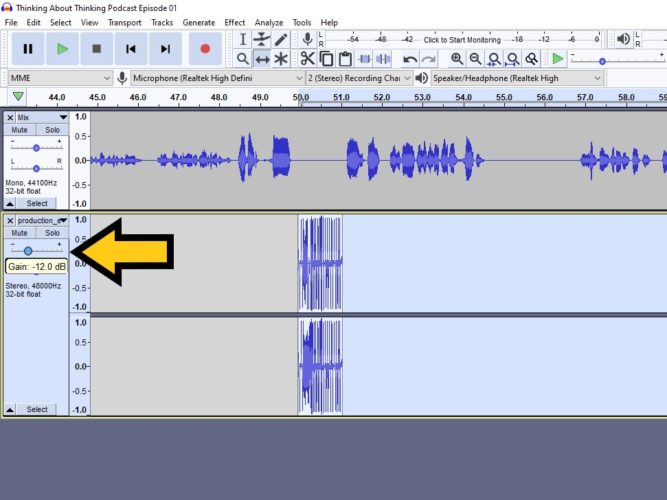
Using the track gain you can lower the volume of the entire track.
Drag the gain meter left to decrease or right to increase the volume of the sound effect.
Adjusting The Sfx Volume Using The Envelope Tool
The ‘Envelope Tool‘ is ideal for precision volume control.
If you require your level to fluctuate during your production this is the ideal tool for the job. It is very helpful for adjusting extended pieces of music to allow speech to be more audible.
Step 1… Select the ‘Envelope Tool‘ using F2. You’ll notice lines appear with some shading.
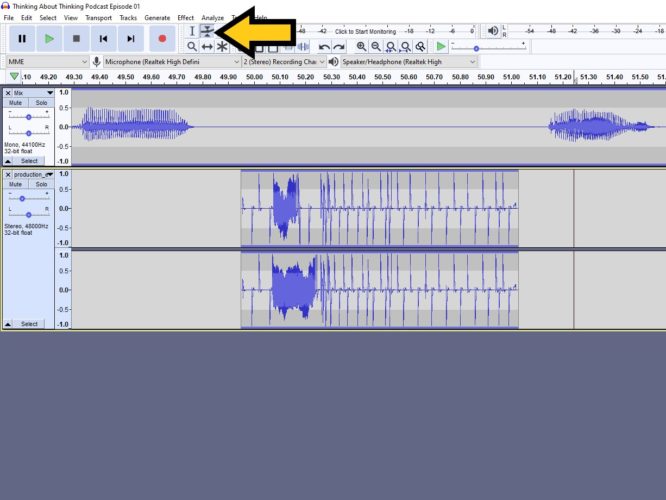
Step 2… Click on the track to activate a control point.
A control point is a point where the level will start to increase or decrease. For every change in volume, you’ll need two control points. One for where the volume shift begins and one for where it ends.
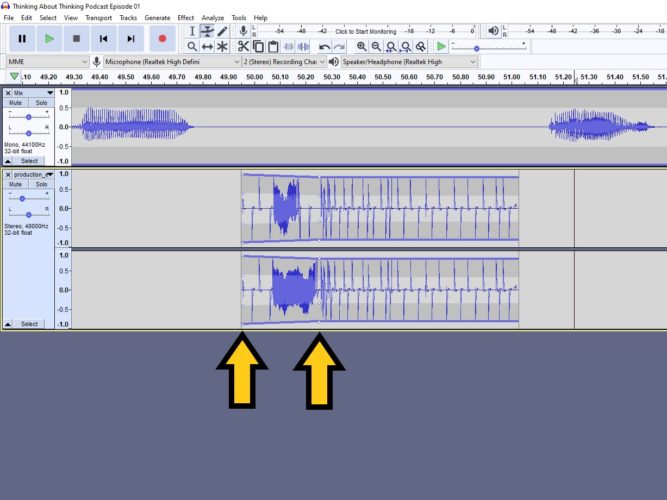
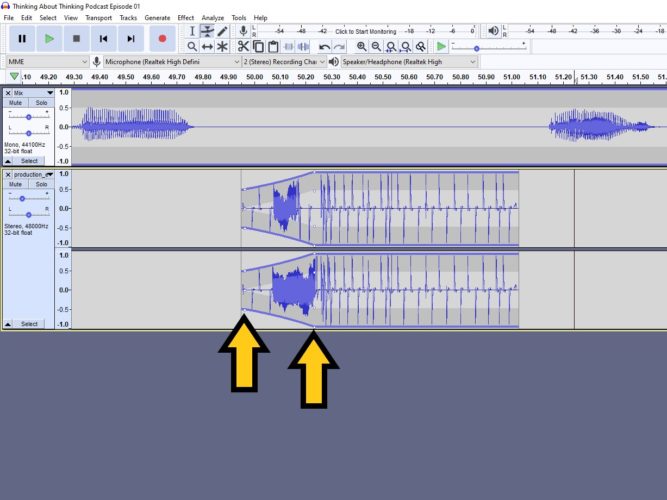
Step 3… Drag the control point outwards to increase the audio volume and inwards to decrease the audio level.
Fading In or Out
The ‘Envelope Tool‘ is ideal for extended audio. If the effect is short and requires no volume automation, fade in and/or out might be the best option.
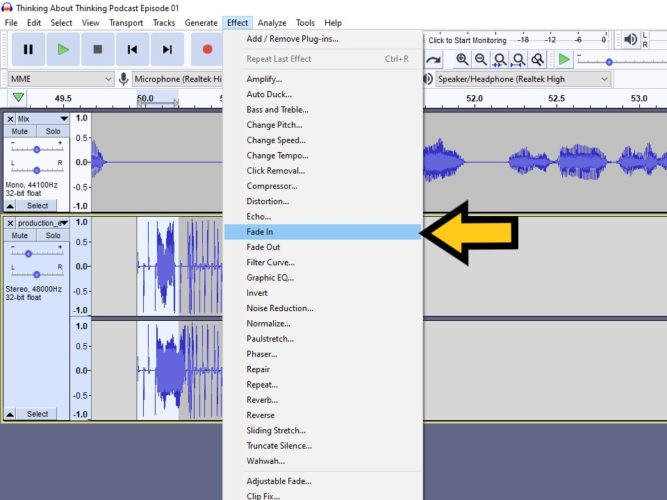
Select the area that you wish to fade in or out. Go to Effect located in the top menu. Then select either Fade In or Fade Out.
How Do I Add Sound Effects To My Vocals?
While there is no SFX as such on the Audacity app, you can use the audio effects to add vocal effects.
Telephone Effect
If you want your vocal track to sound like you’re talking through an old telephone or radio this can be done in these simple steps.
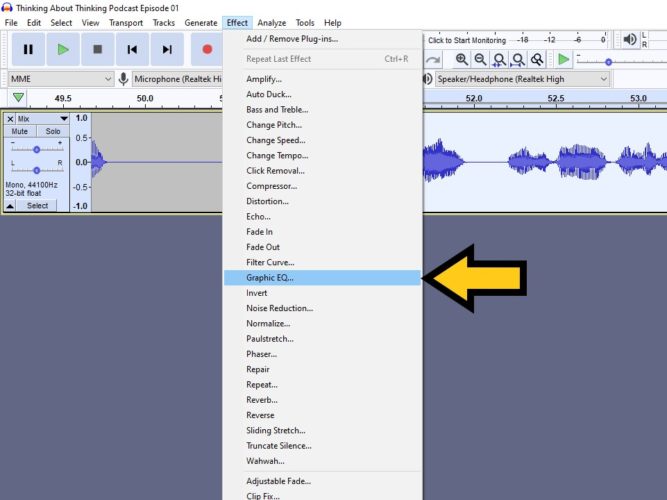
Step 1… In the top menu go to Effect then Equalization.
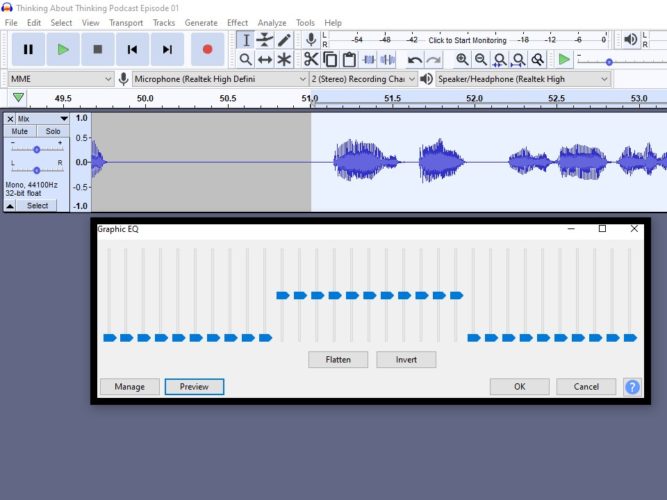
Step 2… Drop all the levels from 20Hz to 120Hz and 2.5kHz to 20kHz.
Robot Effect
Making your vocal sound like a robot is a fun way to engage your audience.
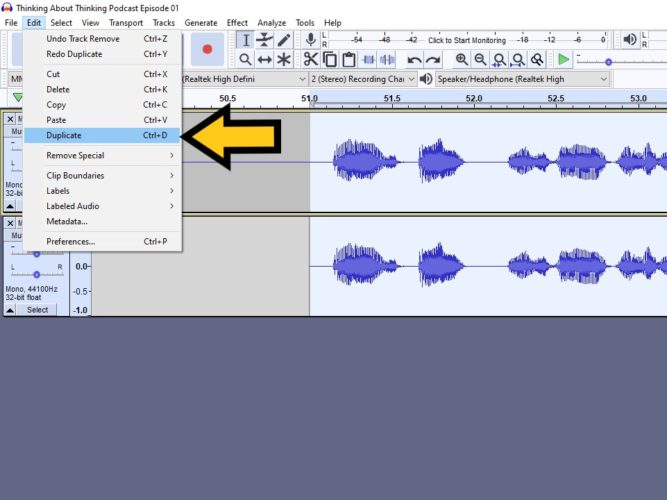
Step 1… Using the ‘Selection Tool‘ select the area of vocal you wish to apply the effect to and click Edit, Duplicate
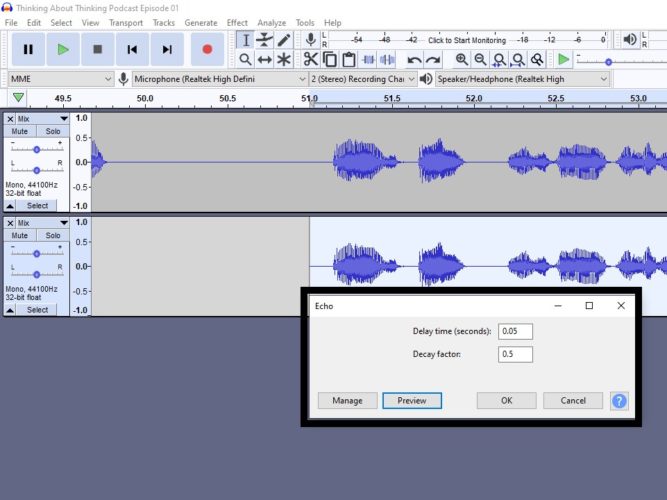
Step 2… On the new track. From the top menu go to Effect and select Echo. Set the Delay time to ‘0.05’ and the Decay factor to ‘0.5’.
Step 3… Go to Effect then Change Pitch and set to ‘-10’.
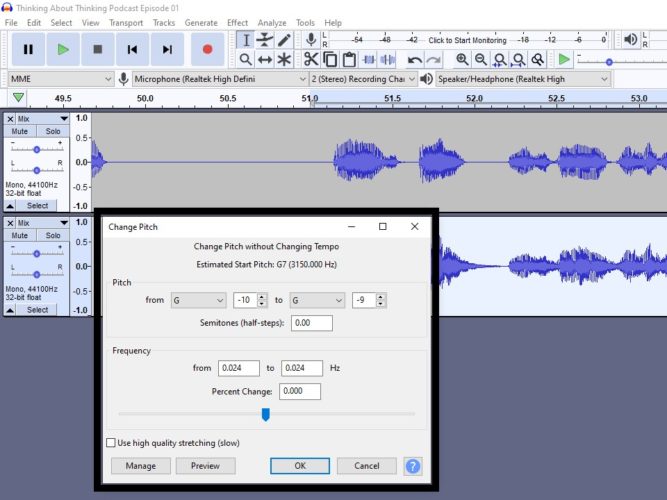
Step 4… Select the original vocal section and use Edit then Duplicate to add another new track. Go to Effect then Change Tempo. Set the parameter as ‘-2’.
Note: Your project may end up with a few tracks.
Exporting correctly will merge the tracks into one single file. Use File, Export then Export As Wav.
Alternatively, if you wish to treat the audio track once merged you can render the track together. Select all the tracks using Ctrl+A then go to Track, Mix then Mix & Render.
Have Fun With Your Creativity
Using SFX is not only a great way to entertain your audience, but it can be a lot of fun for the creator.
When using the online resources to search for SFX don’t be afraid to experiment. There are plenty of effects in all manner of different styles, and by experimenting you might just find the perfect match to suit your production.
Once you’ve added the sounds into the Audacity software you can begin to see if the SFX will work in line with your style.
Whether your SFX are intended to grab attention, create an air of mystery or be humorous is up to!
Enjoy the process!
