If you’re a gamer, YouTuber, vlogger, or streamer, it might be important for you to realize that you nearly have a full-blown recording studio in your pocket (or purse) right now.
All you have to do is learn how to record audio on Android the right way.
And that’s exactly what you’re going to do today!
Even big-time content creators have started using phones to record content.
And to be really honest, the only thing that is keeping your content from being as professional as it could be is the audio.
And the best news? You aren’t going to need a ton of new equipment to change the game, either!
If you want to create amazing audio with your android device, all you need is to get the right equipment, download the right apps, and follow the right advice.
You may also be thinking that you can’t afford to vlog or create content with your android phone… but you would be surprised by how inexpensive it is to get started!
Keep reading to find out just how powerful that little device in your pocket can really be.
How Do I Record Audio on My Android Phone?
Whether you want to record a podcast, interview someone, shoot a YouTube video, or find a simple way to lay down your next sweet track, this is how you get it done.
Step One: Get What You Need To Capture Great Audio
Here’s the thing. Your built-in mic can get you started.
And to be quite honest, it can do a surprisingly good job.
But if you want to really level-up your vlog and/or audio recording game, getting an affordable android mic is the best first step… and you would be surprised at how inexpensive it can be.
If you’re trying to create any type of content or audio recording to use online, step one for recording audio on your phone is this: get the best android microphone you can currently afford.
And get excited… because there are tons of android mics on the market, and they are all awesome.
For example, check out the Shure MV88+.
[amazon link=”B07NZZ6SFJ” title=”Shure MV88+” link_id=”288663″]
[amazon fields=”B07NZZ6SFJ” value=”thumb” image_size=”large” image_align=”center” link_id=”288664″]
This kit comes with a mini tripod, a Rycote Windjammer for the mic… and of course, the Shure MV88 Stereo Condenser Mic itself.
This little kit gives you everything you need to turn your smartphone into an all-out video-making machine! But it also gives you the option to record superior audio by giving you a massive microphone upgrade!
An Alternative to a Shotgun Mic
If you want a microphone that’s a little more discreet, check out the Rode smartLav+.
This omnidirectional lavalier is a perfect fit for use with an android phone… and will give you superior audio without breaking the bank.
[amazon link=”B00EO4A7L0″ title=”Rode smartLav+” link_id=”288665″ id=”37660″]
[amazon fields=”B00EO4A7L0″ value=”thumb” image_size=”large” image_align=”center” link_id=”288666″ id=”37660″]
Plus, as a lavalier, it’s easy to stick onto someone’s collar if you need to record an interview, a lecture, a speech, or even foley sounds, etc.
Does Android Have a Built-in Voice Recorder?
Most Android phones come with a built-in voice recorder app as well as a built-in microphone.
However, now and then an Android phone will have all the apps except the voice recorder — but there is an easy solution to that problem, because there are hundreds of free apps online.
Step Two: Choose The Appropriate Recording App
Now, pick up your phone and search for the recording app. If you’re having trouble locating it, the app is usually called “Voice Recorder,” “Recorder,” “Memo,” or “Notes.” Try typing that into your app search bar.
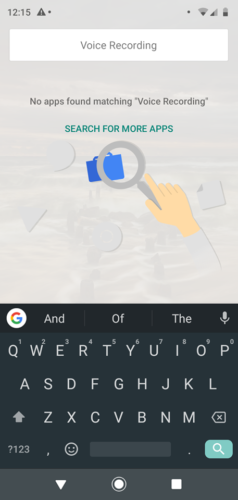
As you can see, this phone does not have a pre-installed recorder. Follow these steps to download a recorder — there are paid as well as free options.
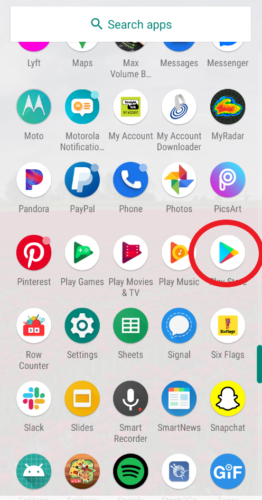
Step One: Open the Google Play Store.
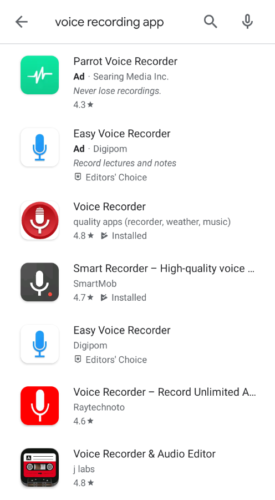
Step Two: Search for “voice recording app.”
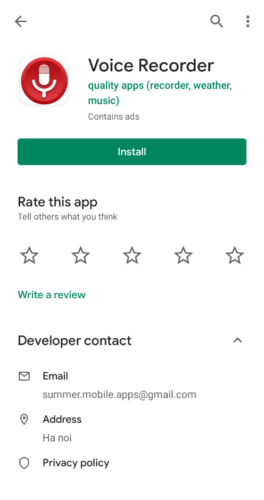
Step Three: Select the voice recorder that you want and click install.
What Is the Best Free Audio Recorder for Android?
For the most part, the recorder app that comes already installed on your Android will work the best — it’s simple, and it’s right there and ready to go.
But if it’s not there, or if you want one of the other recording apps, the best audio recorder on your Android is the one that is easiest for you to use, and has all of the features that you’re looking for.
Like all things in the tech world, audio recording apps are not all created equal.
For example, if you’re a musician, your recording needs will be vastly different from someone who works as an interviewer. So, keep that in mind when you’re choosing an app from the play store.
If you’re shooting video, you probably won’t need a dedicated audio recording app… as you can just capture audio as you shoot.
But if you are using your phone to capture audio while you, for example, are shooting with your DSLR camera… well, then you are going to need an audio recorder.
And if you’re in the business of recording calls now and then, you should know that many of these voice recording apps will also record a call. There are even a few that will keep a calls record.
Other things to consider:
- Do you want to have in-app EQ?
- How do you want to store your audio?
- Do you want the app to also record calls?
- Do you want to record and manipulate multiple tracks?
- How much are you willing to spend? (most apps are free with ads)
- Do you want the app to skip the silent parts automatically?
- What format do you want to use (MP3, FLACC, WAV, MP4, etc)?
- How does the app store your audio? (most applications have access to the cloud)
The Best Premium Recording App
In case you can spare the minimal fee of $5, the best premium recording app for Android is the Hi-Q MP3 Recorder.
This app comes packed with features, such as auto record on click, on-screen widgets, gain control, and much more.
On top of that, there are no funky audio formats to deal with, so everything you record will work flawlessly on all your devices, no problem.
Hands down the best thing about this app, though, is that it backs up your recordings automatically to the cloud.
This is added to the fact that there is no limit (other than your phone’s storage amount) to how long you can record.
What that means for you is that, if you’re in the dark green room and you run out of memory, with this app, it’s really simple to figure out which files have been uploaded so you can free up more storage space fast!
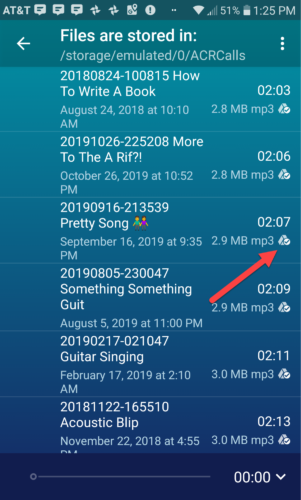
That way, you can dump them off your phone on-the-fly and capture the rest of that interview without skipping a beat.
Step Three: Start Recording Audio on Your Android Phone
Now it’s time to turn it up to eleven and use your Android as a mobile recording studio.
And of course, you can also use your android to shoot video.
Regardless of which you plan to do, the process will be quite similar. You’ll just fire up your camera instead of your recording app to shoot video.
Step One: Go to the appropriate application folder and click on the recorder app that you downloaded from Google Play (or the one that was already there).
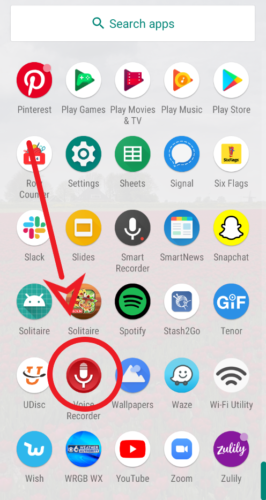
Step Two: Click the record button. The interface on every recording app will be slightly different. But usually, the record button is large and very obvious.
Step Three: Speak into your microphone to test whether or not the app is working. With this app, you can tell because the numbers are moving and the EQ bars light up.
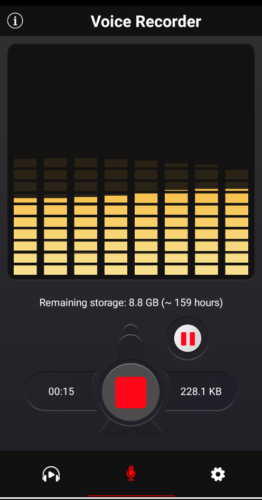
If you aren’t using an external microphone, please make sure you aim your phone’s microphone directly at your subject, and hold it as close as possible as you record for the best results.
No matter what, it’s a good idea to do some test runs before you try the recorder for real. This recorder allows you to pause the recording and resume, not all applications have that feature.
Pro-tip: The best way to record audio flawlessly is to put your Android on airplane mode while you record. This way, a call won’t interrupt a session.
Step Four: Manipulate the Audio
Now, while some recording apps will let you do some rudimentary editing, if you really want to dig in, you’re going to need a Digital Audio Workstation (DAW) application for your phone.
Like the audio recorders, most of these types of apps are free with ads, with premium options available.
And again, which app you select really depends on what you’re doing.
For example, if you’re a musician, with an app like PocketBand, you can have different channels for different instruments, a looper, a mixer, a sampler, and even special effects.
You can even turn your next song into a ringtone with this application.
On the other hand, if you’re a podcaster, there are DAWs out there for you too. Check out Auphonic Edit. This simple application allows you to edit your audio, add tags, encode, and transfer your podcasts or interviews easily.
Step Five: Save Your Audio and Transfer
The final step for your audio recording is to save it and/or transfer it to your computer, so you may further edit it, add it to your video, mix it into a podcast, etc.
Most recording apps automatically save the sound file to your device. But to put it onto your computer, do the following.
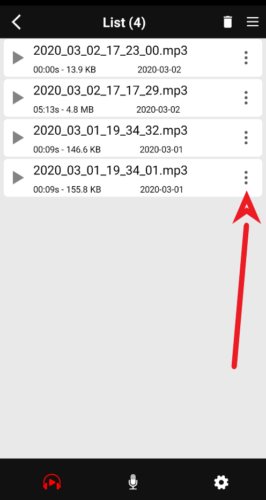
Step One: Locate the file on your device. Click to open recordings.
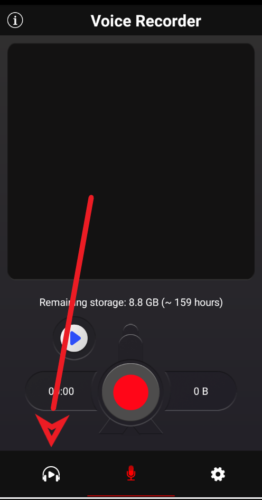
Step Two: Recording apps will have different interfaces for this step. On this app, you click the three dots to open your options.
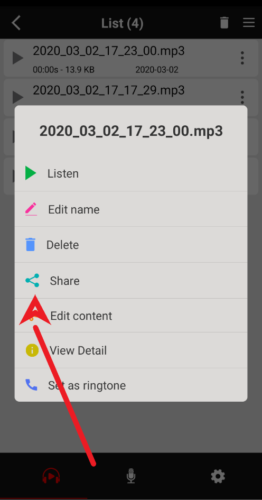
Again, for this step, the share options you see are going to depend on several factors, including the apps you’re using on your phone.
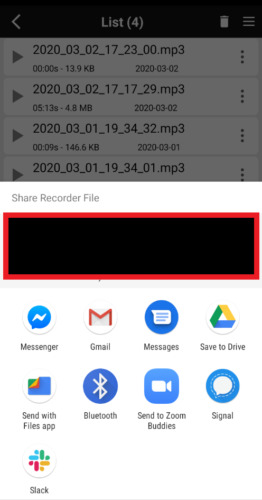
You can choose to email the file to yourself, use one of the free messenger services, ship it to your Google Dropbox, or whatever other option you have on your device.
Where you send the file is entirely up to you, and it all depends on what is easiest for you to access.
Now Get Out There and Create Some Beautiful Content
Now that you know how to use your Android as a mobile recording studio, you’re starting to level up your game.
Whether you’re creating content, or simply keeping records for personal use, this is how you get stuff done without spending a ton of money!
