Let’s get that question answered once and for all:
Can you record a podcast on your iPhone?
Psst: the answer is yes, yes you can.
In this guide, you’re going to learn all about how to record a podcast on your iPhone or iPad. So, follow along with these 5 iPhone podcast recording steps and you’ll be pumping out those podcasts in no time.
- Download a Free DAW from the App Store
- Set Up Your iPhone/iPad Mic Settings
- Record Your Episode
- Edit Your Podcast Recording
- Export for Publishing
Ready to take off in the big, wide, podcasting world?
There are lots of podcast apps for iphone/ipads.
They’re not all free, but we highly recommend you check them out!
Today you will learn how to use Apple’s free app, GarageBand.
Let’s dive in.
Step 1 – Download a Free DAW
In order to record audio and have the ability to edit and export it later, you’re going to need a digital audio workstation (DAW).
Thankfully, Apple offers an epic free one called GarageBand. All you need to do is download it from the app store here.
Step 2 – Set Up Your Microphone & Track
When you first open up the GarageBand app, you’ll be greeted with a screen like this:
![]()
Hit the “+” icon at the top right (not the mic, the one next to it) to open up a new project.
You’ll then be taken to a screen to create your first track.
Scroll through until you find the Audio Recorder option. Then hit the Voice icon in the bottom left corner.
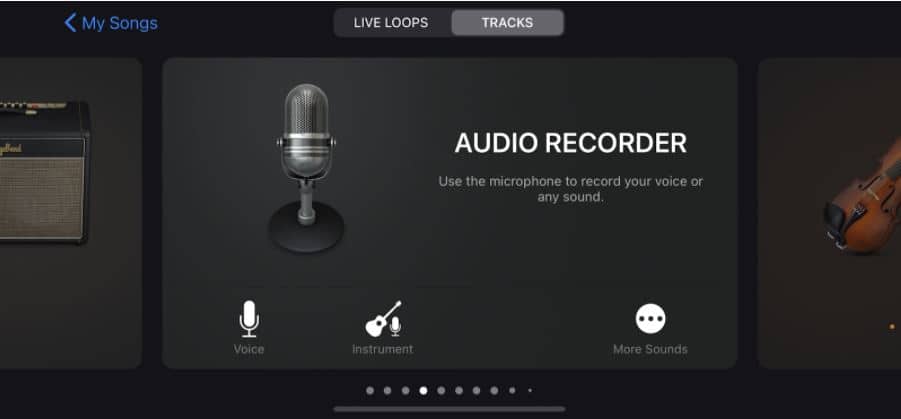
You’ve now created your first track for recording your podcast in GarageBand!
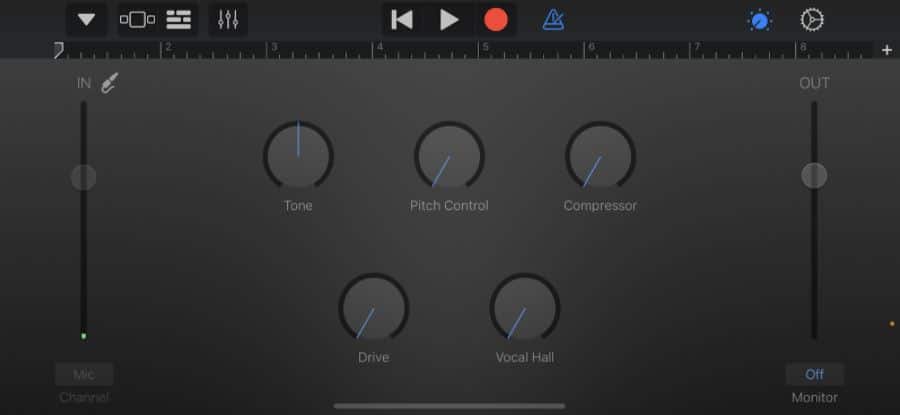
GarageBand automatically adds some effects and processing to your track. But for now, we don’t really want any of them. We just want a nice, clean track to record to.
So, pull back the controls on the Tone, Compressor, and Vocal Hall knobs, until you have something like this:
Depending on the model of microphone (or iPhone) you have, you may be able to plug in a set of headphones to monitor your recording in real-time.
If you have this capability, plug those cans in now.
Setting up your mic:
When it comes to recording a podcast on your iPad or iPhone, you’ve got two options for getting audio into your device.
- Your iPhone or iPad’s built-in mic
- A quality external microphone
Yes, the internal microphone in your Apple device will record audio, but you’ll want to upgrade as soon as possible to an external mic.
Using an external mic will lift the audio quality of your podcast to the next level of professionalism.
What is the best iOS podcast setup?
To make the best recordings on your iOS, the ultimate podcast setup consists of:
- Your device (iPhone or iPad)
- A high-quality iPhone or iPad external mic, or an XLR microphone
- An iOS audio interface if you’re using an XLR mic
- Studio headphones
- Cables to connect it all together
- Recording software (GarageBand)
If you are using an external microphone, now’s the time to plug it into your iPhone and begin recording your episode.
Note:
The iPad Pro needs a little bit more effort to connect an external mic. You can learn three reliable ways to use a mic with an iPad Pro in this post.
Step 3 – Record Your Episode
To switch to GarageBand’s arrangement view, hit the button third from the top left:
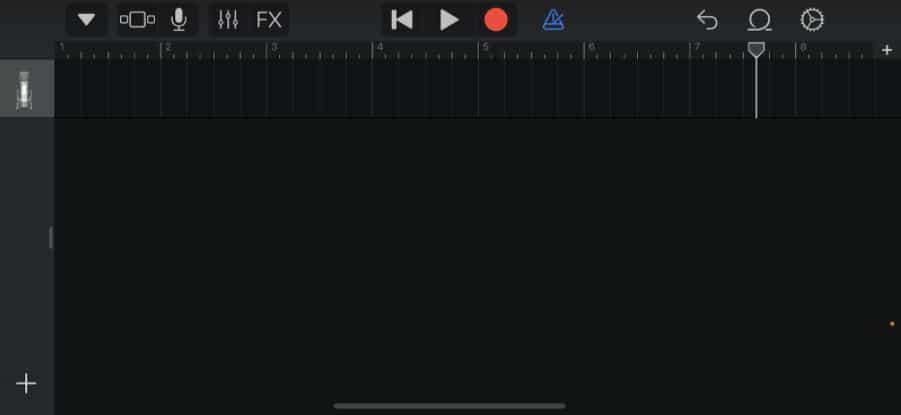
Now you’re ready to go.
Note: If you’re using an external mic, it should work automatically in GarageBand.
Hit the little red record button and drop your podcast episode!
It’s really that simple.
Step 4 – Edit Your Podcast
Creating an epic-sounding podcast isn’t just about recording audio …
You’ll also need to know how to edit your recordings to:
- Remove any unwanted sounds
- Mix in music beds and stings
- Make sure everything flows nicely
There are two ways to edit audio recordings in GarageBand.
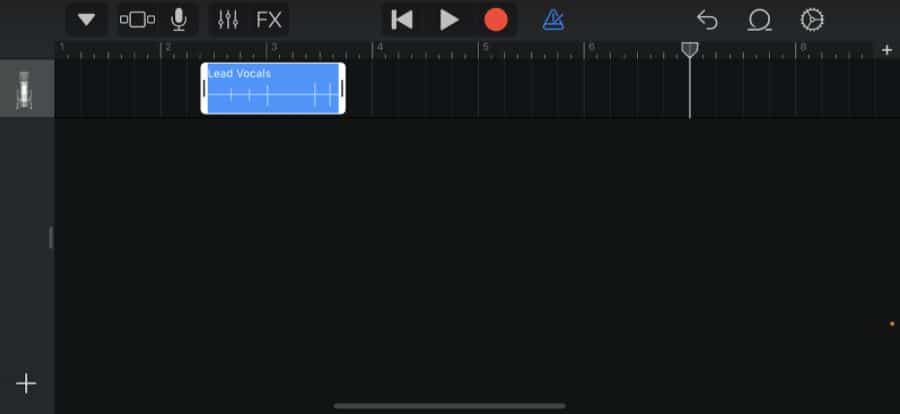
The first is to adjust the recording from either edge of the region.
Tap on any audio recording and you’ll see the edges turn yellow.
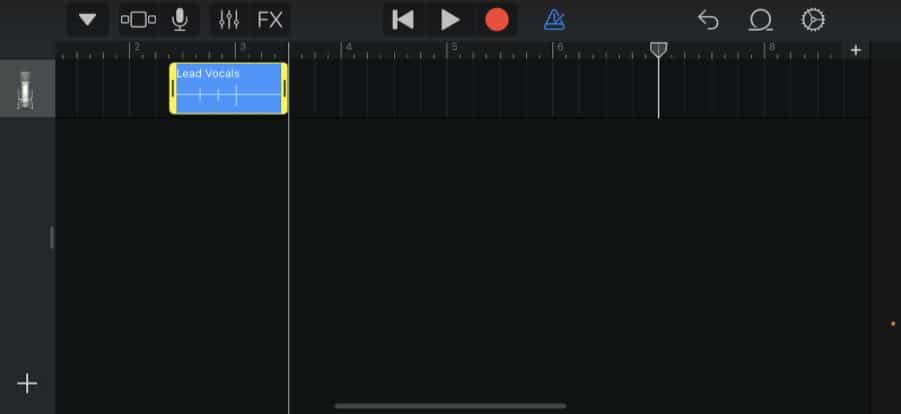
You can now press and hold on these edges and drag them in or out, trimming the region to the desired length.
This is the best way to edit out dead space at the beginning and end of your recordings.
The second way is to use GarageBand’s trim tool.
This method is better for fine-tuning your recording.
Double-tap a region to bring up the editing menu, and hit Trim.
A yellow scissors icon will appear in the region.
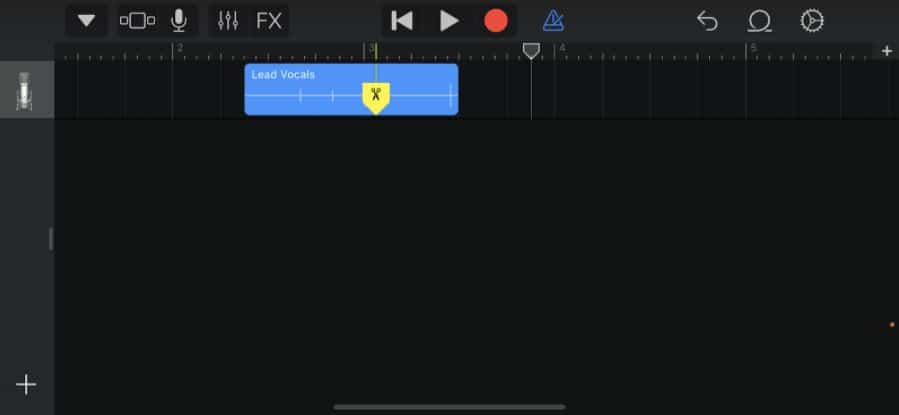
Press and hold the icon, and drag it down across your region to make a cut.
![]()
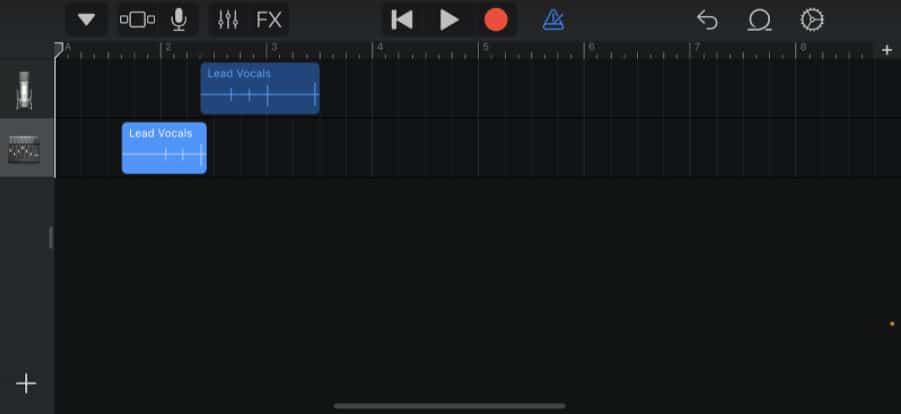
To move audio regions around in the arrange window, simply press, hold, and drag them where you want them!
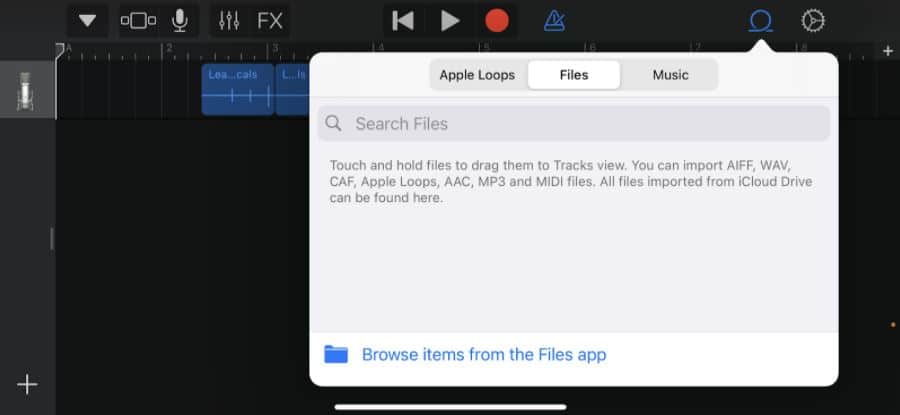
It’s easy to add music beds and pre-recorded podcast intros to your GarageBand sessions as well.
To do this, simply …
- Hit the Loops icon at the top right of your screen
- Navigate over the Files tab
- Locate the file on your device
You can also add music directly from Apple Music, or choose from the royalty-free Apple Loops.
With your new intro or music bed in your session, you can drag it into place on a second audio track, like this:
To learn more about recording voice in GarageBand, check out this guide.
Step 5 – Export for Publishing
Once you’ve finished recording and editing your new podcast episode, it’s time to get it online!
First, you’ll need to export the finished audio file from GarageBand.
Jump back into the Recent Projects window:
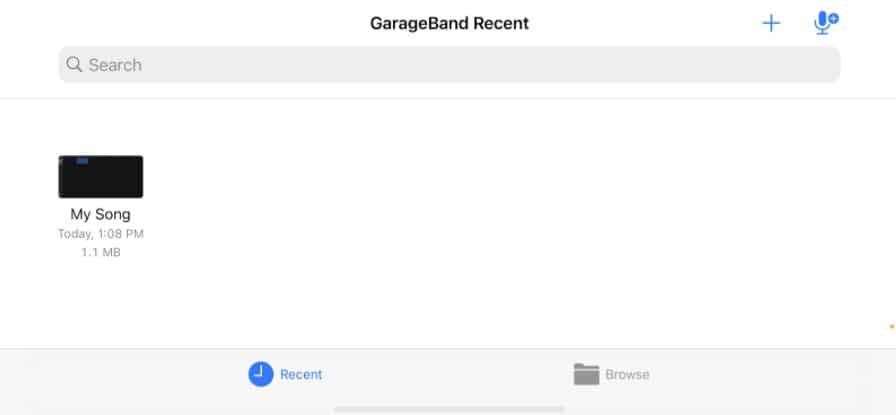
Then press and hold onto your project to bring up this menu:
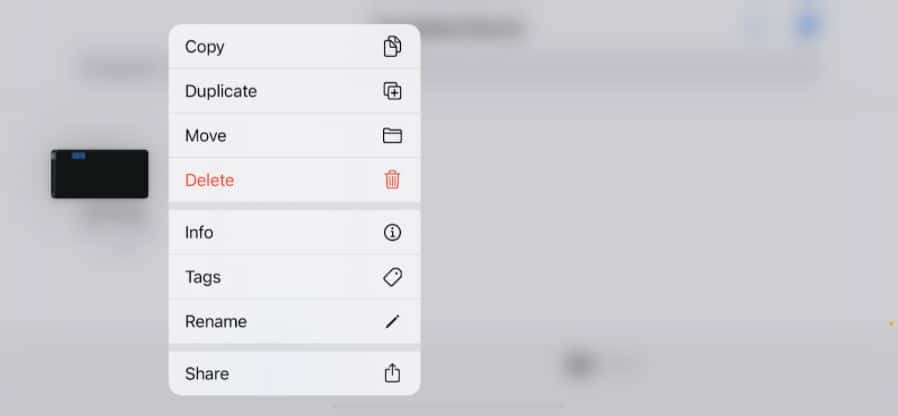
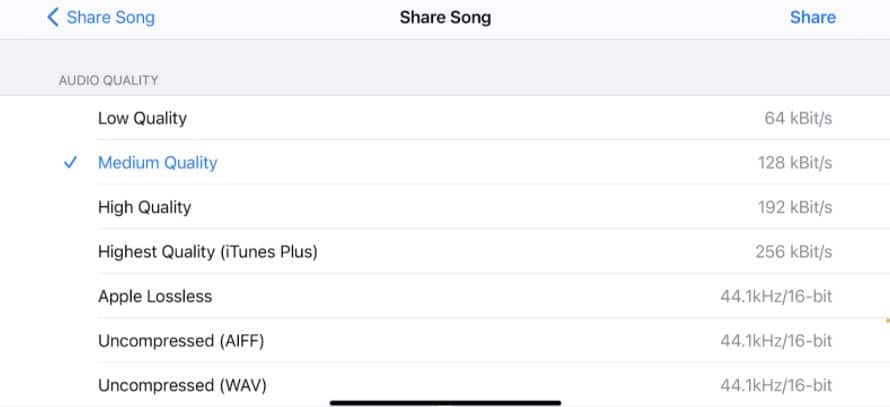
Select share, and opt to save the file as a Song.
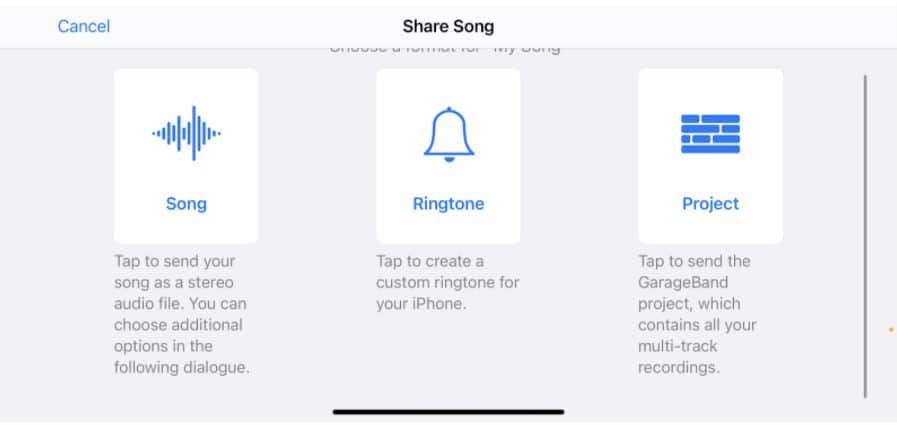
Select Medium Quality (128 kBit/s) so your podcast sounds decent but it won’t take up too much space on your podcast hosting platform.
Then, share that baby!
You’re going to want to upload your episode to whichever platform you plan on using to host your podcast.
Conclusion
In five simple steps, you can go from pipedream to podcast hero using just your iOS device.
The important part is this: nail your launch.