Whatever you’re recording your voice for:
- a podcast,
- voiceover,
- or laying down a vocal track for that new song you’re producing,
GarageBand is a great choice as your DAW (digital audio workstation).
Recording your voice on GarageBand is pretty simple; making it sound amazing is a little bit harder, but don’t worry…
Today you will learn exactly how to use GarageBand to record your voice and make it sound epic.
Let’s dive in.
How To Record Voice On GarageBand
Step 1: Open Up A New GarageBand Session
Head down to the Dock on your Mac and hit that GarageBand icon.
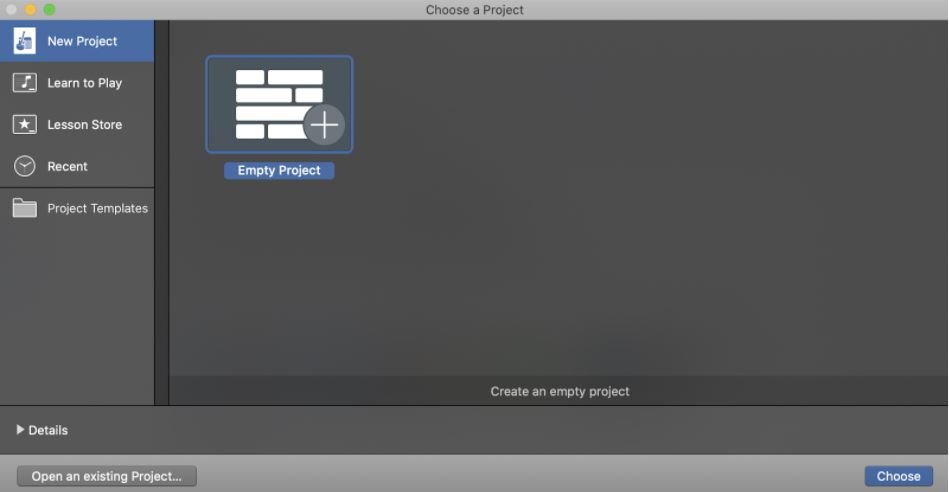
Hit Command+N to open up a new Project.
GarageBand Vocal Presets
GarageBand is all about making recording easy, which is why they’ve included a few Project Templates, one of which is labeled Voice.
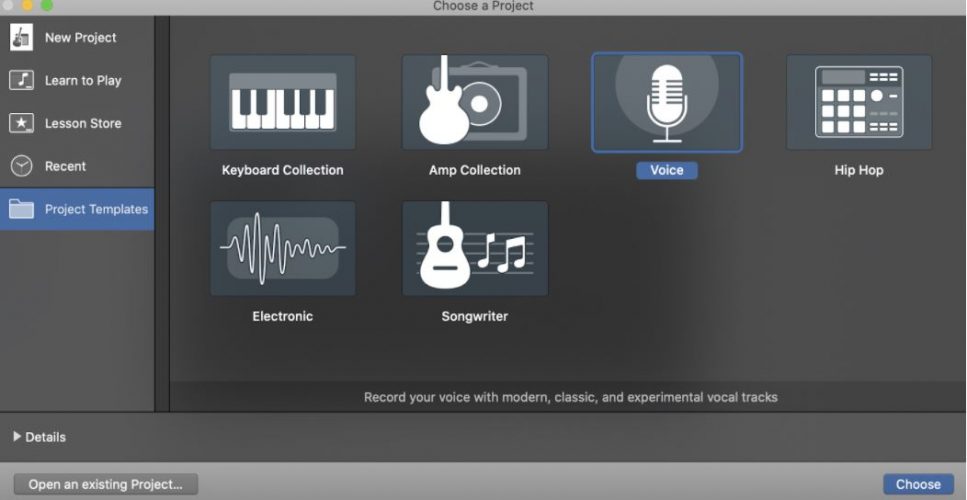
- Narration Vocal – Big and boomy, okay for voiceovers
- Bright Vocal – Good for solo singing
- Fuzz Vocal – Distorted sound
- Telephone Vocal – Mid-range frequencies only
- Robot Vocal – Vocoder effect applied
It’s worth spending a bit of time becoming familiar with these five presets, as you might find something useful here.
As a general rule though, you’ll want to avoid using preset GarageBand effects, and instead choose to open up a blank project.
That’s because, to be honest, they’re a bit of a gimmick. Cool for learning how different types of processing affect your vocal sound, but not much else.
You’ll get better results following the steps in this tutorial to create your own GarageBand vocal effect.
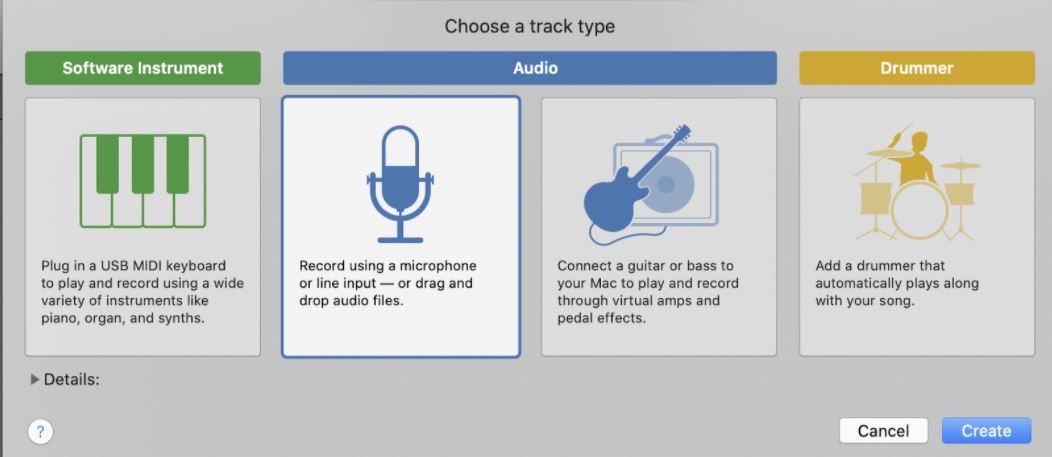
Step 2: Create a New Track and Name It
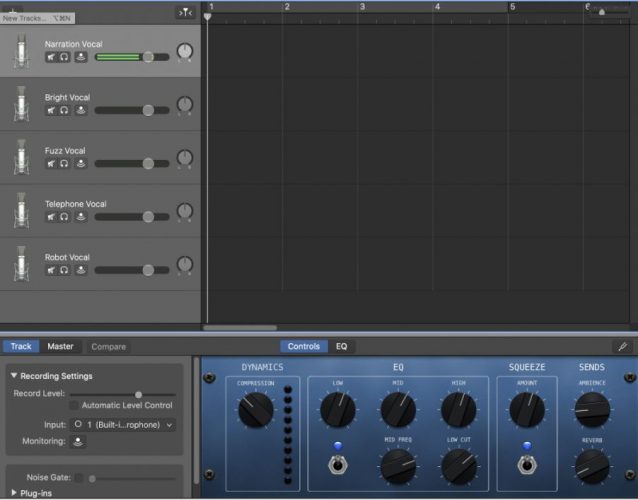
As soon as you open up a blank project, GarageBand will prompt you to create a new track. Select the option with the microphone symbol.
Step 3: How To Record Singing On GarageBand
The way you approach recording vocals in GarageBand ultimately depends on the equipment you have at hand.
Let’s take a look at the three different options for recording singing on GarageBand.
- Simple
- Better
- Best
The Simple Way: How To Record Voice On GarageBand With Built-In Mic
The most simple way to record voice on GarageBand is using the built-in microphone on your Mac.
Yes, it’s not going to give the best audio quality compared to a professional recording setup, but it can be a good way to lay down a quick vocal idea on the go.
Here are the steps to to use your built-in mic on garageband:
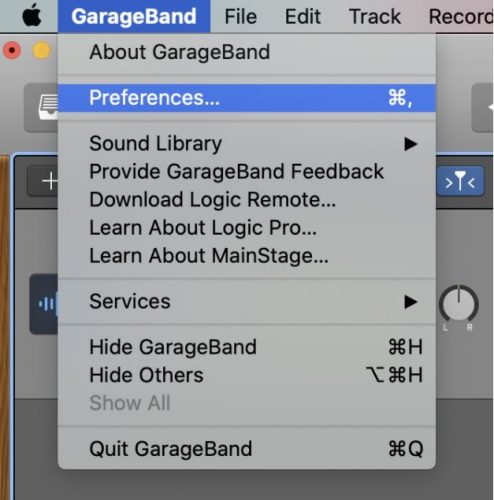
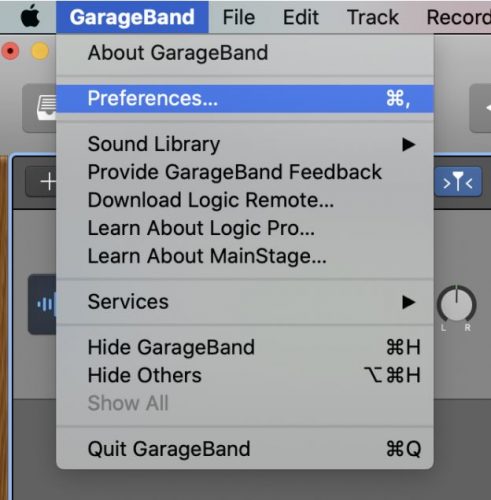
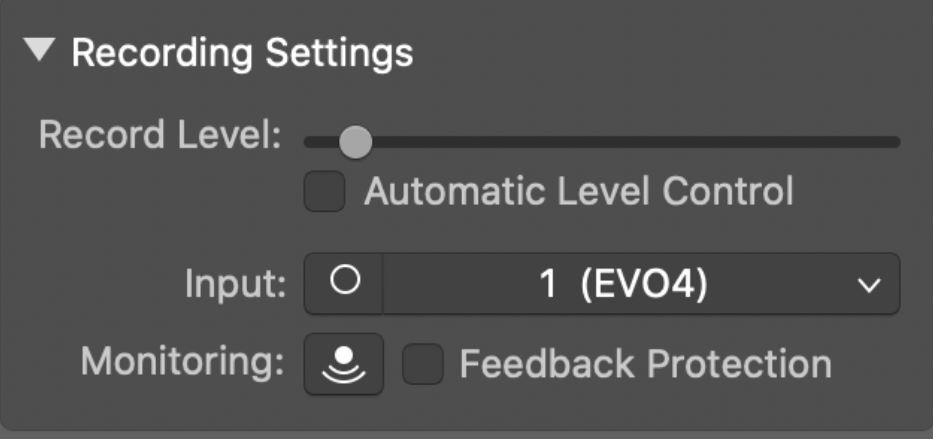
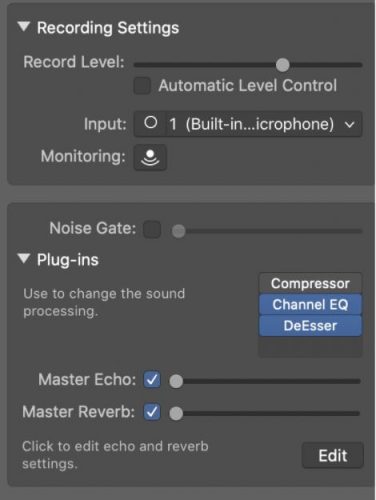
1. In the GarageBand menu, open the Preferences window.
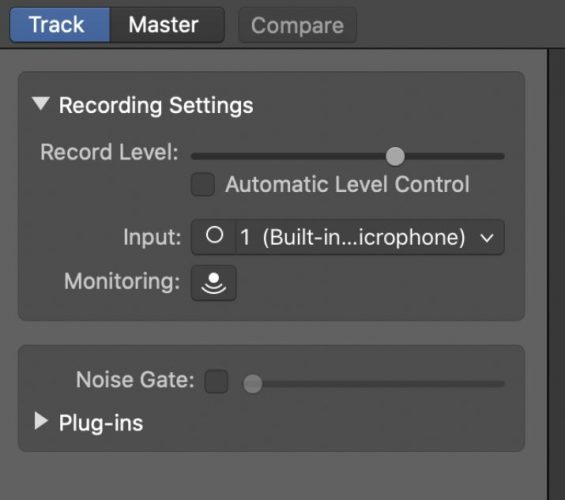
4. Start singing into the microphone, and use the slider in this window to adjust your recording level.
Alternatively, hit the Automatic Level Control box and let GarageBand work its magic.
Now you’re ready to get going. Head down to Step 4 to continue.
The Better Way: Recording Voice With A USB Microphone
If you’re looking to level up your voice recordings, you’re going to want to use an external microphone.
The built-in mic on Apple devices simply isn’t designed to deliver amazing vocal recordings.
There are a number of really great quality USB microphones out there today, many of them offering exceptional audio. Plus, they’re super easy to use.
Simply plug your USB mic into an available USB port, and, all things going well, GarageBand should automatically see your device and set it as the recording input.
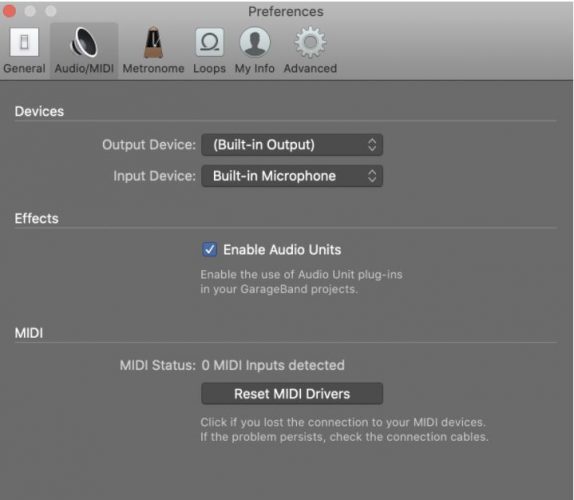
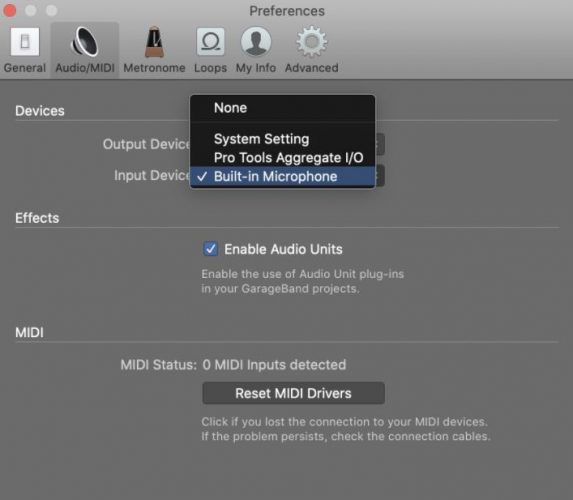
If things aren’t going as planned, open up the Preferences window.

The Best Way: Recording Vocals With an XLR Mic and Interface
For truly professional voice recording results, you’ll want to use a traditional XLR mic and an interface.
Popular microphones for voice recording include the likes of the sE Electronics X1, and Shure’s SM7B, which you’ve no doubt seen on countless podcasts and YouTube channels.
You’re also going to need an audio interface, which amplifies the signal from your microphone and converts it from an analog signal into a digital one. The EVO 4 from Audient is one of the best audio interfaces on the market, as it offers professional sound and intelligent preamps which set their own gain.
Plug your XLR cable into your mic and into one of the inputs on your interface, and then connect your interface to your computer.
Most interfaces will automatically talk to GarageBand and set themselves as the input device.
To check this is the case, open up the Audio/MIDI Preferences window and choose your input and output devices.
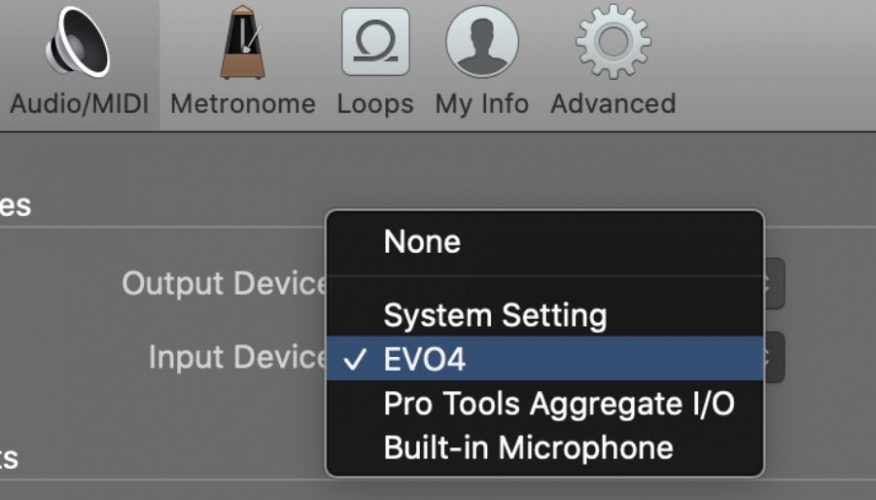
Dial this up while speaking or singing into your microphone, and aim to have the meter in GarageBand just turning yellow.
This will ensure you get a decent signal level, while staying well clear of any digital overages.
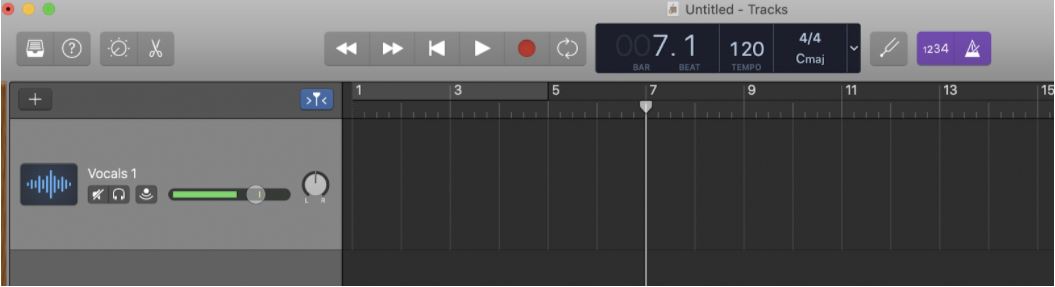
Step 4: Locate The Playhead Where You Want To Start Recording
If you want to start recording right from the start of your timeline, hit Return to bring the Playhead to Beat 1, Bar 1.
Otherwise, locate your playhead where you want to begin recording.
You might find the metronome helpful for keeping in time if you’re singing, though some may find it distracting.
You should leave the count-in on if you’re recording to a backing track, so you have a one-bar count to prepare.
Step 5: Hit The Record Button Or Press R To Record
And that’s it; you’re ready to record!
You can either hit the red record button in the transport bar or simply hit the R key.

Making Your Voice Sound Epic
Now you’ve got your vocal recordings down; it’s time to make them sound AMAZING.
That’s where the real power comes in from GarageBand: it’s ability to take a bare-bones vocal recording and turn it into a beautiful masterpiece.
How To Edit Vocals In GarageBand
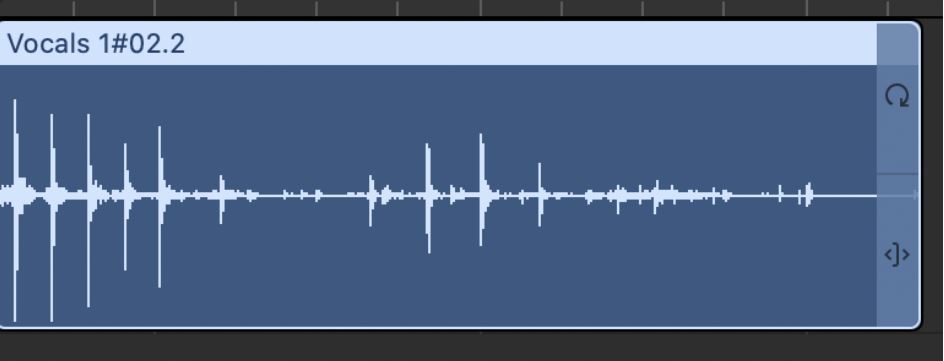
The first step to making your voice recordings sound fantastic in GarageBand is to do a little editing.
Editing is essentially chopping up all the little bits of audio you’ve recorded, and sticking them together in the way that you originally intended.
GarageBand has a few different tools for this:
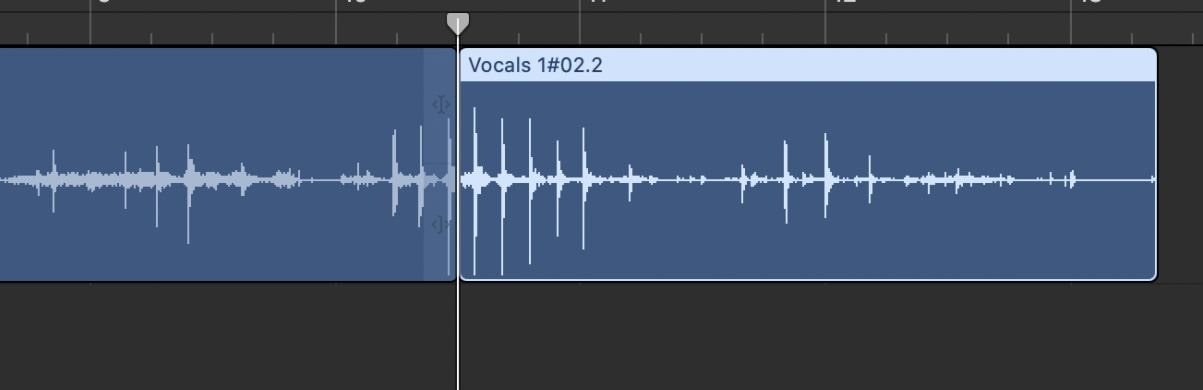
1 – Split At Playhead
The easiest way to make a cut in an audio region is to position your playhead where you want to split the region, and hit Command+T to Split Regions at Playhead.
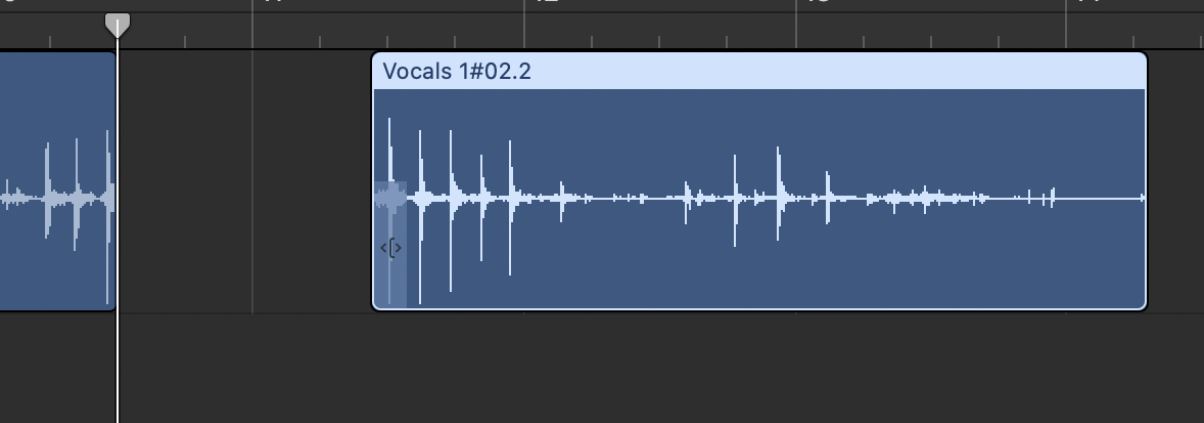
2 – Click and Drag From The Edge of a Region To Trim It
To shorten or lengthen a region, locate your cursor on the bottom left or right-hand corner of the recording, and simply click and drag to the required length.
3 – Click and Drag From The Middle of a Region To Move It
To grab an entire region and relocate it on the timeline, just click anywhere in the middle of the region and drag it away.
How To Clean Up Vocals In GarageBand
One of the first things you should do when you’ve finished recording is to go through and remove any unwanted noises from your vocal tracks.
These might include coughs, rustles, and excessive breath noises.
If you’re editing a singing track, try not to go overboard on editing out the breathing in between phrases. Sometimes it’s nice to leave some of this in for a more natural sound. Use your ears to find the middle ground.
You can also use GarageBand’s editing tools to ensure your vocal melodies are aligned with the rest of the track. If you’re a little out of time here and there, simply make cuts where necessary and drag the audio around until it’s in time.
You might find it helpful to do your vocal editing on headphones, as they allow you to hear the subtleties and smaller noises that might not show up on speakers.
How To Mix And Master Vocals In GarageBand
Now you’ve got your audio nice and cleaned up, it’s time to get to mixing.
Before we dig in, a quick note on mastering.
There’s a common misunderstanding about mastering and mixing being the same thing or part of the same process.
While mastering is definitely an important part of creating a track, it’s a process that is applied to a finished production as a whole, not an individual recording such as a vocal track
To learn about making a song in GarageBand, check out our guide here: How to Make a Song on GarageBand: Make Music Easily in 6-Steps.
With that cleared up, let’s take a look at how to mix a voice recording in GarageBand.
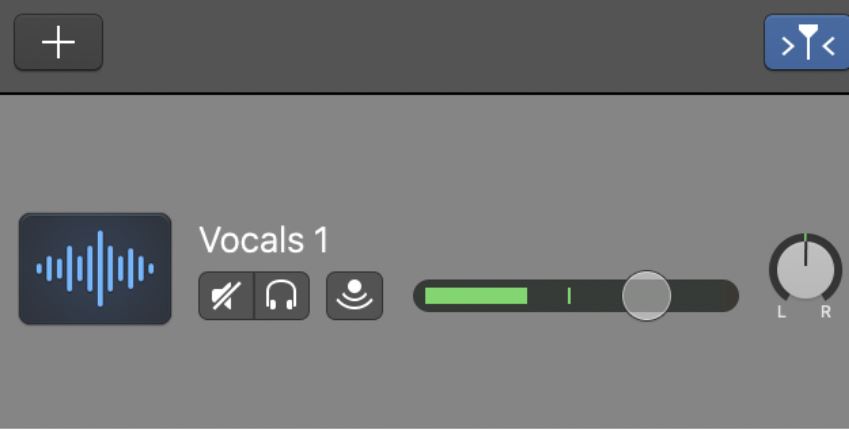
Levels
The most basic and fundamental component of mixing a song is to control the individual track levels.
You can do this on the left-hand side of the project window on the Track Headers.
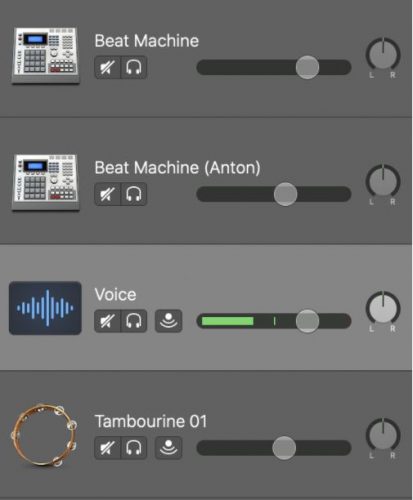
If you have more than one voice track (and this is especially true if you have more than one person’s voice recorded), you may need to spend some time balancing out the different volumes.
Automation
It’s not uncommon to find that a given track level works for a certain section of a song, but not for another.
This may be due to inconsistencies in recording levels, or it may be that a vocal track needs to be a bit louder during more densely packed parts of the arrangement.
Enter Automation.
Hit the A key to bring up the automation lanes in GarageBand.

Click anywhere on the line to create a node, and click and drag to create different levels in different places, like this:

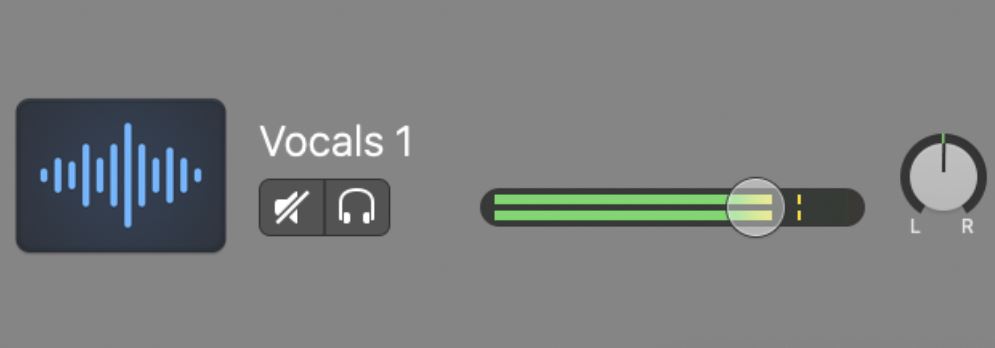
Pan
Next to the level control on each track is the pan control.
This allows you to position each track anywhere within the stereo spectrum, from left to right.
For the most part, vocal tracks should be positioned in the center of your production, unless you’re going for a creative, Hendrix-style vibe.
If you’ve recorded a few different tracks of backing vocals, then you might like to experiment with panning these left and right.
For example, you might have a main vocal in the center, with two backing vocal tracks panned hard left and right for a thick, wide, and lush vocal effect
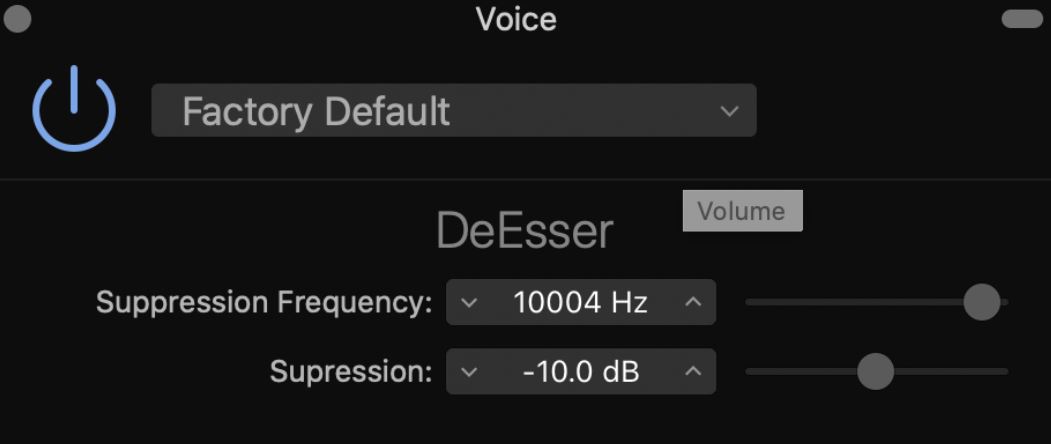
De-Esser
One issue the consistently plagues vocal recordings is an overly sibilant recording.
Sibilance is the presence of S sounds in speech, like all of the S sounds in the sentence “Sibilance is the presence of S sounds in speech.”
You can see how this could become frustrating when vocal sibilance gets out of control. Luckily, GarageBand has a built-in de-esser (that’s literally what they’re called), to take care of this.
Hit B to open up the Smart Controls, then drop in an instance of GarageBand’s DeEsser in the plugin chain.
For that same reason, it’s the kind of processing you’d only apply if you need it, not just because you can.
How To Make Your Voice Sound Better On GarageBand
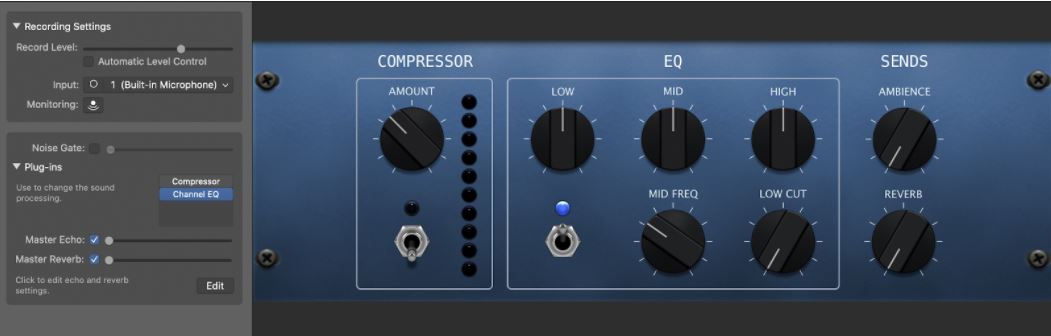
Once you’ve done most of the basic mixing in GarageBand, it’s time to take a look at the plugins the software offers.
Plugins are little tools that you can apply to a track to change the sound of your recording, and they can range from pretty subtle to balls-to-the-wall sonic differences.
Let’s look at a few of the most common plugin effects used for mixing vocals.
GarageBand Voice Effects
With your voice track selected, hit the B key to bring up the Smart Controls.
You’ll notice there are already a couple of plugins loaded up (though they aren’t doing anything yet).
Compression
By default, the Compressor that is loaded on your track is switched off. Hit the toggle to activate it, and use the Amount knob to determine the amount (duh) of compression applied.
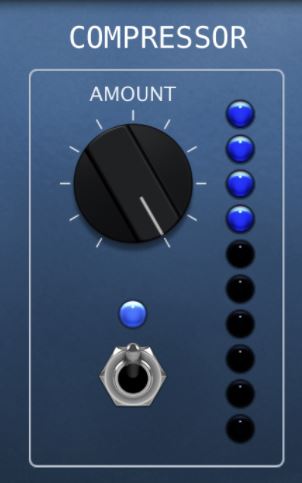
Essentially what a compressor does is make louder parts quieter, and softer parts louder.
For vocals, we usually want a pretty consistent volume, so you should use compressors in GarageBand to ensure there aren’t any overly loud or quiet parts in your vocal track.
EQ (Equalization)
Equalizers, on the other hand, work in the frequency domain.
They allow you to control the high, mid, and low range frequencies on your vocal track, making it darker or bright, adding presence, or controlling for nasality.
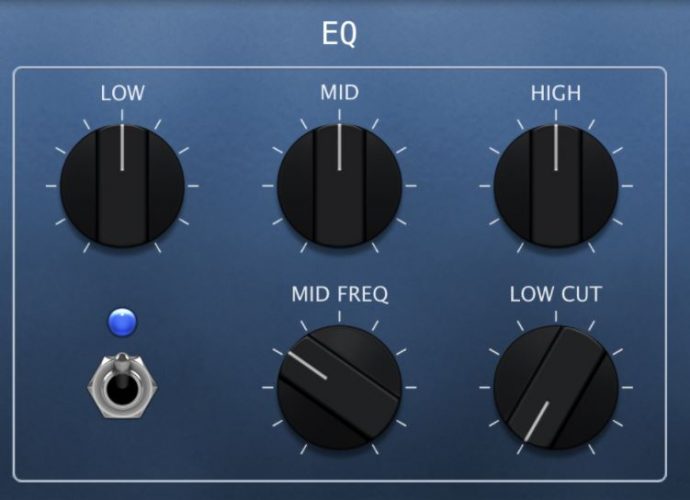
If you’re looking for a boomy, radio DJ voiceover effect, you might turn up the Low end a little bit.
The High end on the GarageBand EQ can be used to add a little more air to a vocal track, whereas the mid-range control can be used to remove nasal overtones, or add a little extra presence and bite to a track.
Reverb
Reverb is essentially the sound of reflections in a room.
If you’re in a room right now, try clapping loudly. You’ll probably notice some kind of echo effect. That’s the natural reverb in the room.
Reverb plugins seek to emulate that, and they are typically pretty flattering on vocal tracks, though you probably don’t want to overdo it.
By default, your vocal track will have two reverb sends: Ambience and Reverb.
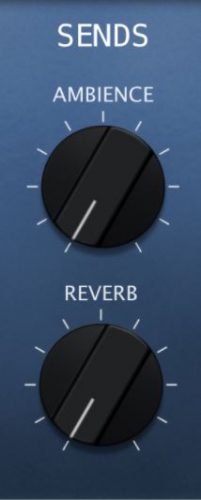
You might like to combine them both, or play around with a bit of automation for some really creative effects.
Delay
If you’ve ever heard a vocal recording where the singer’s voice appears to be repeated back to them slightly quieter after they sing, that’s delay.
There are a bunch of different delay plugins in GarageBand, each offering a slightly different take on the effect.
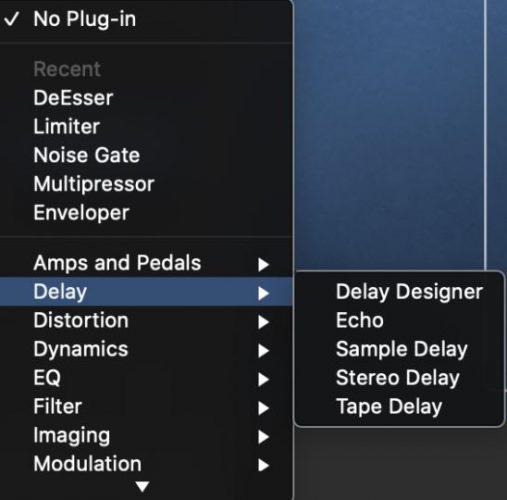
Anything goes, really.
Modulation
Under GarageBand’s Modulation header in the plugin menu, you’ll find the following options:
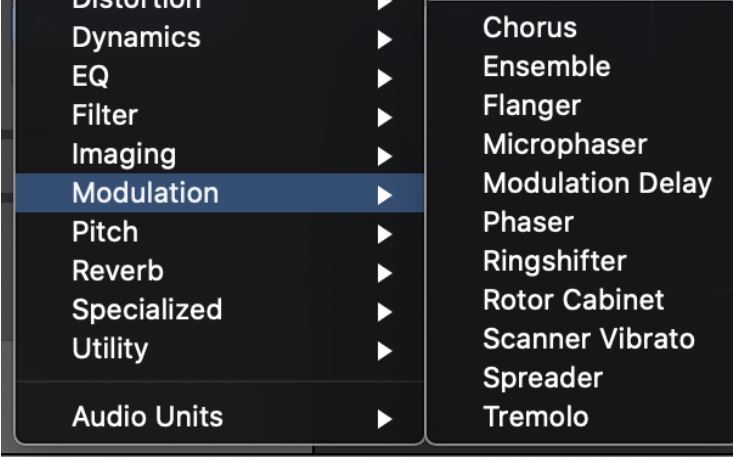
You’ll notice that many of them offer pretty intense effects, so they might not be all too appropriate for your vocal track.
That said, it can be nice to add a subtle chorus or flanger to your vocal track to thicken things up a little bit.
How To Autotune Your Voice On GarageBand
GarageBand has one of the easiest autotune features out there.
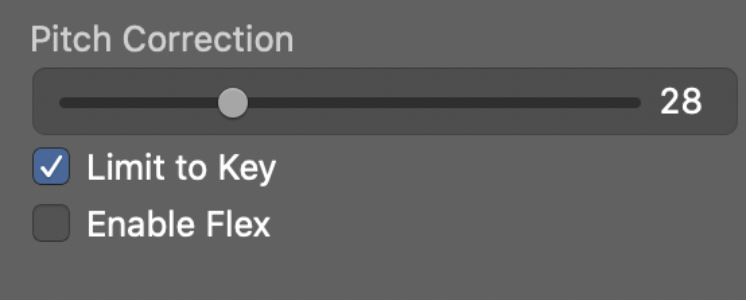
First, you’ll need to make sure you have the correct key set in the transport bar.

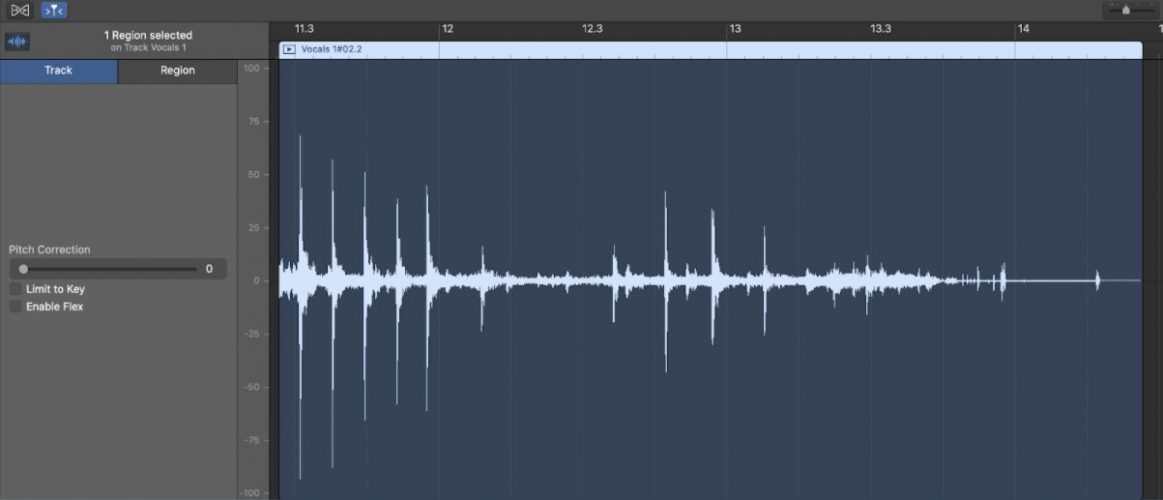
By default, GarageBand will tune the vocals chromatically, so if you want it to lock only to notes within your key, hit the Limit to Key button.
How To Change The Pitch Of Your Voice In GarageBand
Perhaps you’ve decided at the last minute to change the key of your song, and need to adjust your vocal tuning.
Or maybe you’re looking to add a vocal harmony without actually having to record anything.
Either option is really easy in GarageBand using the Pitch Shifter plugin.
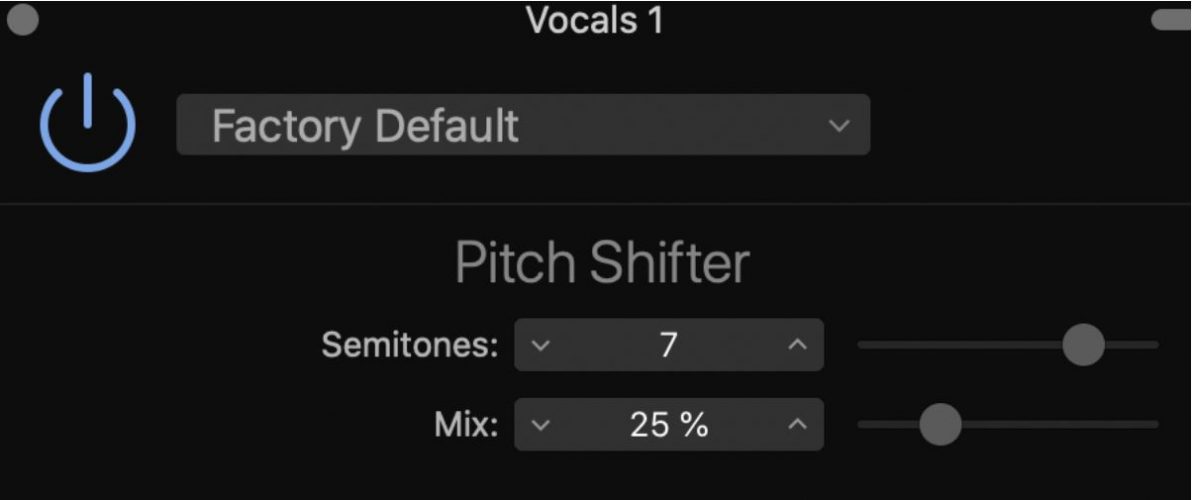
If you’re shifting the vocal all together, then you should go for 100%. If you’re just creating a little texture or harmony, then you can opt for a lower mix value.
How To Make Your Voice Deeper On GarageBand
There are a couple of ways to make your voice sound deeper on GarageBand.
Down-Pitch Vocals
If you’re going for a modern, down-pitched, electronic-style vocal pattern, then you can use the Pitch Shifter or Vocal Transformer plugins.
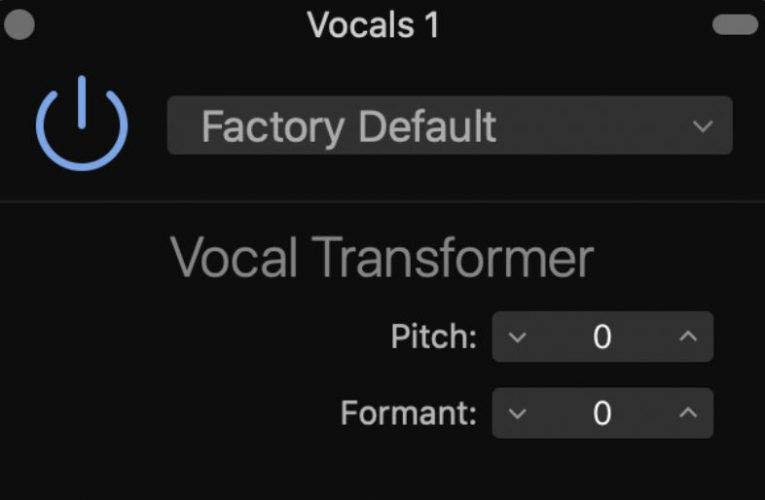
With a bit of time, editing, and automation, you can create some really crazy vocal melodies that can be used as a synth line, in the style of electronic artists like Flume.
Radio DJ Vocals
The other reason you might want to make your voice sound deeper is if you’re going for a boomy, omnipotent radio DJ voiceover.
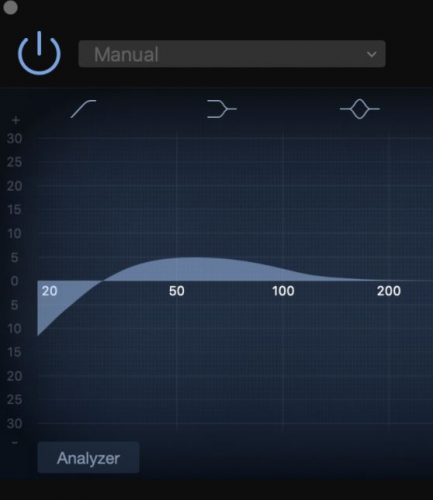
The easiest way to achieve this is using an EQ plugin in GarageBand.
Boost the low shelf by a few dB from around 120Hz to get a bit more low end and boom in your voice.
You should also consider adding in a high-pass filter to cut out anything below around 35Hz. There’s not really anything in that range that’s useful in vocals, and it just adds unnecessary low rumble to a vocal track.
Conclusion

So, you’ve got pretty much every trick in the book under your sleeve for recording voice on GarageBand, it’s time to get on the tools and get recording.